Let’s continue reading this article to know more about Facebook Business Suite…
What is Facebook Business Suite and how can you get it?
Facebook Business Suite is a desktop and mobile application.
On Computer
Simply connect to a Facebook account linked to your company to gain access. After that, go to the following website to access Business Suite on your desktop: http://business.facebook.com
This is the same URL that used to lead to Facebook Business Manager, as we mentioned previously. Unless you specify otherwise, it now automatically sends you to Facebook Business Suite.
On a mobile device
The Business Suite Facebook app, which replaces the Facebook Page Manager app, allows you to access Facebook Business Suite on your mobile device. The Page Manager app has been removed from the App Store.
Who should take use of Facebook Business Suite?
Anyone who uses Facebook and/or Instagram as their major social media marketing and advertising platforms will find Facebook Business Suite to be quite beneficial.
Assume you’re primarily a content producer, and your Facebook and Instagram profiles have been monetized through brand partnerships and advertising. In such situation, Creator Studio is likely to be a more beneficial tool. The more extensive metrics of Business Suite, on the other hand, can assist you understand how your content performs.
As a result, a small company owner or social media manager who manages professional Facebook and Instagram pages is the ideal user for Facebook Business Suite.
Facebook Business Suite includes a number of features.
Some of the Business Suite capabilities have already been discussed in our Facebook Business Suite vs. Business Manager vs. Creator Studio comparisons. More information on how to access and use those features may be found here.
Note: You’ll need to connect your business Facebook and Instagram accounts to get the most out of Business Suite. Check out our step-by-step instructions for linking your Instagram account to Facebook if you haven’t already.
Home screen
The Facebook Business Manager home page gives you a quick look at what’s going on with your Facebook and Instagram profiles.
You’ll see some basic statistics, a list of recent posts with engagement metrics, recent advertising, your schedule of planned posts, and a to-do list of chores to do (like unread messages).
From the main screen, you may make an ad, a post, or a Story, or promote an existing post.
You may also access all of Facebook’s business features from the left-hand menu.
Before accessing any of the other features, make sure you pick the right Facebook and Instagram accounts at the top of the home page.
Create and schedule posts
- Click Create a post from the home screen.
- Choose either Facebook, Instagram, or both for your post.
- Fill up the blanks with your post’s content: text, photographs, or video, and an optional location. You may also include a call to action and a link preview on Facebook. Only the link option is available for the Facebook placement; it will not function if you try to publish to Instagram. Rather of utilizing the same language on both networks, you may change the wording for Facebook and Instagram. You may also include a mood or an activity on Facebook.
- Click Publish to publish right now. To schedule your post for later, select Schedule Post from the drop-down menu next to the Publish button. Then,

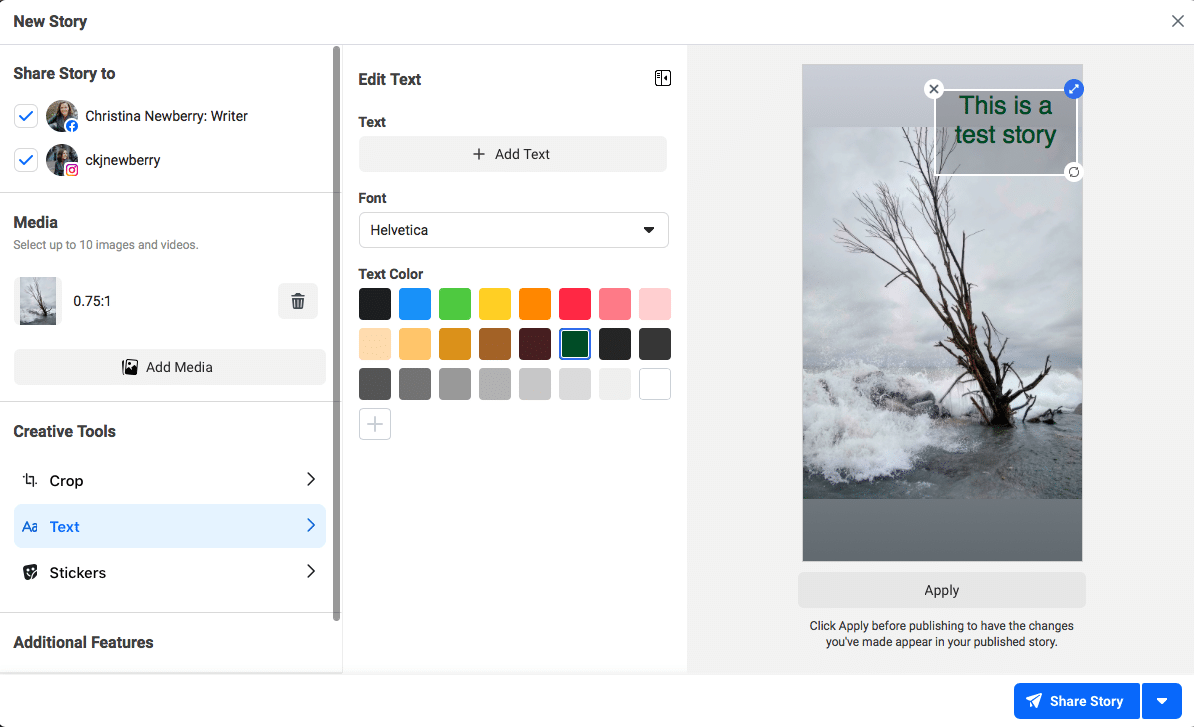
Create and schedule Stories
- Click Create Story from the home screen.
- Choose either Facebook, Instagram, or both for your Story.
- Use the basic creative tools to add photographs or video to your Story and make any necessary modifications (crop, text, and stickers)
- If desired, include a link to Additional Features.
- Click Share Story to post right now. To schedule your Story for later, select Schedule Story from the drop-down menu next to the Share Story button. Then, choose when you want your Story to go live by entering the date and time.
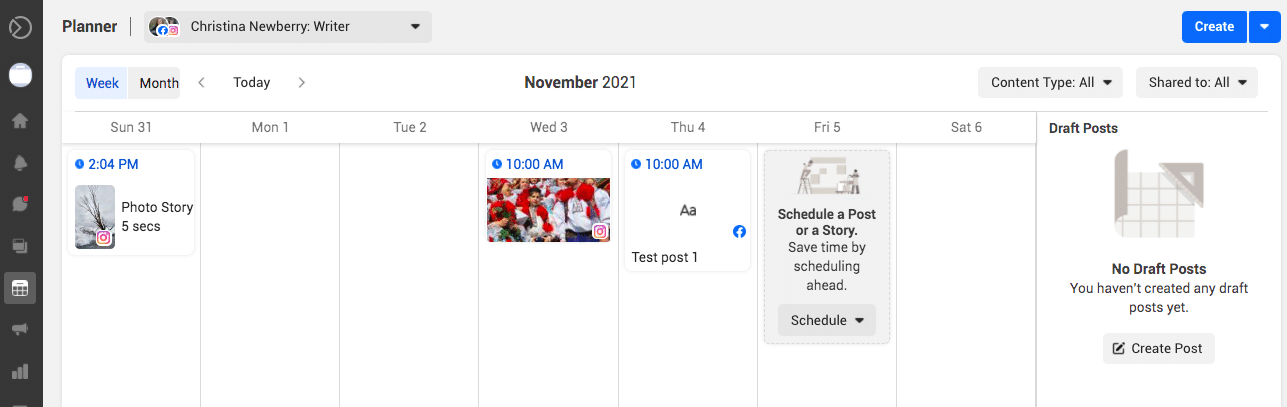
View and adjust scheduled content
After you’ve scheduled any posts and Stories, you can examine them in a calendar view and make any necessary changes.
- To go to the calendar view, go to the left menu and select Planner.
- You may choose to see your calendar by week or month. You’ll view all planned material by default. Filter by content type or platform using the drop-down options in the top right corner.
- To relocate a post to a different date, drag and drop it. (The current publishing time will be maintained.) Alternatively, you may preview any post by clicking on it, then making edits by clicking the three dots symbol in the upper right corner of the preview.
Create ads
- Click Promote from the home screen.
- Choose an objective for your advertisement. If you’re not sure, read our entire guide to Facebook advertising.
- On the next screen, create your ad. Depending on the aim you pick, the information and creatives you’ll need to supply will differ. Click Promote Now after you’re satisfied with your ad.

Boost a post
- Simply click Boost Post next to any existing content on the home screen if you’d rather boost an existing post rather than create an ad from scratch.
- On the next page, select the required parameters before clicking Boost Post Now.

By choosing Ads on the left sidebar, you may examine your ads at any moment. You can get a preview of each ad, as well as its status, campaign details, and ad results, on the Ads screen.
Access Insights
On July 1, 2021, Facebook Analytics as a stand-alone application was decommissioned. While you can still use Facebook Page Insights and Instagram Insights separately, adopting a centralized solution like Facebook Business Suite is far more efficient.
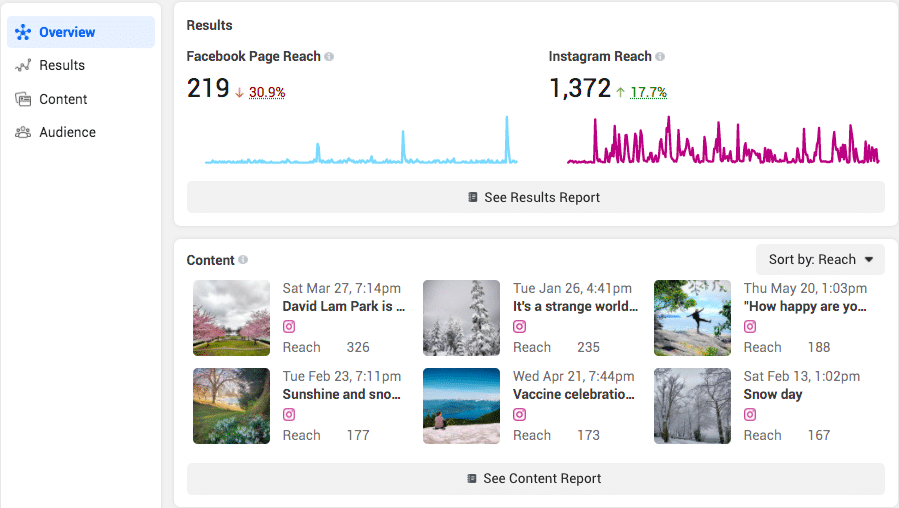
You may compare your Facebook and Instagram account performance on the Insights page.
Page reach, your top-performing sponsored and organic content, and audience information are all displayed on the main Insights tab.
For more thorough reports, choose Results, Content, or Audience in the left column. You may also download and export these reports.
Inbox
On one screen, you can access and react to direct messages and comments from both Facebook and Instagram using the Facebook Business Suite Inbox. You may also delegate follow-up to a different team member.
The profile of the person who sent the message will appear for each conversation. You can add notes and labels, thus it’s a simple social CRM.
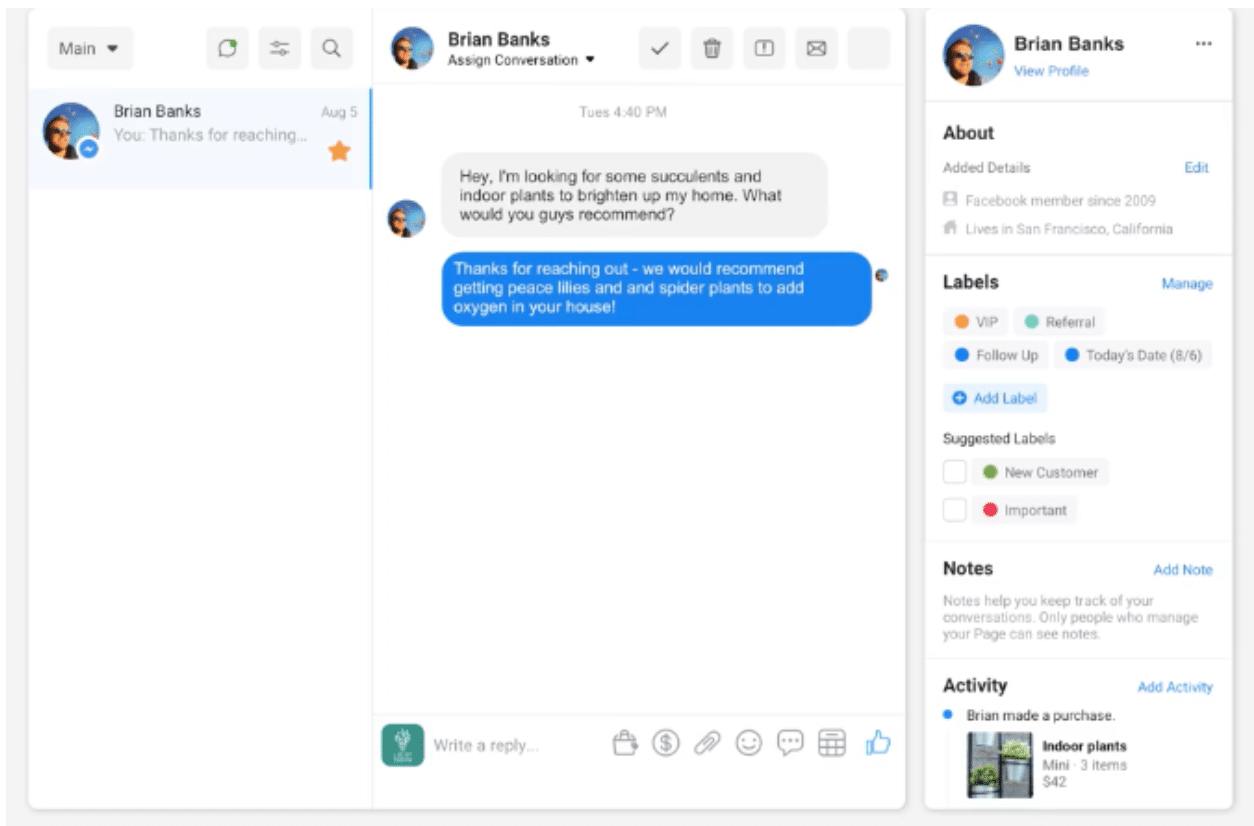
Filters and follow-up flags in the Inbox help you stay organized.
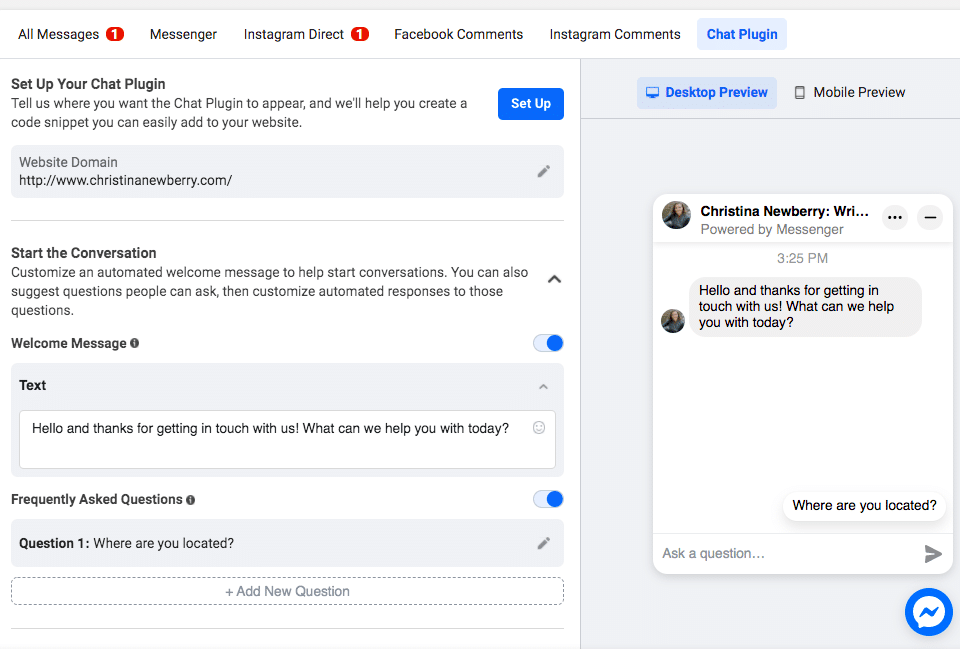
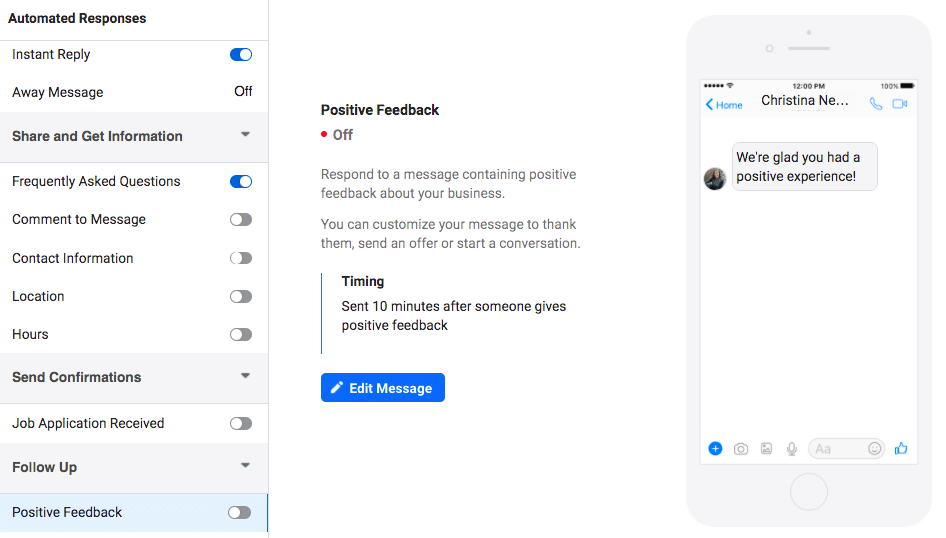
The ability to put up automatic messages based on keywords and phrases or typical requests is a highly useful feature of the Inbox. This works like a rudimentary chatbot, allowing consumers to obtain instant assistance even if no one from your team is available to respond.
You can also use Inbox to create a Messenger chat plugin for your website. To configure your chat information and acquire the code to install in your website, go to More, then Chat Plugin in the top menu.