Watermarks and Their Purpose
Before diving into removal techniques, it’s essential to understand what watermarks are and why they’re used. Watermarks are visual overlays added to images to protect copyright, indicate ownership, or prevent unauthorized use. They can range from subtle text to large logos covering significant portions of an image.
While watermarks serve a protective purpose, there are legitimate reasons why someone might need to remove them, such as when you own the rights to an image or have permission to use it without the watermark.
WatermarkRemover.ai

WatermarkRemover.ai is an AI tool to remove watermarks from images. Its sophisticated algorithms ensure that the watermark is removed without damaging the original quality of the image. This makes it an ideal solution for photographers, designers, and anyone needing clean images for non-commercial purposes.
Key Features
- AI Technology: The core of WatermarkRemover.ai is its AI-driven technology that intelligently distinguishes between the watermark and the actual image content.
- Support for Various Watermark Types: It can handle a wide range of watermark types including full-screen overlays, logos, text-based marks, photo stamps like dates and locations, and even signatures.
- User-Friendly Interface: The platform is designed to be intuitive, allowing users of all skill levels to navigate and use the tool effectively.
- Batch Processing: Users can process multiple images at once, which is a significant time-saver for those dealing with large volumes of photos.
- Cross-Platform Compatibility: The tool works seamlessly on both desktop computers and mobile devices, providing flexibility for users on the go.
Step-by-Step Guide to Using WatermarkRemover.ai
Step 1: Access the Website
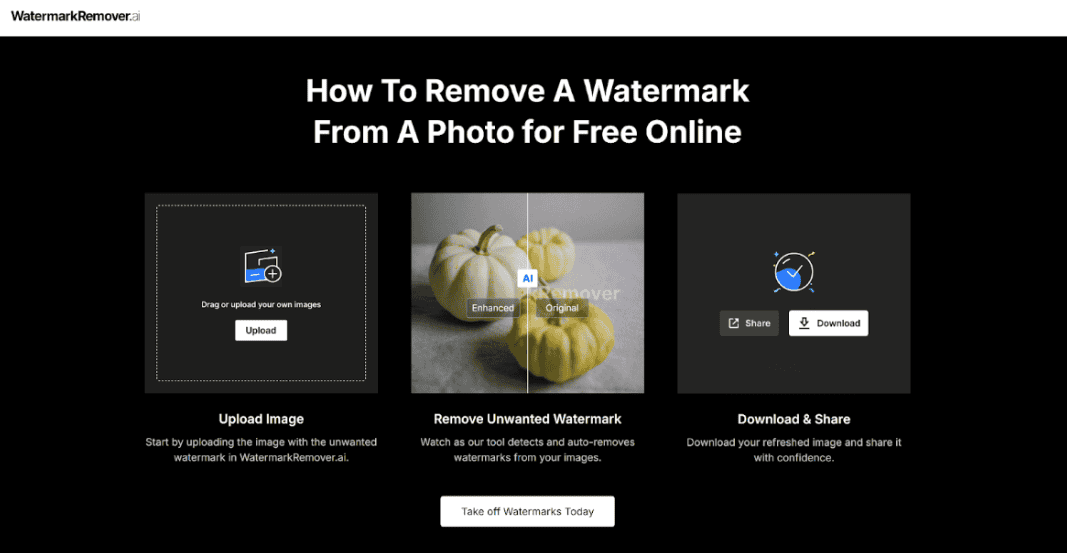
To start using WatermarkRemover.ai, visit their official website. The homepage is straightforward, featuring an upload section prominently displayed. This ease of access ensures that users can begin their watermark removal process without unnecessary delays.
Step 2: Upload Your Image
Uploading your image is simple and can be done in two main ways:
- Drag and Drop: Drag your image file directly into the upload area on the website.
- Click to Upload: Click on the upload button to open your device’s file explorer and select your image.
The tool supports various formats such as JPG, JPEG, PNG, BMP, and TIFF, making it versatile for different user needs.
Step 3: Automatic Watermark Detection
Once your image is uploaded, WatermarkRemover.ai employs its AI algorithms to automatically detect any watermarks present. This process is quick and efficient, usually taking just a few seconds. The AI scans the image thoroughly to identify areas where watermarks are located.

Step 4: Review the Watermark Removal
After detection and initial removal by the AI:
- Preview: Users can preview the edited image to check if the watermark has been completely removed.
- Comparison: Toggle between the original and edited versions to ensure satisfaction with the changes made.
This step is crucial as it allows users to verify that no important details from the original image have been lost during processing.
Step 5: Manual Touch-Up (Optional)
If small remnants of the watermark remain or if certain areas require more precise editing:
- Manual Adjustment Tools: Use available tools such as a brush or eraser function to manually refine specific areas.
- Zoom Functionality: Zoom in on intricate parts of the image for detailed editing.
Manual touch-up ensures that even complex watermarks can be fully removed without leaving traces that might detract from the image’s quality.
Step 6: Download the Edited Image
Once you are satisfied with the results:
- Download Options: Choose from various resolution options depending on your needs. High-resolution downloads are available for those requiring print-quality images.
- File Security: Rest assured that your files are secure; they are automatically deleted from WatermarkRemover.ai’s servers after processing to protect user privacy.
Best Practices for Using WatermarkRemover.ai
Respecting Copyrights
While removing watermarks can enhance an image’s aesthetic appeal, it’s important to respect copyright laws:
- Non-commercial Use: Ensure that any images you edit are used for personal or educational purposes unless you have explicit permission from the copyright holder.
- Obtaining Permission: If you intend to use an edited image commercially or publicly, obtain consent from the original creator or copyright owner.
Optimizing Image Quality
To maintain optimal quality during editing:
- High-Resolution Images: Start with high-resolution images whenever possible as they provide more data for AI algorithms to work with.
- Avoid Over-editing: Excessive manual editing can sometimes degrade image quality; aim for subtle adjustments where necessary.
Utilizing Batch Processing
For users dealing with numerous images:
- Batch Upload: Take advantage of batch processing capabilities by uploading multiple images simultaneously. This feature saves time and ensures consistency across all edited photos.
- Consistent Settings: Apply consistent settings across batches to maintain uniformity in style and quality.
Troubleshooting Common Issues
Despite its advanced technology, users might encounter occasional challenges when using WatermarkRemover.ai:
Incomplete Removal
If parts of a watermark remain visible:
- Refine Detection Settings: Re-run the detection process with adjusted settings if available.
- Manual Touch-Up: Use manual tools provided by WatermarkRemover.ai for precise removal of stubborn areas.
Quality Loss Concerns
Should there be noticeable quality loss post-editing:
- Check Original Resolution: Ensure that your original file was high-resolution; lower-quality inputs can lead to poorer outputs.
- Adjust Output Settings: Experiment with different output settings offered by WatermarkRemover.ai to find a balance between file size and quality.
Conclusion
WatermarkRemover.ai provides a robust solution for removing unwanted watermarks from images while preserving their original quality. By following this comprehensive guide, users can effectively utilize this tool for personal projects or creative endeavors.
However, always remember to respect copyright laws and obtain necessary permissions when using edited images beyond personal use. With these considerations in mind, WatermarkRemover.ai stands as a valuable resource in enhancing digital imagery with ease and precision.

