
Comping vocals in your DAW is a great way to create the perfect vocal track by combining the best parts of multiple takes. Whether you’re new to comping or looking to improve your skills, this guide will show you how to do it step by step. Plus, we’ll share 7 easy tips to make your next comp even better.
Ready to take your vocal tracks to the next level? Let’s get started!
Table of Contents
ToggleWhat is vocal comping?
Vocal comping is a method in music production where different vocal recordings are combined to create one polished performance. Instead of using a single take, producers record multiple versions of the same part—like a verse or chorus. They then pick the best pieces from each to make the final track.
Tip: The term “punching-in” comes from the old days of tape recording. Back then, artists would record over specific parts of the tape to fix mistakes.
This process allows more creativity and flexibility, helping you get the perfect vocal sound.
Vocal comping helps producers put together a performance that sounds natural and seamless. It allows you to experiment and fine-tune your vocals, ensuring the final result is as polished as possible.
How to comp vocals in your DAW
Most DAWs have features that make vocal comping easy.
But if your DAW doesn’t have a specific comping tool, you can still do it with basic audio editing tools.
Start by recording six to seven takes on separate tracks over your instrumental. Be sure to mute each previous take as you record the next one.
After you have a few takes you like, listen to each one. Then, cut and paste the best parts onto a final vocal track.
It’s a simple process, but without a dedicated tool, creating new tracks, muting old vocals, and recording can be a bit tedious and distracting.
Now, let’s look at how to comp vocals in some popular DAWs.
How to Comp Vocals in Ableton Live
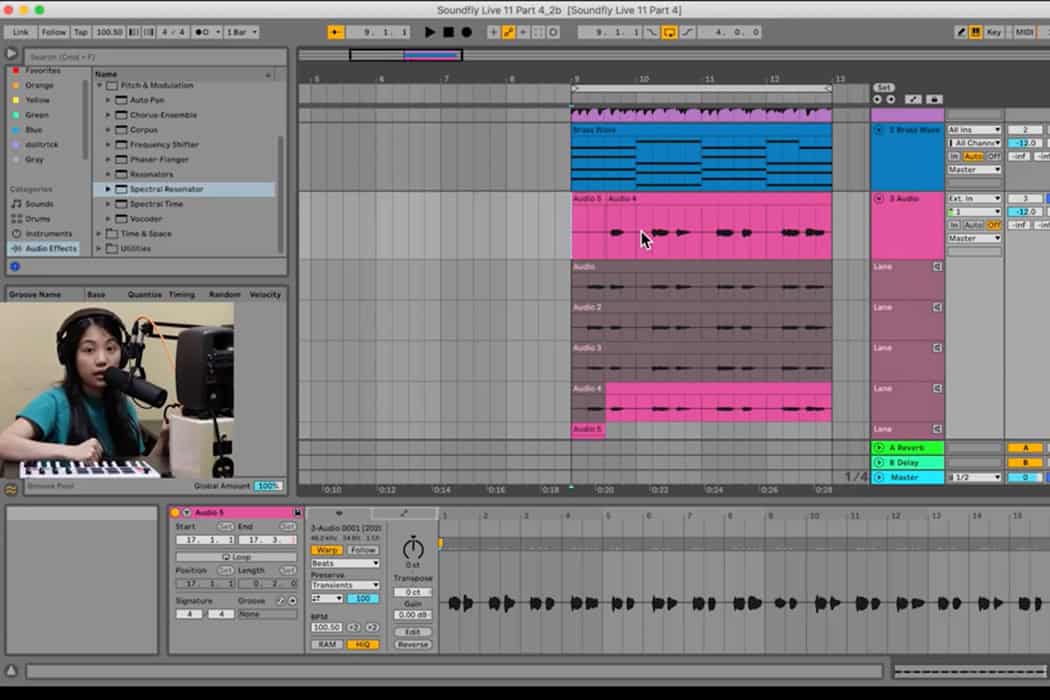
In Ableton Live, you can comp vocals by recording multiple takes in a looped section and using the “Take Lanes” feature to organize and listen to them.
The easy looping process lets you record several takes without needing to adjust the DAW much, so you can focus on your singing.
Once you have some take you like, you can quickly cut the best parts from each take lane and combine them into one vocal track.
How to Comp Vocals in Logic Pro
In Logic Pro, vocal comping is made simple with the “Quick Swipe Comping” feature.
Like in Ableton, you can record multiple takes in a loop without needing to adjust the DAW often.
After recording several takes into a take folder, just swipe your mouse over each take to pick the best parts.
When you find a section you like, Logic automatically adds that part to the comp track based on where you swiped and cut the take.
How to Comp Vocals in Studio One
Studio One makes vocal comping easy with its “take layers” feature, which works like Ableton’s “take lanes.”
You can record multiple takes in a looped section and then expand the layers to see all the takes.
After expanding the layers, you can quickly listen to each take and choose the best parts.
How to Comp Vocals in Pro Tools
Comping vocals in Pro Tools uses the playlists feature to handle multiple takes.
First, record several takes, then create a playlist that holds all the takes you’ve recorded.
In the playlist, you can listen to each take, choose the best parts, and combine them into the final vocal track by promoting the sections you want.
Pro Tools doesn’t have a looping feature like Ableton or Logic Pro, so you’ll need to make a new audio track for each new vocal take.
However, the playlist feature is flexible and can be used in many recording situations. With a basic understanding of Pro Tools shortcuts, the process becomes pretty quick and easy.
How to Comp Vocals in FL Studio

FL Studio doesn’t have a specific vocal comping feature, but you can still do it using the “Playlist” and “Track Grouping” features.
After setting up a recording track, record multiple takes in a looped section. Then, use the playlist to organize and listen to the takes.
Manually choose the best parts from each take, cut them out, and arrange them on a new comp track.
How to Comp Vocals in Cubase
In Cubase, vocal comping is made easy with the “Lanes” feature.
When you record multiple takes on the same track, each take is automatically placed in its own lane. You can then listen to each take, pick the best parts, and create a comp by simply clicking and dragging.
Cubase also provides advanced tools like “TrackVersions” and “AudioWarp” for further editing, helping you achieve a smooth and accurate vocal comp.
7 Vocal Comping Tips
Vocal comping is the process of combining several vocal takes into one polished track. It’s important for getting a professional sound.
Here are seven easy tips to improve your vocal comping:
1. Choose the Best Take as Your Guide Track
Start by picking the best overall take. Use this as your guide to keep timing and phrasing consistent as you work. This guide track helps you compare the other takes, making sure the final vocal sounds natural and smooth.
2. Record More Takes for Tricky Verses and Choruses

If some verses or choruses are hard to get right, record several takes just for those parts. This gives you more options to pick from when creating the best version of the difficult sections.
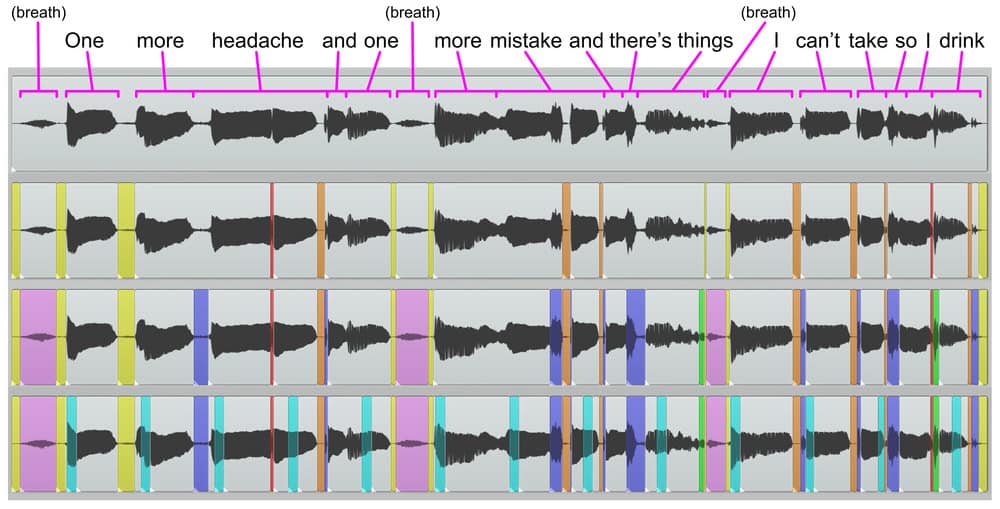
3. Cut Between Breaths and Pauses
When combining parts from different takes, try to make your cuts between breaths or natural pauses. This helps keep the vocal flow smooth and makes the transitions between takes less noticeable.
4. Use a New Track for Vocal Layers

When adding background vocals or ad-libs, make sure to create a new track separate from your main comp track. This stops you from accidentally recording something important.
Always open a new audio track when adding background vocals or ad-libs.
With the latest features, you can quickly align vocal layers in no time.
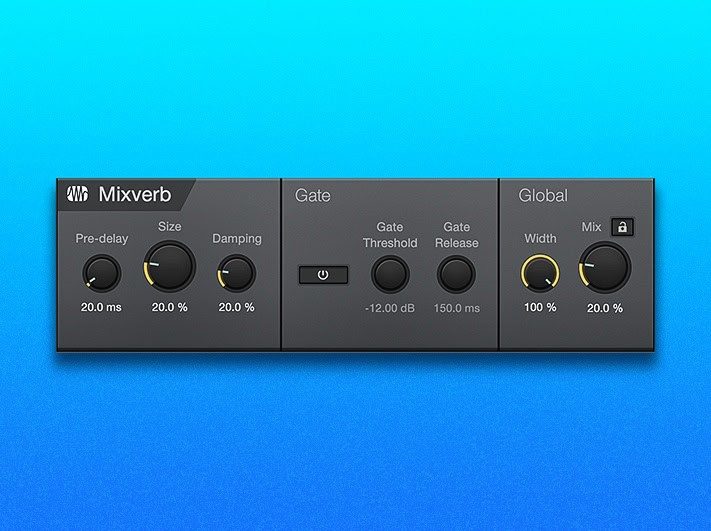
5. Comp Without Effects
Start comping your vocals without any effects. Raw vocals let you hear any flaws that effects like reverb or delay might hide.
Record your vocals without AutoTune or other effects. After you finish comping, you can add effects to the whole track for a polished sound.
6. Prioritize Emotion
While technical accuracy is important, don’t forget that emotion and expression make a vocal performance stand out. Choose takes that capture the right feeling, even if they aren’t perfect.
Trust your gut and aim for a performance that feels right.
7. Don’t Be Afraid to Record Another Take
If you’re not happy with your takes, record a few more. Sometimes the best final track comes from mixing parts of new takes with the old ones.
Vocal comping is a process, and more options often lead to a better result.
Getting Perfect Vocals
Every producer wants perfect vocals.
It’s okay to use vocal comping to make your track as close to perfect as you can.
With these simple techniques, your DAW will help you find your best sound.
Now that you know how to record your dream vocal take!