Recently, Facebook and Messenger introduced end-to-end encryption for all chats and calls, enhancing the security of your Messenger conversations. To add an extra layer of protection, you can enable the disappearing messages feature on Facebook. With this feature activated, messages in a chat are automatically deleted after 24 hours. Additionally, you’ll be notified if the other person takes a screenshot of the chat. If you’re curious about how to enable disappearing messages on Facebook, keep reading!
How Do Facebook’s Disappearing Messages Work?
- As the name suggests, messages sent after activating this feature will disappear from both sides of the chat after 24 hours.
- When the disappearing messages feature is enabled on Facebook Messenger, you will be notified if the other person takes a screenshot of the chat.
- Additionally, you can only report a disappearing message within 6 hours of sending it.
- When you enable disappearing messages, the other person will be notified within the chat.
How to Enable Disappearing Messages on Facebook?
On Phone
- Open Facebook Messenger and navigate to the chat where you want to enable disappearing messages.
- Tap on the profile name at the top of the screen to access chat settings.

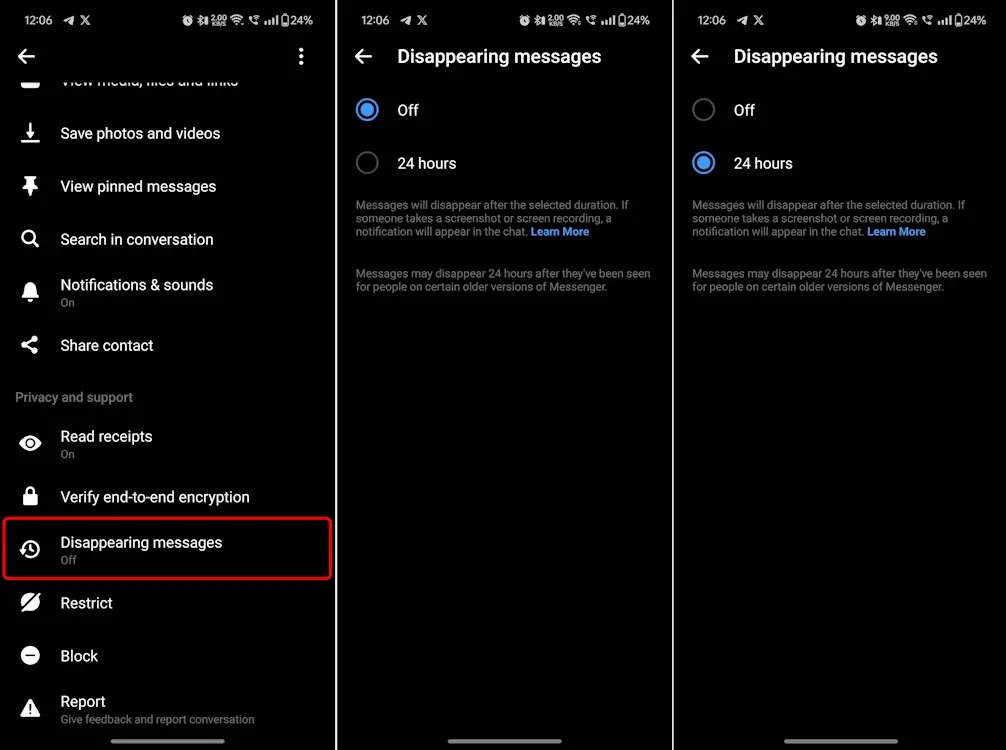
- Scroll down to find the Disappearing Messages panel at the bottom.
- By default, it is turned off, so tap on it and select 24 hours. Then, return to the chat.
- Disappearing messages are now enabled for you. You will see a notification indicating that disappearing messages have been activated for this chat on Messenger.
On Website
- Open Facebook in your preferred browser and visit the profile for which you want to enable disappearing messages. Click on the blue Message icon on the right side of the screen.
- A small window will appear at the bottom displaying your messages with that person.
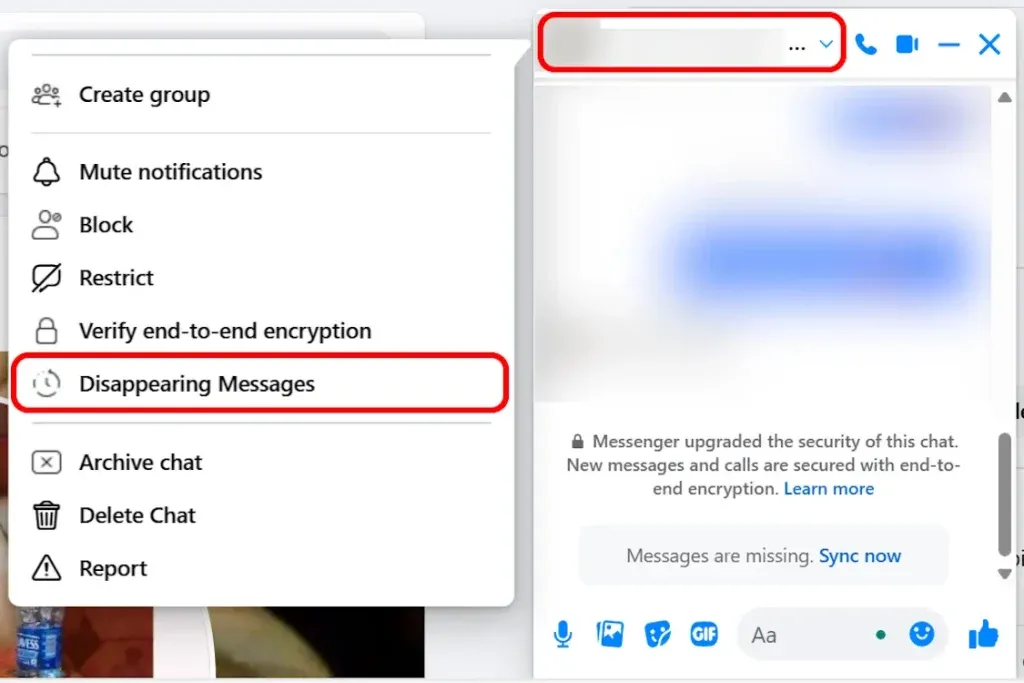
- In this window, click on the person’s Facebook profile name, which has a small down arrow next to it.
- A window with a list of options will appear on the left. Scroll down to find the Disappearing Messages panel and click on it.

- In the pop-up window, select 24 hours and click on Done. This will immediately enable disappearing messages for that particular chat on Facebook.
Last thoughts
In our busy digital lives, privacy is more important than ever. Enabling disappearing messages on Facebook is a simple way to keep your conversations private and your chat history tidy. This feature makes sure your messages disappear after a set time, so you don’t have to worry about old conversations hanging around. Whether you’re sharing something sensitive or just like the idea of temporary messages, disappearing messages give you that extra bit of control. It’s a handy tool to boost your online privacy and keep your chats secure. So go ahead, try it out, and enjoy the peace of mind that comes with knowing your messages won’t stick around forever. In a world where privacy is key, a little extra security can make a big difference.