Since it launched in 2016, Facebook Live video has grown from a novelty to a serious broadcasting and marketing tool on the world’s largest social community.
Facebook mentioned “there have been more than 3 billion Live broadcasts, made by hundreds of millions of people. Practically 2 billion people have watched a Live broadcast—that’s more than 1 / 4 of the entire population of the world”.
So if you do not know how to use this feature, or if it’s not working properly with your business. Below is how to use and 10 tips to help your account grow faster with Facebook Live.
How to use Facebook Live
The process of launching a Facebook Live video—also known as “going live”—is slightly different relying on whether you’re utilizing a personal profile or a business page.
The simplest method to get began is to create a Facebook Live broadcast directly from your mobile device since this doesn’t require any particular equipment, software, or coding—and you may broadcast anywhere you’ve got a strong internet connection.
How to make a mobile Facebook Live video from your business page
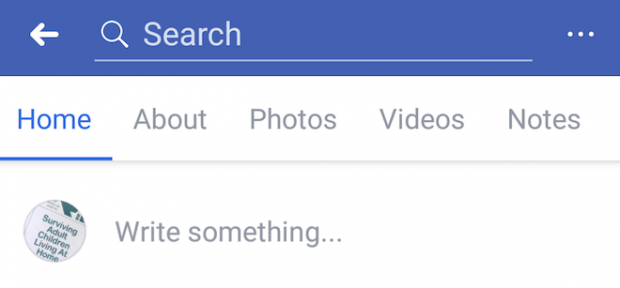
1. Go to the Facebook app on your mobile device.
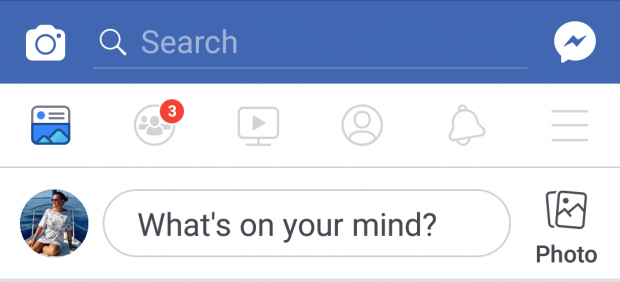
2. From your newsfeed, tap Write something.
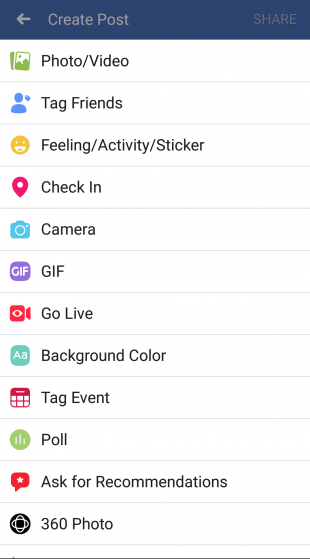
3. Choose Go Live.
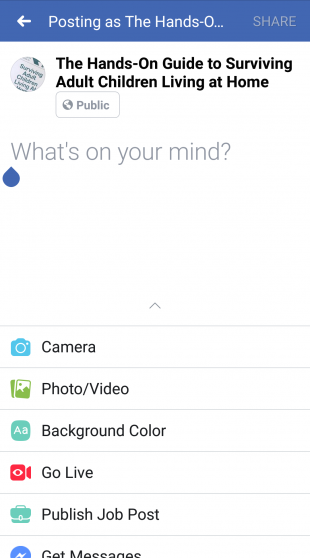
4. Add a description of your video.

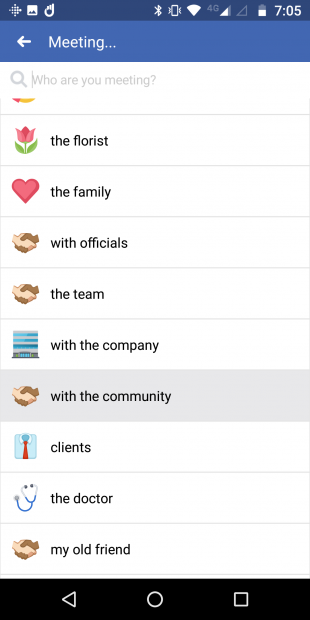
5. Add details: Tap the location icon to tag your location if appropriate and tap the face icon if you wish to add more information about what you’re doing.
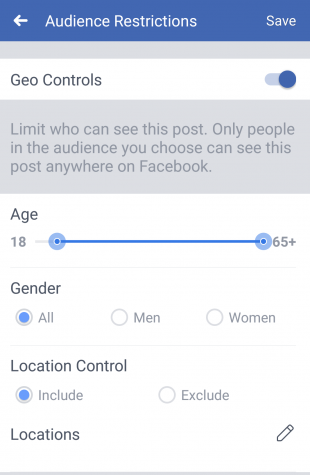
6. Tap the three dots icon on the bottom right, then tap Geo Controls to choose the viewers for your video.
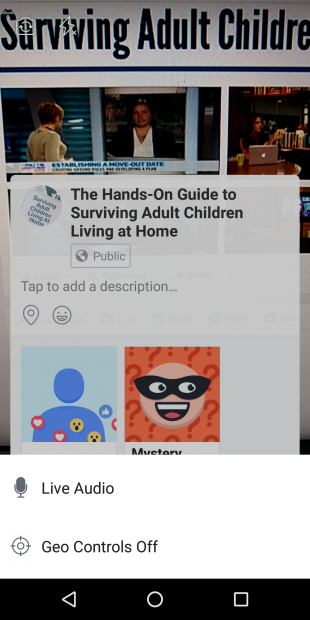
7. Select the viewers for your video based on age, gender, and location.
8. Tap Live Video.
9. Tap Start Live Video.
How to make a mobile Facebook Live video from your personal profile
1. Go to the Facebook app on your mobile device
2. From your newsfeed, choose What’s on your mind at the upper of the screen
3. Choose Go Live.
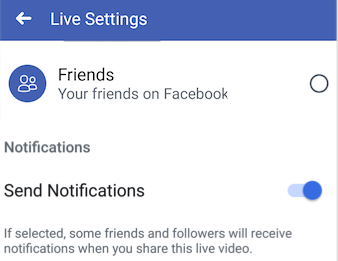
4. Tap the To: field to select whether to make your video public, visible only to friends, visible in a group, or visible to only a custom list.

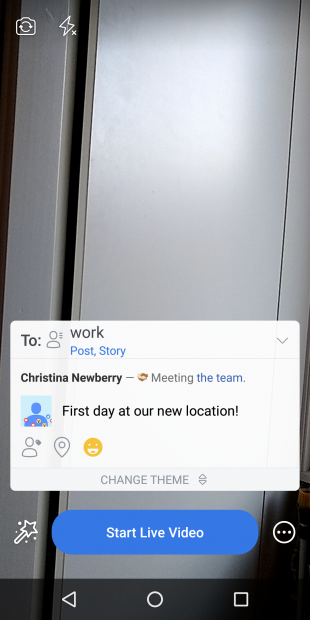
5. From the same screen, select whether to share your live video as a post, or only to your Fb story. When you select to share it only with your Story, the video will only be available while you are broadcasting—it won’t be saved to your profile.
6. On a similar screen, swipe down to Notifications and make sure the Send Notifications toggle is switched on to notify friends and followers when you go live.
7. Add a description of your video.
8. Add details: Tap the person icon to tag anybody who appears in your video with you. Tap the location icon so as to add your location if appropriate, and tap the face icon to add more details about how you’re feeling or what activity you’re showcasing in your video.
9. Choose Live Video to broadcast by yourself or Bring a Friend to broadcast with another person in a different location.
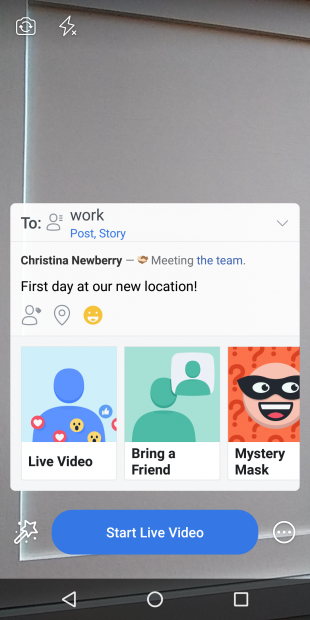
10. Tap Start Live Video.
When you choose, you may also go live from your laptop or desktop pc.
How to make a Facebook Live video on your pc
1. From the Create post box on your news feed, click on Live or Live Video.
2. Click on Camera to use your computer’s built-in webcam.
3. Select where your video will appear and add your description.
4. Add a title for your video.
5. Click on Go Live.
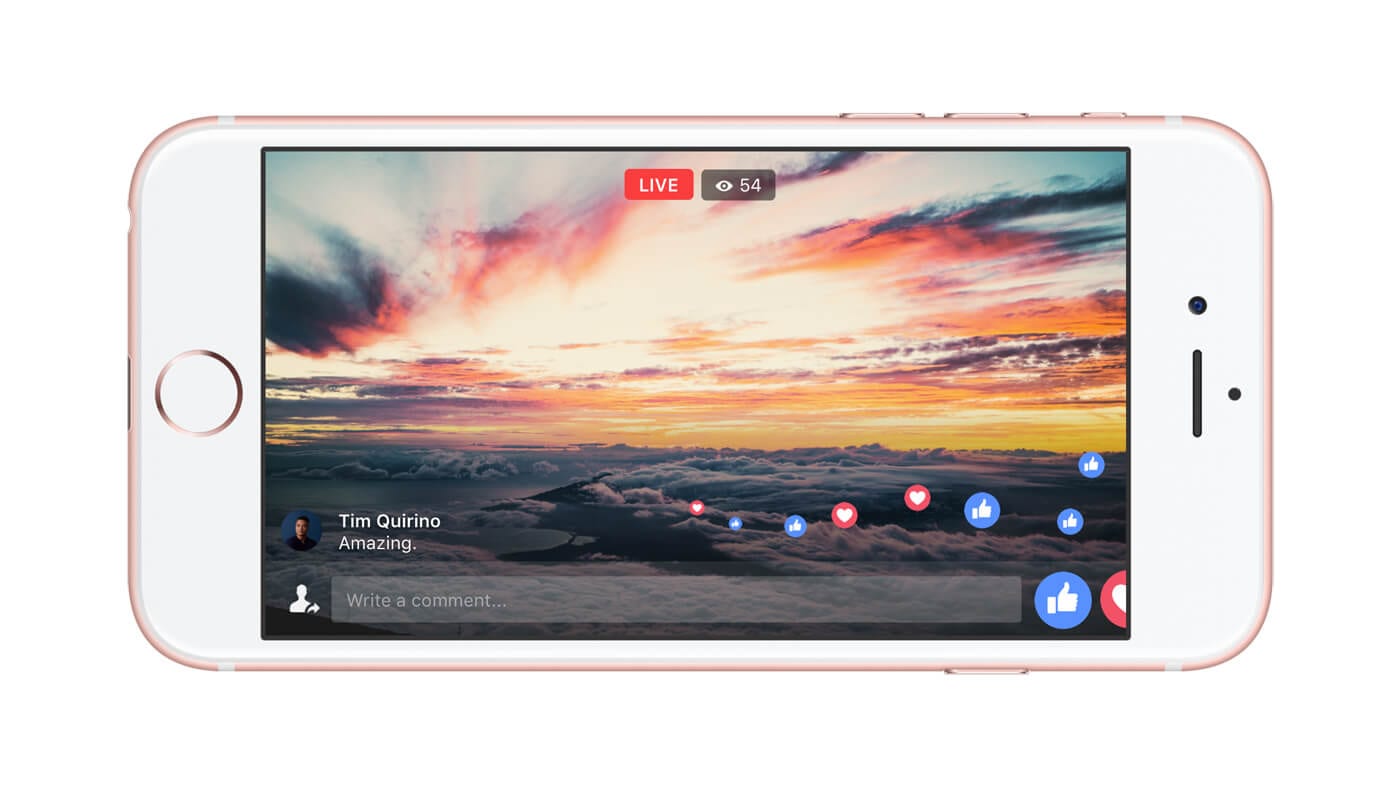
During your Facebook Live broadcast, you’ll see the number of live viewers, the names of any friends who’re tuning in, and a real-time stream of comments. When you’ve ended your broadcast, the post will save to your profile or Page like any other video, unless you’ve chosen to share it to your story only.
Live broadcasts could be up to 4 hours long.
10 tips for using Facebook Live
1. Plan your broadcast
Broadcasting live, by its very nature, means you could not plan precisely what’s going to occur. However, that doesn’t mean you need to just wing it.
Like any kind of content online, a Facebook Live broadcast should have a goal.
Before you start Facebook streaming, make sure that you’ve taken some time to think about what your broadcast is about, what you want to say (or do) in it, and why it makes sense as a Facebook Live stream as opposed to some other format of content material.
Plan a list of talking points to have on hand. You might never need them, however, they’ll save your broadcast when you suddenly freeze once the camera’s on, or when you hit a lull in your conversation with a guest.
2. Be yourself
While viewers expect social video to be polished, audiences usually enjoy the opposite in Facebook Live video. Production worth tends to be less professional and rawer, which many viewers perceive as more authentic.
“With so much competing for noise on social, the content material can usually come across as an advertisement,” said Hootsuite’s social media marketing specialist, Amanda Wood. “Facebook Live provides insight into the brand personality and culture.”
“The appeal of Facebook Live is its unedited and raw nature,” adds Hootsuite’s social media marketing coordinator, Christine Colling. “Your viewers are much more forgiving here.”
3. Notify followers prematurely
Let people know about your live stream in advance with teaser posts on Facebook and other networks.
Facebook recommends letting your viewers know about your live stream one day in advance and asking viewers to subscribe to Live notifications so they’ll always know when you go live. Simply ask them to click on the Follow button at the bottom of your Facebook Live video.
4. Check your Internet connection and tools
It’s necessary to make sure you have a strong signal before you start broadcasting. While WiFi is great, if it’s While WiFi is ideal, if it’s unavailable, a 4G connection works well. In case your connection isn’t good enough, the Go Live button will be greyed out and you won’t be able to begin your live broadcast.
You also need to test your tools in advance. Try setting your Facebook Live viewers to Only Meto preview how well your lighting and sound tools are working before sharing the video with your followers.
On that note, while you can go live with nothing more than your mobile phone or pc, we recommend the following tools:
- External microphones, particularly for interviews. In case you’re alone, you should utilize the built-in microphone on your earbuds.
- A tripod to make sure a steady shot. When you don’t have one, you may simply prop your device up against some books or a wall.
5. Create a compelling description of your video
Your description tells people what your video is about. A great one captures the viewer’s attention and a bad one—or worse, none at all—makes it all the more likely they’ll keep on scrolling.
Use your description to tell a story. Give context about what your broadcast is about and make sure you make it clear why people would want to watch.
6. Tag your location
Add your location to your Facebook Live video so it shows up on the Facebook Live Map and offers you a greater chance of being found by new viewers. The map showcases public live videos from all over the world and is one of the greatest methods for viewers to search out live videos from publishers they don’t already follow.
7. Remember people may join part-way through
Not everybody will join your live stream immediately. Facebook recommends broadcasting for at least 10 minutes to achieve the most people.
So, give your video an excellent intro, however don’t try to cram everything into the first couple of minutes, since some people may miss what you say.
When you’re interviewing another person, a classic radio interview method can help create a context for people who join your live video in progress. Every so often, say your guest’s name at the start of a query to let viewers know who you’re talking to without disrupting the flow of the conversation.
A brand watermark or branded background can also help ensure people have some context for what they’re watching as soon as they join your live stream.
And, of course, that is another reason why it’s necessary to write a compelling and informative description of your video.
8. Engage with your viewers
As with any type of social content material, engagement is key on Facebook Live video. Facebook recommends saying hi to commenters by their name, then responding to their comments.
It may be difficult to keep up with viewers comments when you’re the one hosting the video. If possible, assign somebody to respond to comments as they come in, so you may concentrate on speaking. This person can let you know if there’s a query you should answer live or can point people to related resources in the comments.
Think about what resources you may need in advance so you may have a list at your fingertips as the questions begin to come in.
To encourage engagement, try pinning a comment that asks viewers a question related to your video content material. Just write your comment, publish it, then tap it and tap Pin this Comment.
9. Reuse your work
Your Facebook live video will remain visible on Facebook after it finishes. However, you might also to consider editing it into one or more shorter videos that highlight certain key points or great moments. You may then share these as regular Facebook videos, or post them to other social networks. This makes sure you reach people on the platforms they use, rather than forcing them to come to you.
That said, once you share your video on other platforms, you may mention that the content comes from a Facebook Live stream and encourage followers to follow you on Facebook or join Live video notifications if they wish to be the first to see your new live video content.
10. Go live on a regular schedule
The Facebook algorithm considers “how frequently viewers return to watch your content material and how many you retain on a weekly basis.” Broadcasting live on a regular schedule will encourage viewers to return regularly since they know what to expect from you and when.