
Knowing how to use quantization in music features is crucial when inputting information with a MIDI controller. However, these features might be perplexing if you’re unfamiliar with them. In this article, you’ll learn what quantization is, how it functions, and the best practices for utilizing it in your DAW.
What exactly is quantization in music?
Quantization is a crucial process in music that aligns MIDI or audio information to the tempo grid of bars, beats and subdivisions. It’s necessary to adjust the timeline position of material after it has been played or inputted using a MIDI controller. Whether you’re working on MIDI or audio editing workflows, quantization is an essential step.
Producers frequently utilize quantization to improve the timing of parts for better arrangement or enable other musicians to play in time.
Quanzition in Music 2023
Why should you quantize MIDI or audio in your music?
If you’re not comfortable playing keyboards when recording MIDI parts for virtual instruments, quantization is crucial.
It corrects mistakes, timing errors, and velocity and provides a distinctive sound commonly heard in electronic music.
Quantization was initially used in drum machines and groove boxes, so it’s perfect for electronic genres. Even if you don’t use hardware, you’ll need strict quantization for certain songs.
In addition to MIDI, your DAW’s quantization features can also adjust audio clips to the tempo grid.
This is particularly useful for rhythmic audio like percussion that is sliced into samples based on transient information.
How does quantization work?
You’ll need to understand your DAW’s quantization dialog if you want to conform your MIDI notes to the grid.
The quantization dialog window specifies several parameters that can affect your results, such as quantization strength and note division.
Here’s a brief guide to the most common quantization parameters.
Note division
The rhythmic value that will be used to anchor the quantization is determined by note division.
Set this to the smallest note division in your musical phrase.
For example, if your music consists mostly of long, sustained notes, you can use a higher setting such as quarter notes, half notes, or whole notes.
Consider 16th notes or higher if your passage contains rapid runs or repeated hits.
You may need to use the triplet grid or dotted grid settings depending on the rhythmic qualities of the material.
Strength/Amount
This parameter controls how much quantization is applied to your notes.
When set to 100%, this parameter directs the notes to the grid division you specified in the note division parameter.
It moves your notes closer to the selected grid divisions by a factor at lower percentages.
Note start and end
Some DAWs allow you to apply quantization to both the onset and release of a note.
For example, quantizing both the beginning and end of each note ensures that trailing notes do not overlap the next, resulting in a clean musical phrase.
Exclude within
Quantization dialogs may include options that preserve the human feel while correcting passage errors. The “Exclude Within” parameter is one such approach. It sets a threshold before quantization takes place. For instance, a 10% Exclude Within parameter ensures notes that fall within 10% of the selected note division won’t be altered. Adjusting this parameter and the strength control helps to achieve the desired humanized quantization.
Guide to quantize MIDI in your DAW
All DAWs include features for quantizing MIDI data.
Here’s a rundown of how they work in each major app.
Ableton Live
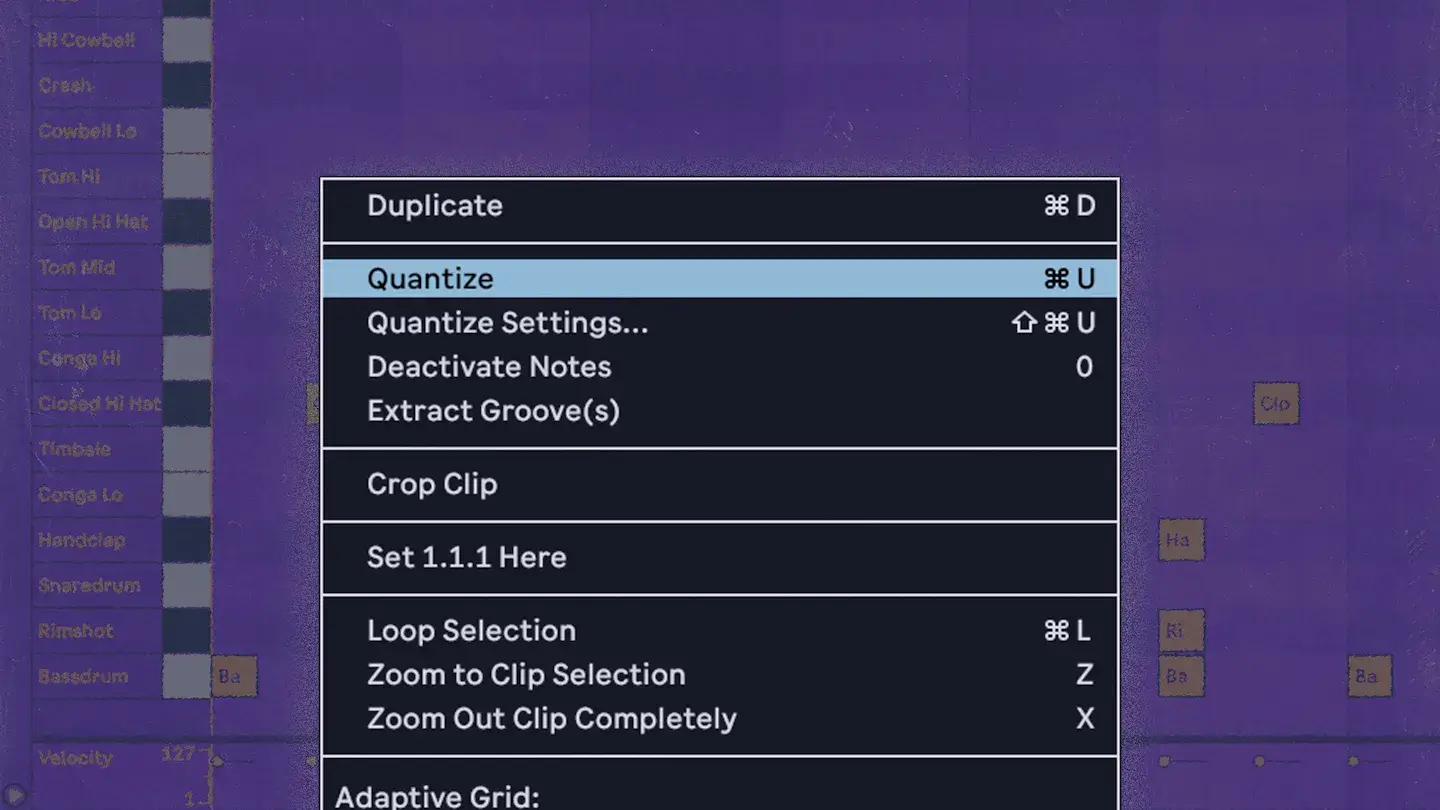
Quantization is an important function in Ableton Live. Fortunately, whether you’re in Session View or Arrangement View, it’s simple to access and apply.
To quantize a passage, select the MIDI notes to be adjusted and press command+shift+U to open the quantize dialog.
Logic Pro
In Logic Pro, MIDI clips have the quantized dialogue right next to the note display in the Piano roll.
To conform the notes to your settings, simply select the quantization parameters and press the Q button.
FL Studio
FL Studio, like the other DAWs on this list, has several methods for importing MIDI data.
However, if you record to the Playlist with your keyboard or controller, the best way to align notes to the grid is to open the Quantize Tool in the Piano Roll by pressing alt-Q.
You’ll find all of the familiar parameters I mentioned earlier to help you finish your notes on time.
Reaper
In Reaper, quantization is as simple as double-clicking a MIDI clip to open the piano roll. When you select notes and click the Q icon, the basic quantization settings dialog will appear.
Pro Tools
For both MIDI and audio, Pro Tools provides various quantization options. The MIDI piano roll window contains standard quantization features, including note division and strength. Besides, Pro Tools has a useful quantized menu for audio clips that lets you line up individual clips directly to the grid on the timeline.
Moreover, the popular Beat Detective function can also apply quantization to the slices it generates by utilizing the conform tab of the menu, with equivalent parameters.
Better quantized MIDI clips
Quantization has become an integral part of modern music production, shaping the sound of contemporary genres. Despite its controversial nature, aligning notes to the tempo grid remains a fundamental process in most producers’ workflows. With a good understanding of its mechanics, quantization can be used creatively to enhance musical compositions.
If you have read through this article, you are off to a great start in mastering the art of quantization.