Deleting a YouTube channel may seem like a big step, but it’s a straightforward process if you’re sure about your decision. Whether you’re looking to remove your channel permanently or just hide your content, it’s important to understand the steps and consequences involved. In this guide, we’ll walk you through the process, explain how to back up your videos, and show how to delete your YouTube channel without affecting your overall Google account.
Let’s dive into how you can manage your YouTube presence effectively.
1. Back up all the videos you want to keep
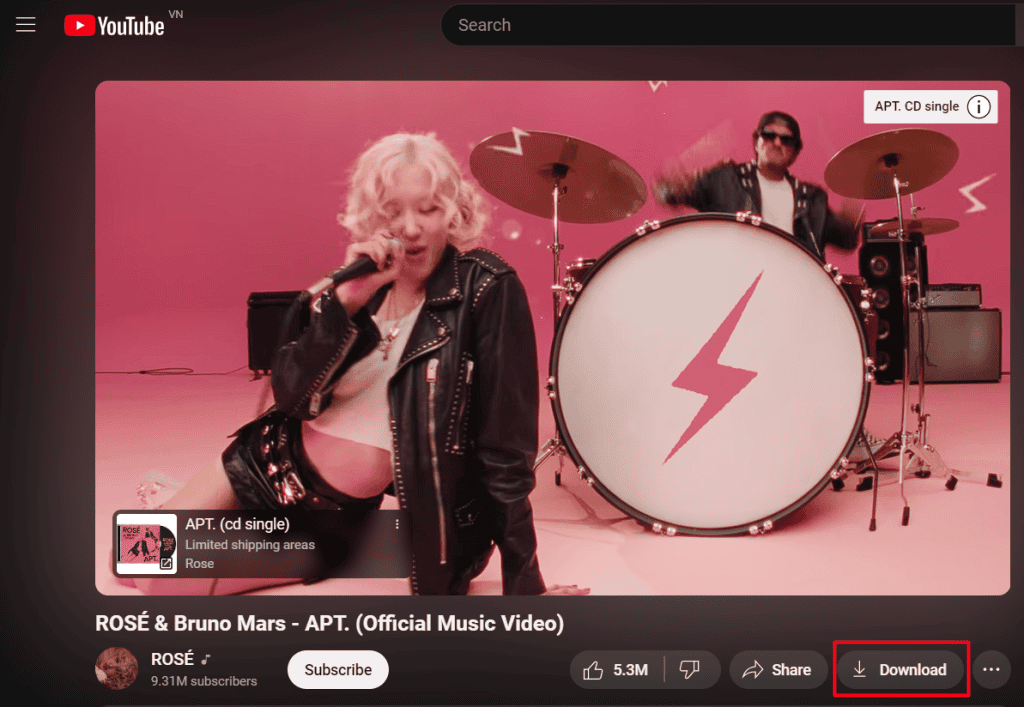
If you choose to delete your YouTube channel, all of your videos will be permanently removed as well. So, if there are any videos you’re attached to, make sure to save them to your hard drive before proceeding.
Fortunately, Google has made it simple to download your YouTube videos directly to your desktop or mobile device. In addition, just follow their easy step-by-step instructions, and you’ll have your videos saved in no time.
2. Steps to Delete a YouTube Channel
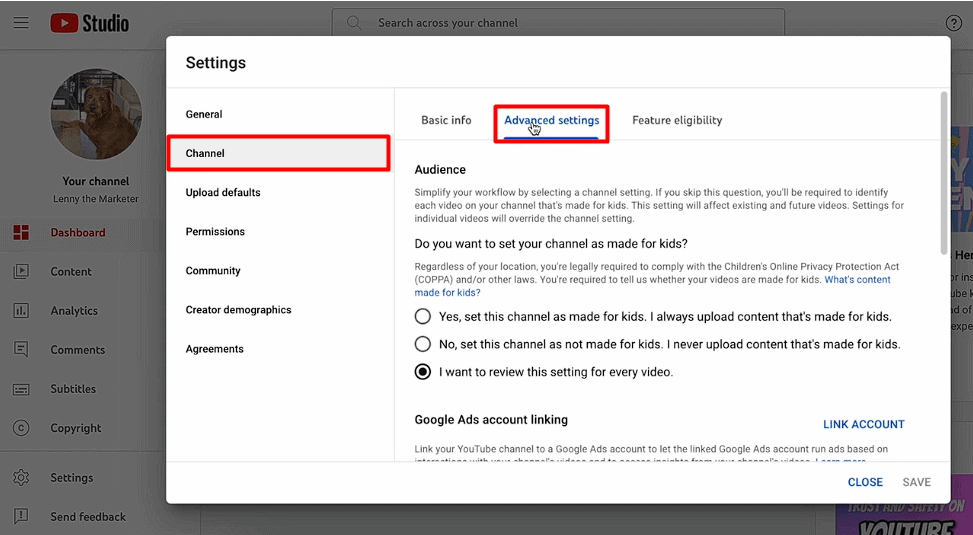
1. Open up the advanced settings from your channel dashboard
The delete button is tucked away in your channel’s advanced settings. To access it, you’ll need to use a desktop computer.
Open your web browser, log in to your YouTube Studio account, and you’ll arrive at your channel dashboard. From there, head to the settings in the menu on the left side of the screen. Once inside, navigate to the “Channel” section, then click on the “Advanced settings” tab.
2. Select “Remove YouTube content”
Scroll down until you find the link to the Remove YouTube content page. Once you see it, go ahead and click to open it.
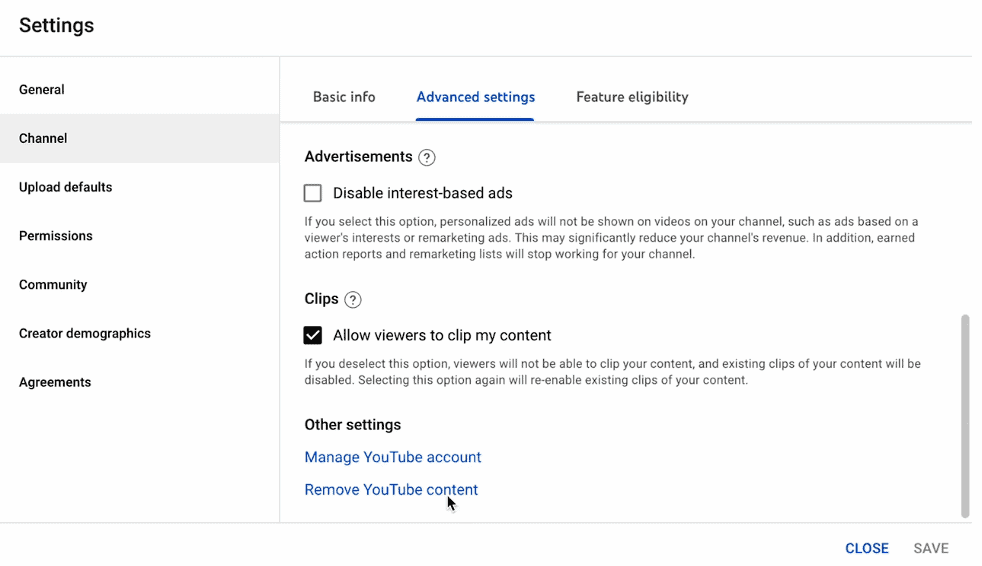
You may encounter a pop-up from YouTube asking you to log in again to confirm your decision to remove your content. Next, simply follow the prompts and re-enter your login details if necessary to proceed.
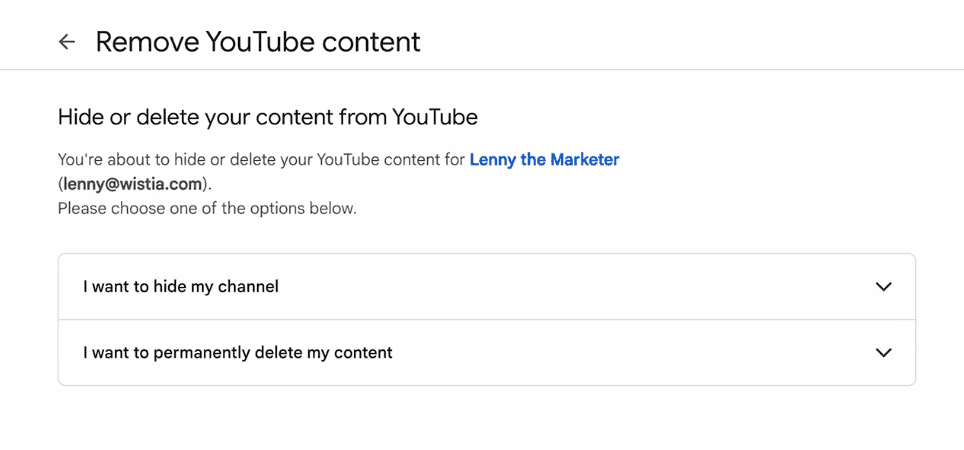
3. Choose “I want to permanently delete my content”
Open the drop-down menu labeled “I want to permanently delete my content.” Two checkboxes will appear, giving you options to confirm your decision.
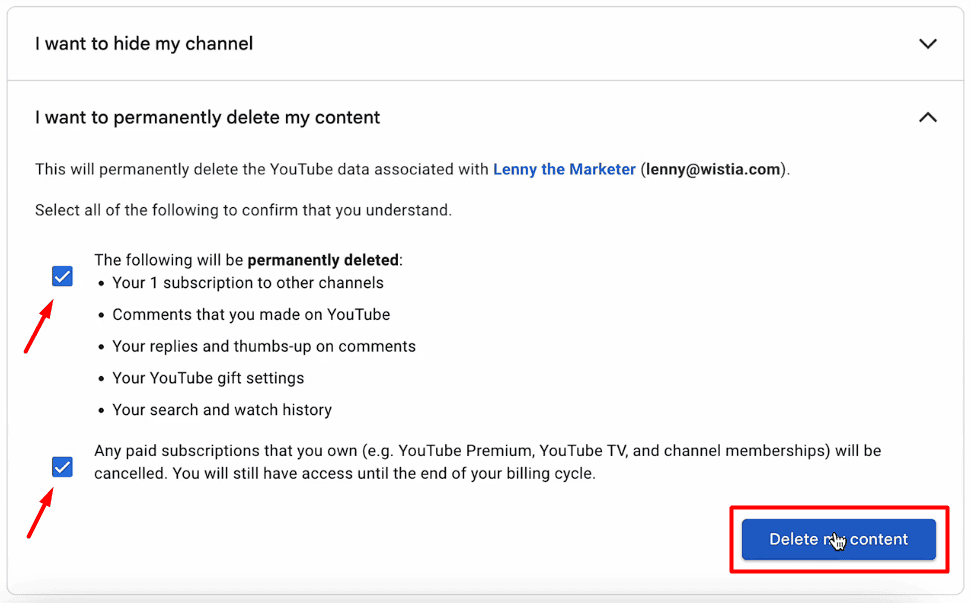
The first checkbox ensures that all content linked to your channel will be permanently deleted.
The second checkbox confirms that any paid subscriptions, such as YouTube TV or channel memberships, will also be canceled. Make sure to check both boxes.
4. Hit that blue “Delete my content” button
You’re almost there! Take a deep breath and hit the delete button. Then, You’ll be prompted to enter the email address associated with your account for confirmation.
And that’s it! YouTube will display a confirmation page letting you know that your content is in the process of being deleted.
Conclusion
In conclusion, deleting a YouTube channel is a significant step that requires careful consideration. By following the outlined steps, you can ensure your content is backed up, and your account is managed properly. Whether you’re looking to permanently remove your channel or hide it temporarily, it’s important to understand the implications for your videos and Google account. Then, make sure this decision aligns with your long-term digital goals and follow the correct process to avoid any issues.