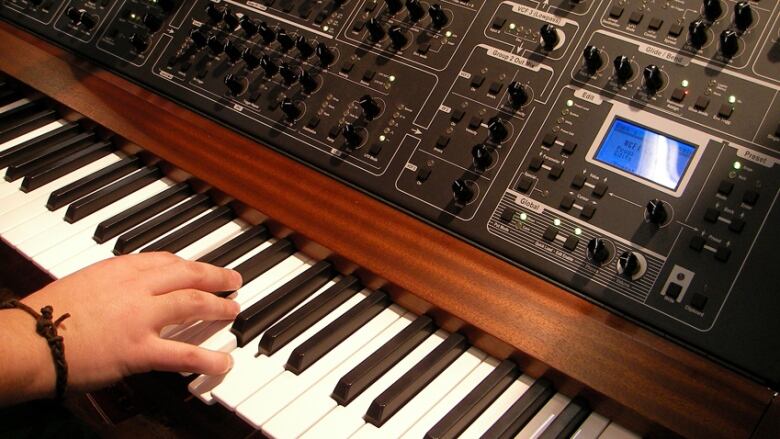
Continue to discover the best way to design subtractive synthesis sound…
Filter
The following step within the signal chain is the filter. That is where the “subtracting” actually takes place.
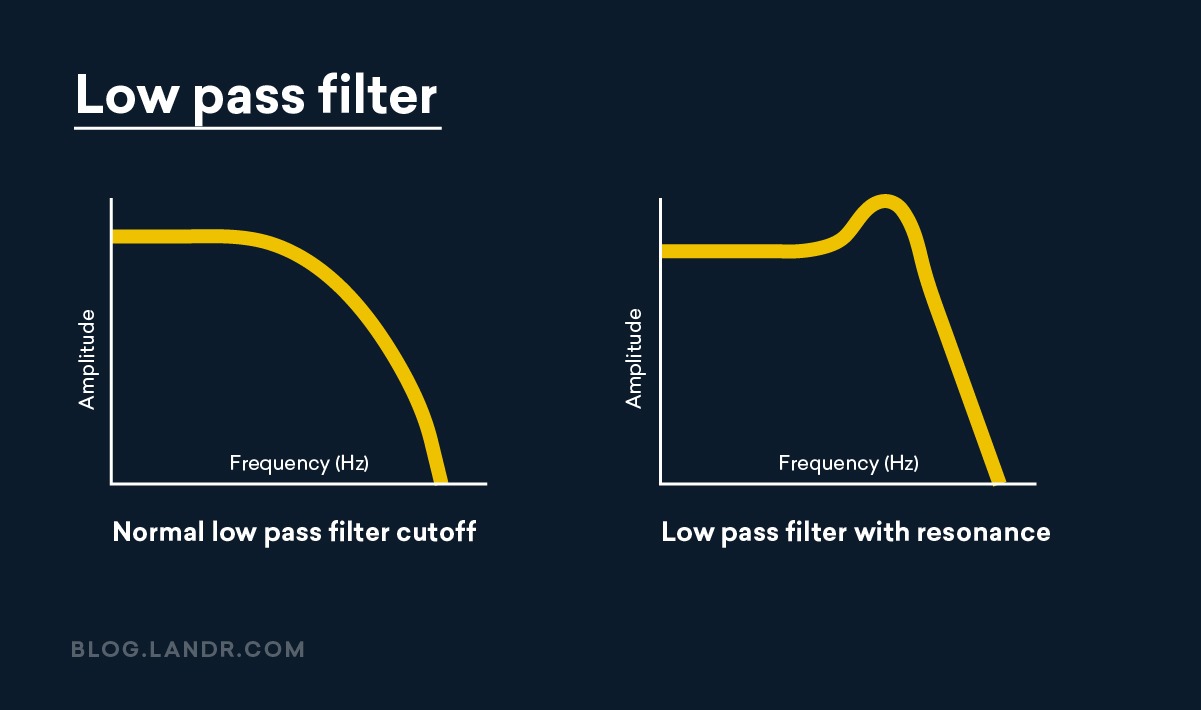
Many synths provide multimode filters, however, the commonest filter kind in a subtractive synthesis sound is a low pass filter.
The low pass filter is called for the frequencies it permits by—which means that an LPF is definitely an excessive cut.
Filtering out these excessive frequencies dramatically adjustments the sound. Every frequency position of the low pass filter reveals a different harmonic character within the authentic oscillator.
That’s why the subtractive synthesis sound is so highly effective!
The filter’s resonance management creates a “bump” proper across the cutoff frequencies that you should use to sculpt the sound even more.
Play around with your filter’s cutoff frequency and resonance to get a thought of how they have an effect on the sound. You’ll probably hear how these parameters create lots of the most recognizable subtractive synthesis sound.
As I discussed above, your filter may need some additional modes apart from the low pass. These let you choose the frequency vary that will get cut from the original rich signal.
Excessive pass is the alternative of low pass and cuts the lowest frequencies from your signal. Bandpass cuts everything besides a slim band across the heart frequency.
The last basic parameter your filter may embrace is a “poles” switch. That is generally written as “2-pole/4-pole” or “12 dB/octave or 24 dB/octave.”
This parameter controls the slope of the filter and impacts how dramatically it’s going to attenuate materials above the cutoff frequency.
12 dB/octave or 2-pole is gentler whereas 24 dB/octave is a steep drop off below the cutoff frequency.
There’s a lot more beyond the fundamentals in the case of filters but for now I’ll move on to the following hyperlink within the chain.
Amplifier
The subsequent part in a subtractive synthesis sound is the amplifier. That is the part that brings the signal up to a level that’s sturdy sufficient to connect with other gear like a mixer or audio interface.
An amplifier by itself isn’t that exciting, it’s what controls it that provides you so much sound design functionality.
I’m talking about the envelope generators. Let’s dive right into it.
Envelope generators
Envelope generators are one of many ways that you create change over time in your subtractive synth patch.
They’re completely important to crafting compelling sounds with subtractive synthesis.
Many synths include a couple of them, however, the most typical configuration is one EG that acts on the amplifier and one other that acts on the filter.
I’ll begin with the amplifier because it’s the simplest to know.
When an envelope generator acts on synth’s amplifier, it adjustments the general quantity of the sound in keeping with the form of the envelope.
As quickly as you press a key in your synth, its EG begins a cycle that goes via four phases: attack, decay, sustain, and release.
These are generally shortened to ADSR.
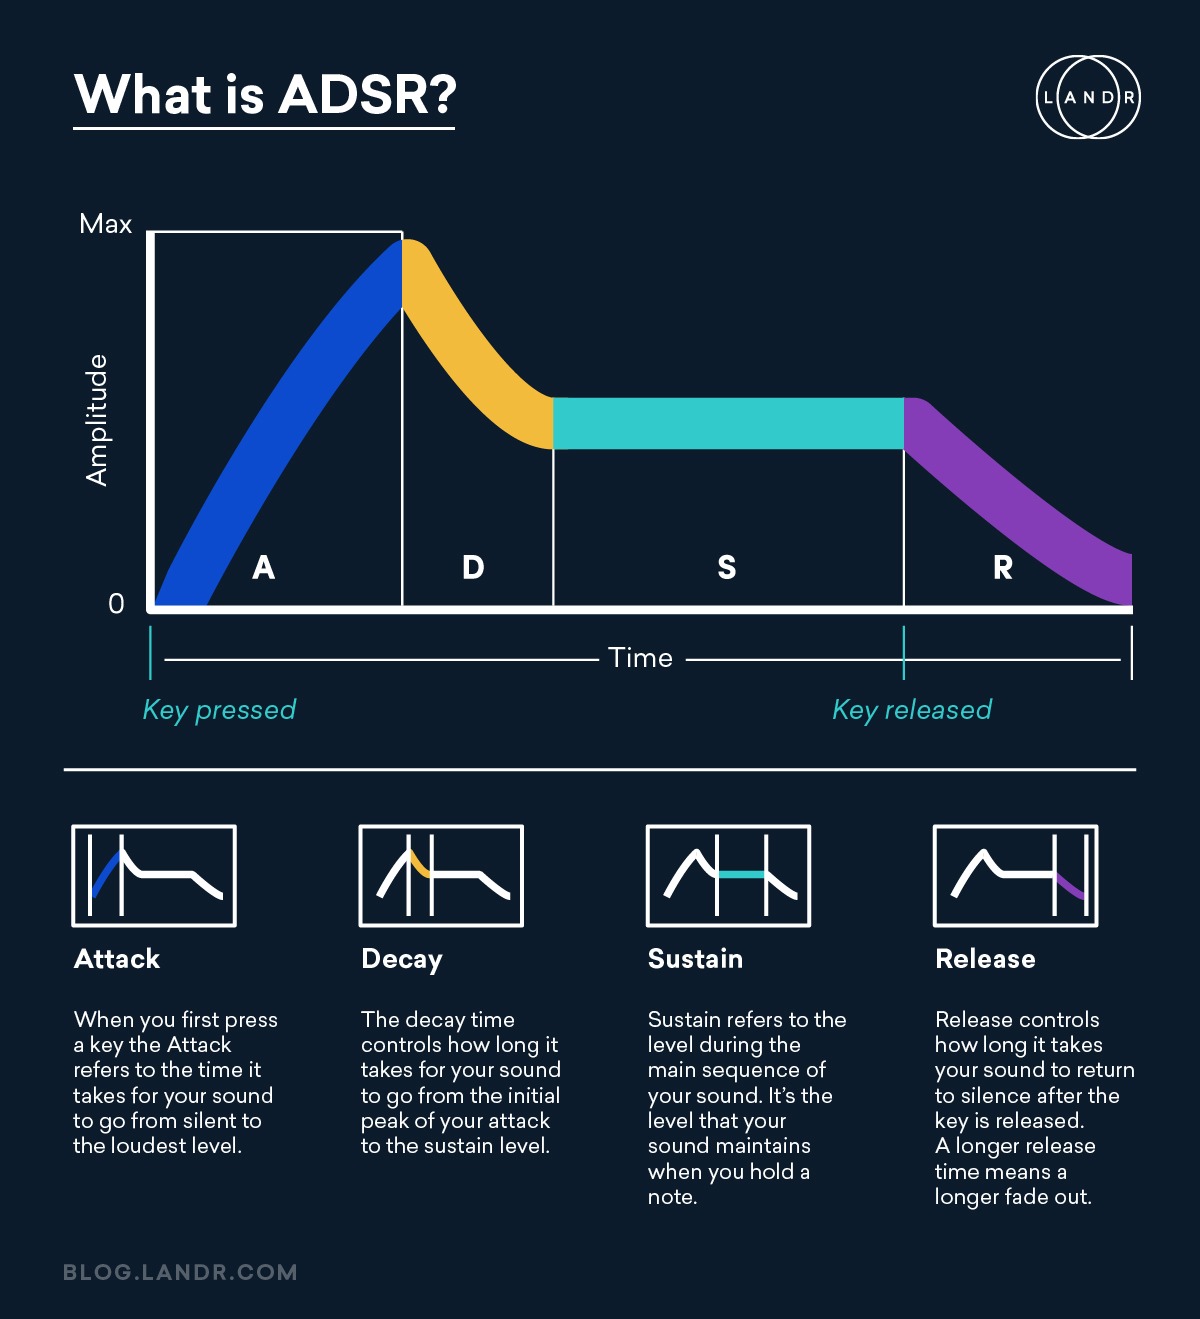
I’ll go through each one in detail and explain how it affects your sound when connected your synth’s amplifier:
Attack
Attack controls the first moments of your synth sound’s quantity. It determines whether or not it has a punchy, abrupt onset on a more gradual fade in.
The attack control is measured in units of time, often milliseconds. It controls how long it takes for a sound to succeed in its maximum intensity
Use the minimum attack time for sharp sounds and longer settings for ambient pads:
Decay
Decay controls how long it takes to your sound to settle on the level it’ll proceed till you take your finger off the important thing.
It’s additionally measured in time. Quick decay instances create a more dramatic drop off in quantity from the height.
That is the way you create extremely dynamic seems like plucks or snares.
Sustain
Sustain controls the general level your sound will play without delay the attack and decay phases are over.
It’s measured in dB. Lower sustain values will make the distinction between the beginning of the sound and its “body” more dramatic.
Release
Release controls the time it takes for your sound to drop off from its level during the sustain stage to silence.
Longer release times will give notes a trailing, ambient tail, where short release times will cut notes off just after you release the keys.
Filter envelopes
I simply described the impact of an envelope on a synth’s amplifier. However, envelopes can act on any other parameter—identical to an LFO.
You’ll typically see them on filters, where they control the animation of the cutoff frequency over time.
The ADSR parameters work the same way, however, their impact on the sound is solely completely different.
Attempt experimenting with your filter’s envelope to see how the completely different controls add character to your synth sound.
LFO
The final key piece of the subtractive signal chain is the LFOs.
LFO stands for a low-frequency oscillator. They’re just like common oscillators—with a twist.
These oscillators have shapes similar to those in your important sign generators. However, they operate at a lot lower frequency—so low that you wouldn’t essentially hear it as a musical tone in case you instantly listened to their output.
Instead, LFOs create repeating modulation in your synth sound.
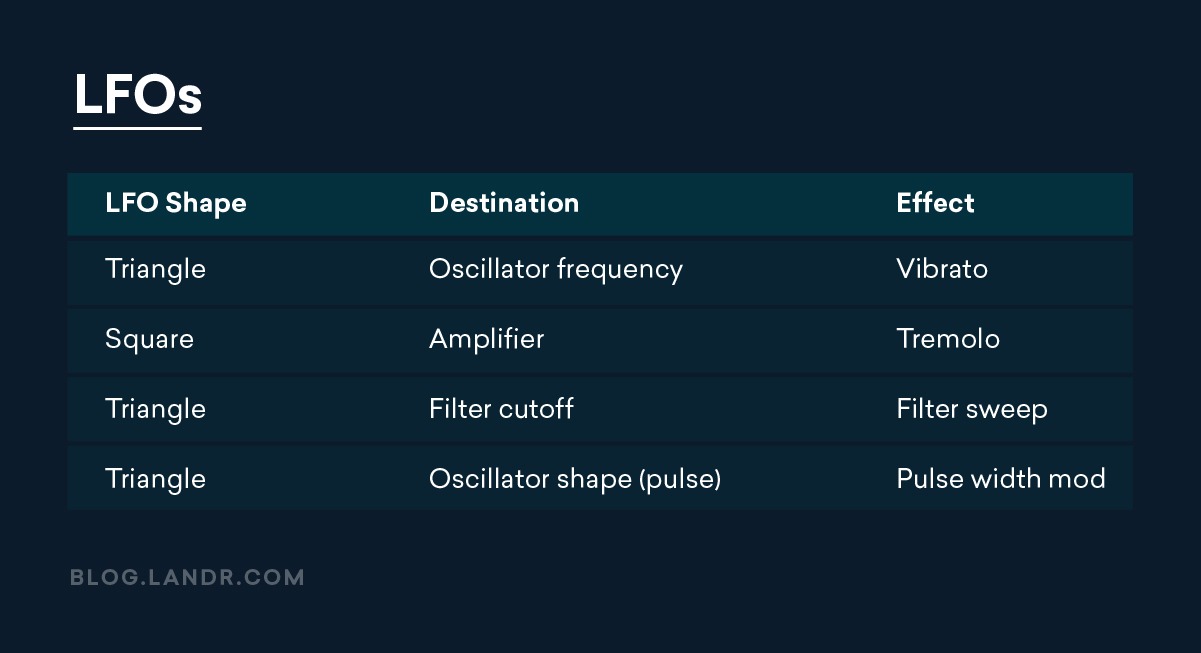
Think about you had a third hand to show a knob in your synth back and forth at precisely the identical charge each time—that’s LFO modulation!
You can connect LFOs to so many different parameters in your synth. To help you get an idea of the outcomes of an LFO here are some common routing options that produce well-known effects:
Putting it all together
All these components may appear overwhelming, however, constructing sounds with subtractive synthesis is enjoyable and intuitive.
To make it simpler, let’s evaluation the fundamentals within the order you’d set them to construct a sound:
Select the beginning sound with the oscillator, form its frequency stability with the filter, animate it with LFOs and sculpt its envelopes with ADSR.
That’s all there is to it!
Once you used this signal processing flow, you’ll start dialing in great synth tones in no time.
Now that you’ve got the fundamentals down, get again to your DAW, and begin making patches.