
Continue with some steps to use Facebook Business Manager…
Step 5: Connect your business partners or ad agency
This may not apply to you when you are just getting started with Fb advertising, however, you could always come back to this step later.
- From your Business Manager dashboard, click on Business Settings on the upper right.
- On the left menu, click on Partners. Under Partner to share assets with, click on Add.
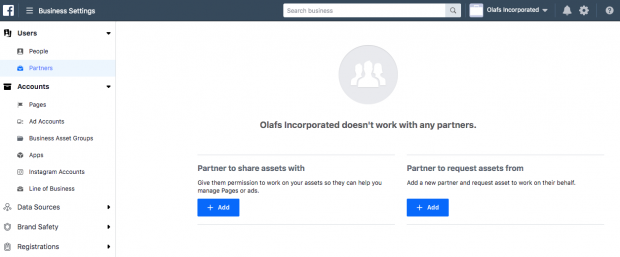
- Your partner must have an existing Business Manager ID. Ask them to provide it to you. They could discover it in their own Business Manager under Business Settings>Business Information. Enter the ID and click on Add.
The business you have just added could handle permissions for the individuals on their own groups from their own Fb Business Manager account. Meaning you do not need to worry about assigning and managing permissions for all the individual people who service your account at your agency or partner firm, just the partner company itself.
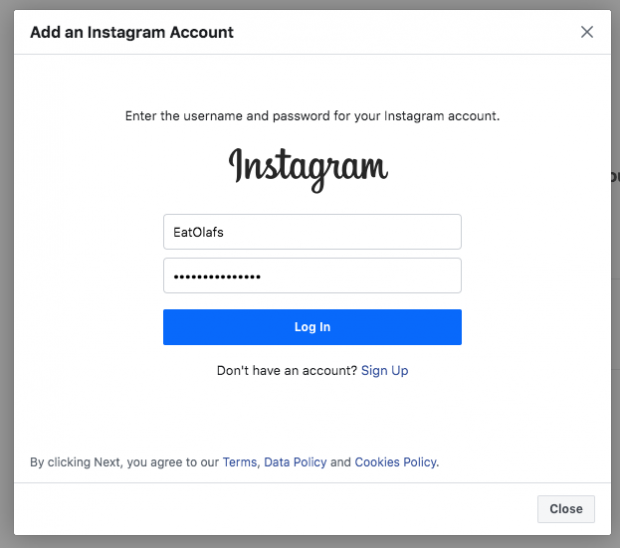
Step 6: Add your Instagram account
Now that you have got your Fb assets set up, you could connect your Instagram account to Fb Business Manager as well.
- From your Business Manager dashboard, click on Business Settings on the upper right.
- In the left column, click on Instagram Accounts, then click on Add. In the pop-up box, enter your Instagram login info and click on Log In.
Step 7: Set up Fb Pixels
What’s a Facebook Pixel? Put simply, it is a small bit of code that Fb generates for you. If you place this code on your site, it gives you access to info that’ll permit you to track conversions, optimize Fb adverts, build targeted audiences for your adverts, and remarket to leads.
We recommend setting up your Fb pixel instantly, even if you aren’t ready to start your first advert campaign yet because the data it gives now will be valuable when you’re ready to start advertising.
Our complete guide to using Facebook pixels is a good resource that walks you thru everything you should know about making the best use of the info a Fb pixel could provide. For now, let’s get your pixel set up from within Fb Business Manager.
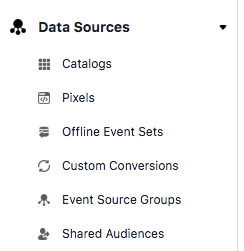
- From your Business Manager dashboard, click on Business Settings.
- In the left column, broaden the Data Sources menu and click on Pixels, then click on Add.
- Enter a name (up to 50 characters) for your pixel. Enter your site so Fb could provide the best suggestions for how to set up your pixel, then click on Continue. If you click on Continue, you’re agreeing to the pixel terms and conditions, so you need to read these before you go any further.

- Click on Set up the Pixel Now.
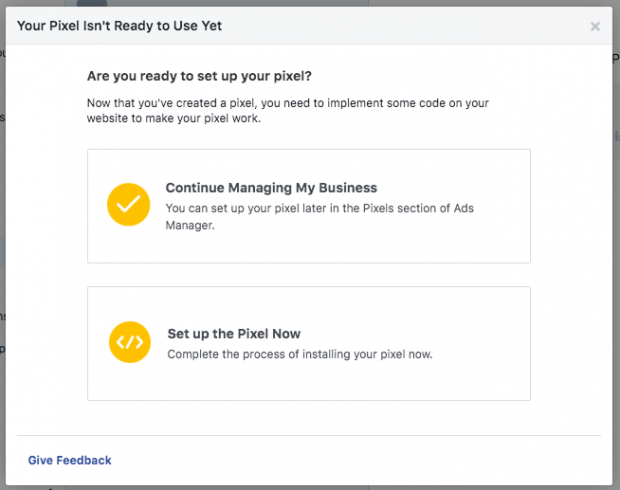
- Follow the detailed instructions in our Facebook pixel guide to get the pixel set up on your site and begin collecting data.
You could make up to 10 pixels with your Business Manager.
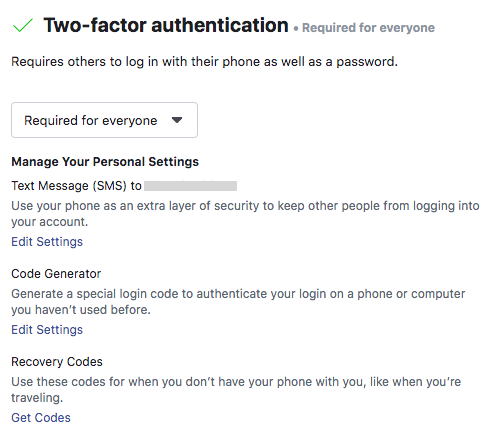
Step 8. Increase security on your account
One of the advantages of use Facebook Business Manager is that it gives extra security for your business assets.
- From the Business Manager dashboard, click on Business Settings.
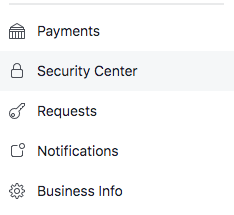
- On the left menu, click on Security Center.
- Set up two-factor authentication. Setting it as Required for Everybody gives the highest security.
How to create your first campaign in Fb Business Manager
Now that your account is set up and your pixels are in place, it’s time to launch your first Fb advert.
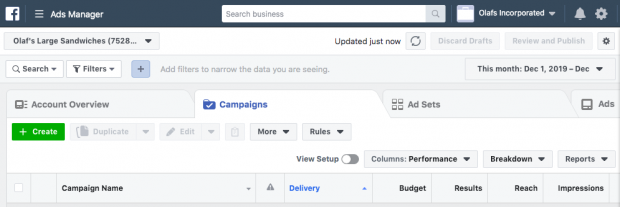
Step 9: Place your first advert
We have got a full guide that explains all the strategy and particular details you should know to create compelling and effective Facebook ads. So here, we will just walk you thru the steps you should take to get an advert up and running in Business Manager.
- From your Business Manager dashboard, click on Business Manager on the top left.
- Under the Advertise tab, click on Ads Manager, then click on the green Create button.
- Select your campaign objective, target your audience, set your budget and schedule, and select your particular ad types and placements following our step-by-step instructions.
Organize Fb Business Manager with business asset groups
As the number of assets in your Fb Business Manager grows, it could become difficult to keep track of everything. Business asset groups help keep your pages, advert accounts, and team members organized and clear.
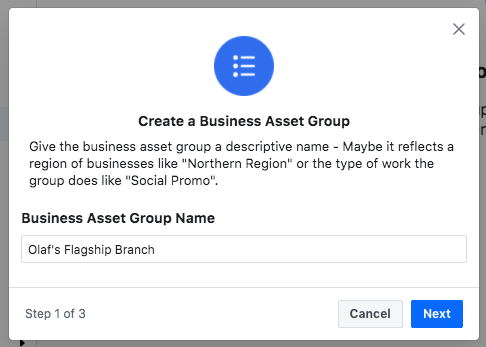
Step 10: Create your first business asset group
- From the Business Manager dashboard, click on Business Settings.
- From the left menu, under Accounts, click on Business Asset Groups, then click on Create Business Assets Group.

- Select whether to organize your assets based on brand, area, agency, or another category, then click on Confirm.

- Name your business asset group, then click on Next.
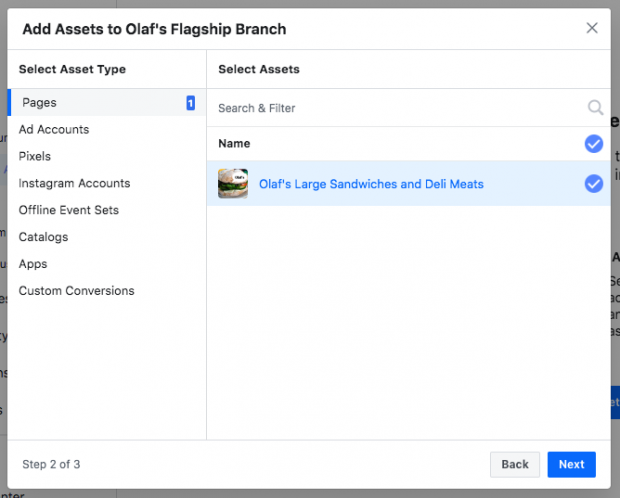
- Select which assets to add to this asset group. You could add pages, advert accounts, pixels, and Instagram accounts, as well as offline events, catalogs, apps, and custom conversions. If you have chosen all of the related assets, click on Next.
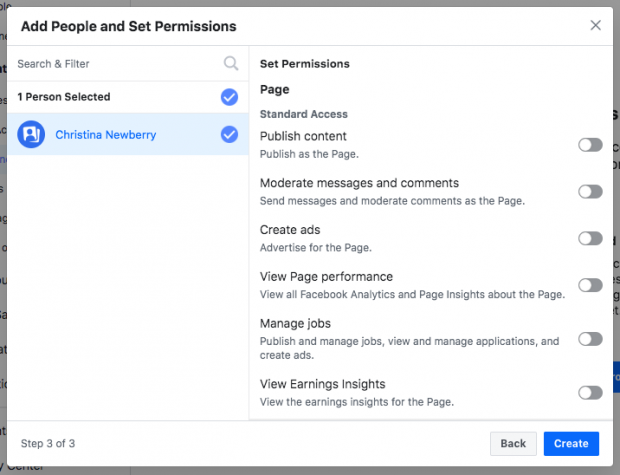
- Select which people to add to this asset group. You could control their access to all assets within the group from one screen. If you’re completed, click on Create.
And that’s it! With the small amount of effort invested today, you have got everything centralized in one spot, and you are ready to use Facebook Business Manager to take advantage of your Fb adverts and marketing efforts.