YouTube Autoplay is like a virtual assistant suggesting new content. It’s handy, queuing up videos tailored to your interests, and enhancing your viewing experience.
However, sometimes it suggests things you’re not keen on. The good news? You can easily turn it off with a few clicks and take charge of what you watch. Follow this simple step-by-step guide to regain full control of your viewing on YouTube.
To Disable Autoplay on Desktop
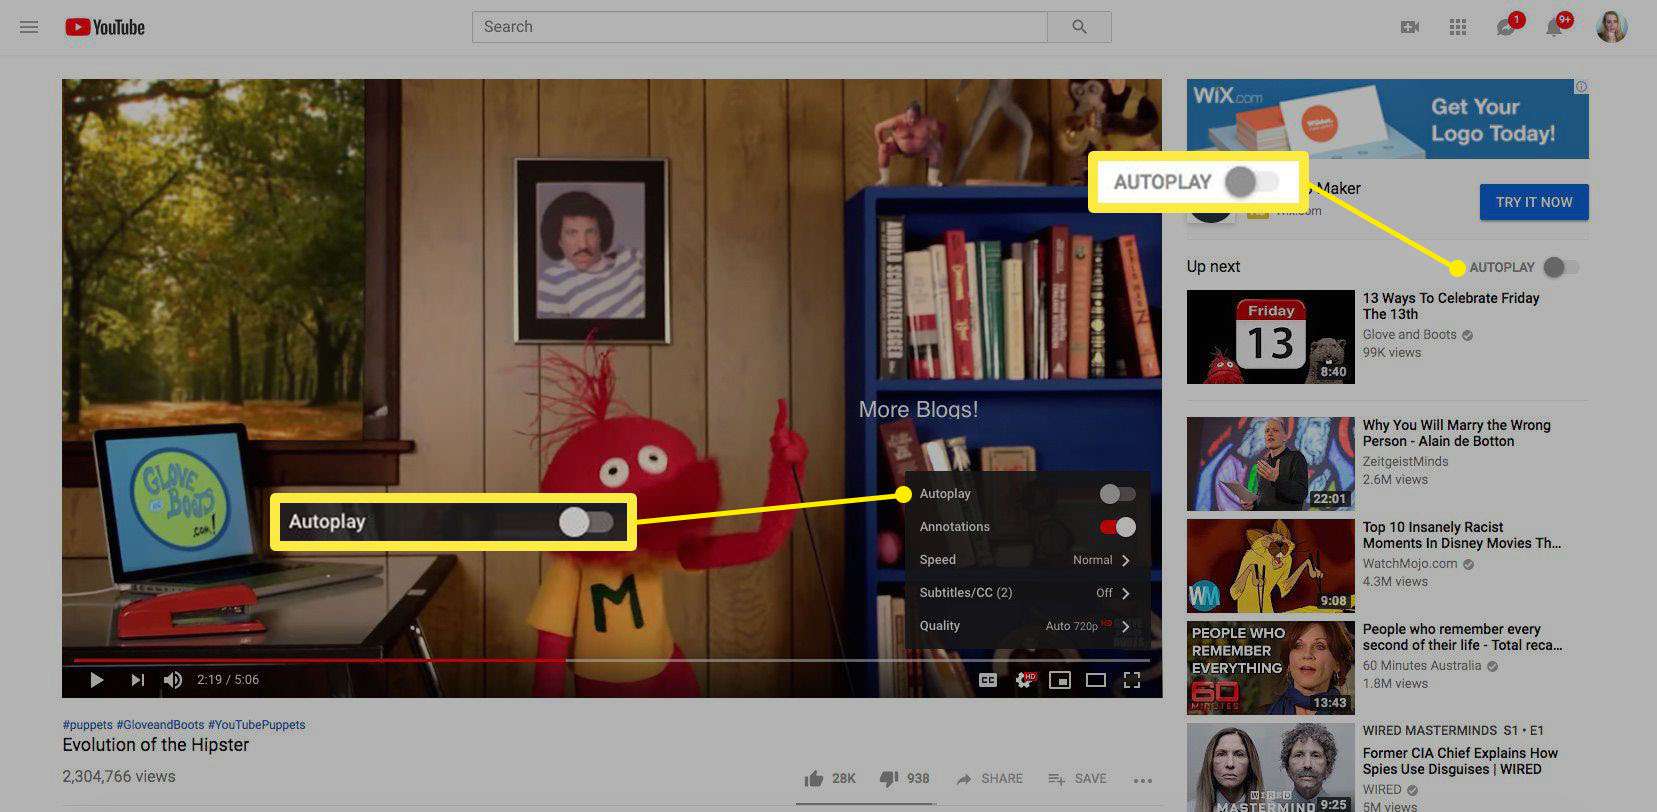
To turn off Autoplay on YouTube.com, follow these steps:
1. Open a video and start playing it.
2. Hover your cursor over the video until the player options appear at the bottom.
3. Locate the Autoplay toggle next to the CC button.
4. Turn it off.
Pro tip: If you prefer Autoplay to remain on but want to skip the next video in the queue, just click “Cancel” on the screen during the countdown before the new clip starts.
To Disable Autoplay in the YouTube App
On iOS and Android, disabling Autoplay is a breeze:
1. Open YouTube and pick a video.
2. Find the player options at the top.
3. Switch off the Autoplay toggle.
You can also tweak your settings in the Menu section:
1. Open YouTube.
2. Tap your profile picture in the upper right.
3. Go to Settings, then tap Autoplay.
4. Turn off the Mobile phone/Tablet option.
These steps also work for turning off Autoplay on the YouTube app on your smart TV.
Closing thoughts
If you’re aged between 13 and 17, keep in mind that Youtube Autoplay is automatically turned off for your channel. If you have an unsupervised account, you can control Autoplay using the steps we discussed earlier. But, if your profile is in restricted mode, you won’t be able to change Autoplay settings.
Additionally, you have the option to set different Autoplay preferences on various devices using the same account. For example, you can turn off Autoplay on your phone but keep it on for the desktop or your Smart TV. If you prefer having the same settings on all your devices, you’ll need to adjust them manually.


