
It’s the hidden magic that transforms a good take into an outstanding pop vocal. However, when misused, it can make vocals sound dull and artificial. So, how can you make the most of vocal editing plugins? With some practice and a few fundamental techniques, you can significantly enhance your results. In this article, I’ll share seven tips to guide you on your journey to becoming a vocal tuning pro.
Let’s dive in.
1. Prioritize editing
A top-notch vocal performance begins with a stellar initial rendition, but in today’s music landscape, most finalized vocal takes are the outcome of meticulous comping.
For those unfamiliar, comping involves piecing together a composite performance from multiple takes of the same material. By cherry-picking the standout moments and incorporating them into the primary take, you can create the most polished representation of the vocalist’s efforts during the recording session.
Take the necessary time to create a comprehensive comp and proceed from there. Even after you have your compiled take, additional editing is crucial for optimal results.
Eliminating noise, artifacts, and unnecessary sections of the audio is essential, as they can impact the accuracy of vocal tuning plugins. Additionally, take the opportunity to align any double tracks during this phase to ensure you’re starting with a take that’s as close to finished as possible.
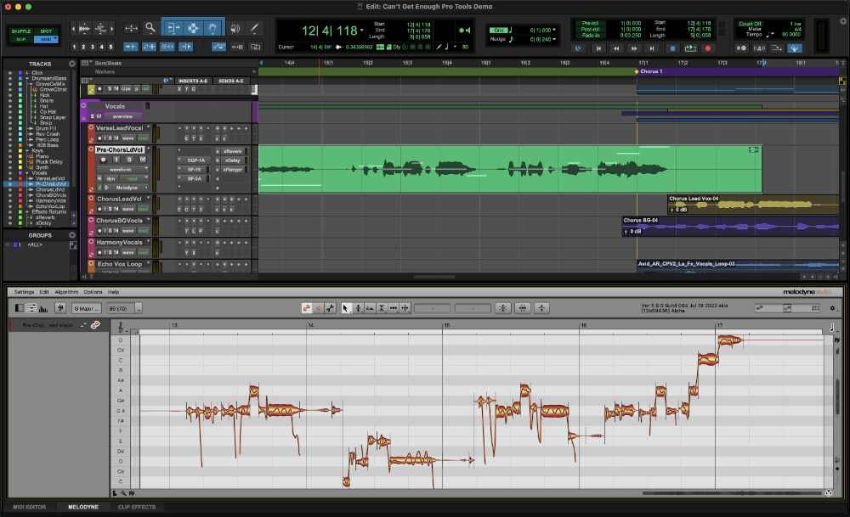
2. Capture the audio properly
If your DAW lacks ARA2 support for your vocal tuner, you’ll have to record the audio from your active track.
The process varies between plugins, but typically, you’ll activate capture mode and play through the audio in real-time to load it into the plugin.
Try to capture all the material in a single pass. While modern vocal tuners can handle stops and starts quite well, capturing everything at once ensures it stays consistently in time and is more reliable.
3. Master Your Vocal Tuner’s Tools
Unless you’re aiming for a really intense effect, relying solely on the automatic mode with 100% settings is unlikely to get you the precise pitch correction you need in your music.

So, the bulk of your pitch correction work will be hands-on, using the different tools provided by your plugin.
While making sure your notes are in tune might seem simple, singing performances can have a lot of variation. Things like vibrato, note duration, and other inconsistencies might require you to use different tools to keep things in check.
It’s important to take the time to understand what your plugin offers, how to use it, and where it works best.
4. Only use one process at a time
When it comes to tools, the temptation might be to apply every available option to each note during pitch correction.
However, you might not require as much processing as you initially assume.
Begin with the pitch center and gradually move through the entire vocal. Sometimes, a single operation could suffice to achieve your vocal tuning objectives.
Following pitch center adjustments, address pitch drift, focusing specifically on the most problematic instances.
Proceed to utilize your shaping tools—you can see the pattern!
In essence, initiate your process by employing the least invasive tools and gradually progress to more impactful ones, implementing minor adjustments with each pass.
5. Compare to the original
It’s quite simple to overdo it with vocal pitch correction. Once adjustments begin, it’s easy to lose sight of the original sound of the part.
To ensure you haven’t gone too far, the most effective method is to compare against the original track.
Fortunately, in most workflows, listening to the original is as straightforward as bypassing the plugin.
Make it a regular practice!
6. Listen in context
Similarly, in music production, context plays a vital role in any operation.
Numerous producers understand that EQing a sound while in Solo mode is an undesirable habit that can result in suboptimal mix decisions.
The same principle applies to vocal tuning.
In any music production task, context is paramount.
When listening in isolation, there’s a risk of being dissatisfied until the vocals sound perfectly robotic in pitch. However, this level of precision is often unnecessary for the overall song.
As always in music production, your objective is to present the music in the best possible way for the audience, and that doesn’t always entail mechanical perfection.
7. Commit when you’re done
Are you happy with how your vocals sound after editing? If so, take the next step and render the audio using the commit or bounce-in-place function.
There are two main reasons for doing this.
Firstly, unrendered audio comes directly from the vocal tuner plugin, playing back from files stored outside of the project folder and calculating its own timing to stay in sync. As you add more plugins for vocal track mixing, you might experience increasing latency, leading to unreliable timing and frustrating issues that can be hard to troubleshoot.
The second reason is more of a psychological one. Mixing requires a close examination of your sounds. If you’re still editing your vocals during the mixing process, there’s a temptation to focus too much on pitch editing rather than addressing issues related to dynamics or frequency balance. This can result in over-tuning.
By committing your vocal tuning to a simple audio file, you avoid the urge to continuously re-edit the pitch, allowing for a smoother and more focused mixing process.
Closing thoughts
Vocal tuning has become a standard task for most producers nowadays. However, if you’ve never done it before, it can still seem a bit intimidating! Whether you’re looking to completely transform a rough performance or simply enhance an already clean take, these tips are designed to assist you in refining your vocal tuning skills.