If YouTube is your creative stage, then YouTube Studio is the backstage control room where you manage everything. Think of it as your all-in-one hub for monitoring, managing, and improving your content.
YouTube Studio is an essential tool for any content creator who wants to get the most out of their channel. It’s where you’ll upload and edit videos, track performance, and dive deep into analytics that show how your audience is engaging with your content. While it may seem overwhelming at first with all the options, don’t worry—it’s designed to be user-friendly. With a bit of exploration, you’ll quickly get the hang of it.
In this guide, I’ll show you how to use YouTube Studio effectively. Whether it’s editing a video or YouTube Short, analyzing your channel’s performance, or optimizing your content to grow your subscriber base, we’ve got you covered. Let’s break down everything you need to know to maximize your YouTube channel’s potential using YouTube Studio!
What exactly is YouTube Studio?
YouTube Studio, previously known as YouTube Creator Studio, is a comprehensive tool that allows creators to manage their channels efficiently. Whether you want to upload, edit, or analyze videos, YouTube Studio gives you full control. It also lets you interact with your audience by responding to comments and provides detailed insights into metrics such as viewer activity and revenue generation.
This free tool is accessible to all creators—there’s no subscriber count requirement to use YouTube Studio. All you need is a YouTube channel. It’s important to note that a YouTube channel and a regular YouTube/Google account are not the same. While a Google account lets you watch videos, a YouTube channel is needed if you want to upload and manage your own content. Unsure if you have a channel? Simply visit studio.youtube.com, and if you don’t have a channel, you’ll be prompted to create one.
You can access YouTube Studio in several ways. On your computer, the easiest way is by navigating to studio.youtube.com in your browser. If you’re already on YouTube, click your profile picture in the top-right corner, and select YouTube Studio from the menu.
For mobile devices, YouTube Studio has a dedicated app available for download, separate from the regular YouTube app. While the browser version offers more robust management features, having the app on your phone ensures you stay connected with your audience through real-time notifications for comments and other engagement.
Downloading the app and turning on notifications helps you stay up to date and engaged with your subscribers even when you’re on the go!
What Features Are Available in YouTube Studio?
A better question might be, “What can’t you do in YouTube Studio?” To explain everything it offers, let’s walk through the main sections of the tool and what you can accomplish in each one.
On the desktop version, you’ll find all these sections on the left-hand side of your screen. If you’re using the YouTube Studio app, you can navigate these features through the tabs at the bottom of your phone screen.
Dashboard
The Dashboard in YouTube Studio acts as your homepage. It gives you a quick snapshot of your channel’s activity, including how your most recent video is performing, new comments, subscribers, and other key stats. You’ll also see YouTube updates, new features, and tips for improving your content and engagement.
Content Tab
The Content tab is your video library. Here, you’ll find everything you’ve uploaded—full-length videos, Shorts, live streams, and playlists. You’ll likely spend a lot of time here managing your uploads. By clicking on a specific video or post, you can edit the details and settings or access more advanced options like analytics and video editing.
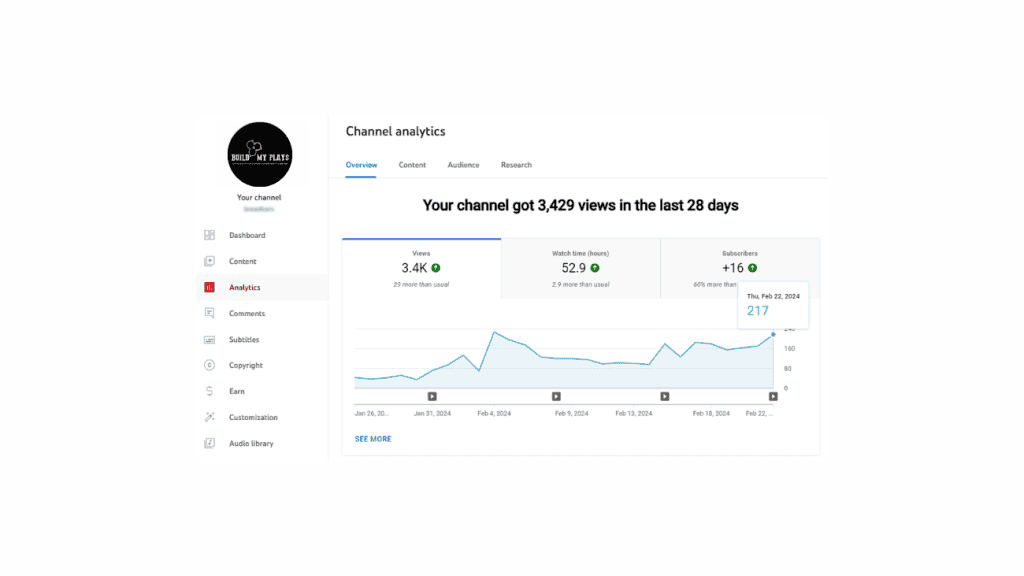
Analytics Section
Comments
The Comments section allows you to view and respond to comments on your videos. You can also track mentions from other YouTubers. It’s a great tool for staying engaged with your community and managing conversations across your channel.
Subtitles
The Subtitles tab lists your videos and allows you to add or edit captions. It functions similarly to the Content tab, but focuses on managing subtitles, making it easier to improve accessibility for your viewers.
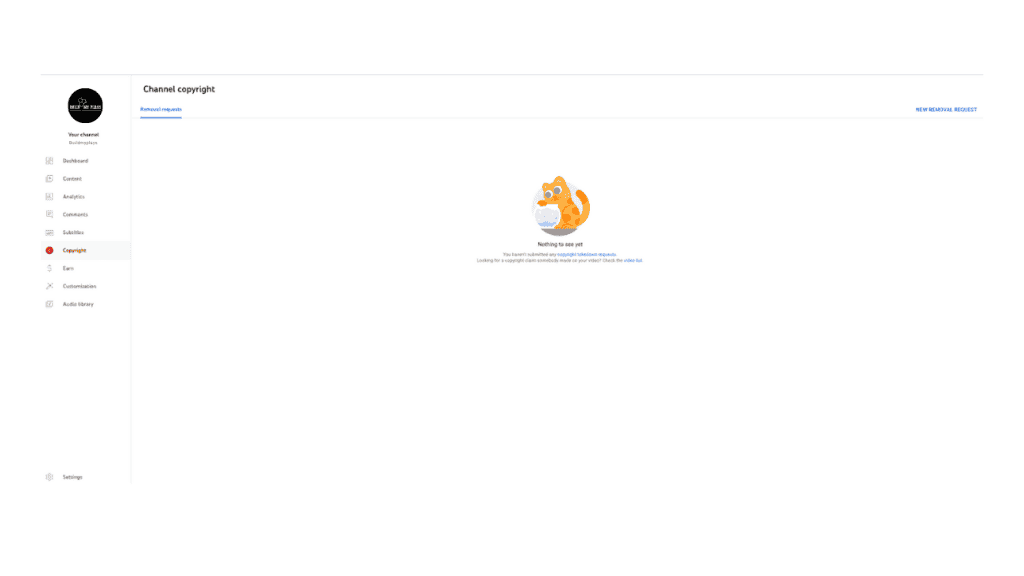
Copyright Section
Earn
The Earn section is important for creators who are part of the YouTube Partner Program. It allows you to manage monetization settings and track your eligibility for monetization. Here, you’ll also find detailed reports on your revenue metrics.
Customization
In the Customization section, you can adjust the layout, branding, and basic info of your channel. This is where you optimize your channel’s appearance and messaging to best represent your brand and attract subscribers.
Audio Library
The Audio Library provides free music and sound effects for your videos. You can browse, listen, and save audio tracks for future use. Any saved tracks are easily accessible under the Starred tab. The Audio Library also integrates with YouTube Music, especially for managing podcast content, where podcasts function as playlists.
With these tools and sections, YouTube Studio gives you all the resources you need to manage, grow, and protect your channel effectively.
How to use YouTube Studio?
Now that you’ve familiarized yourself with YouTube Studio, navigating and performing tasks on the platform will feel much easier. Let’s dive into some essential actions, starting with how to upload a video.
How to Upload a New Video
To upload a new video or YouTube Short, click the Create button located at the top-right corner of your screen (you’ll see it in almost every section of YouTube Studio). The process is the same for both regular YouTube videos and Shorts — if the video is under 60 seconds, it will automatically be tagged as a Short.
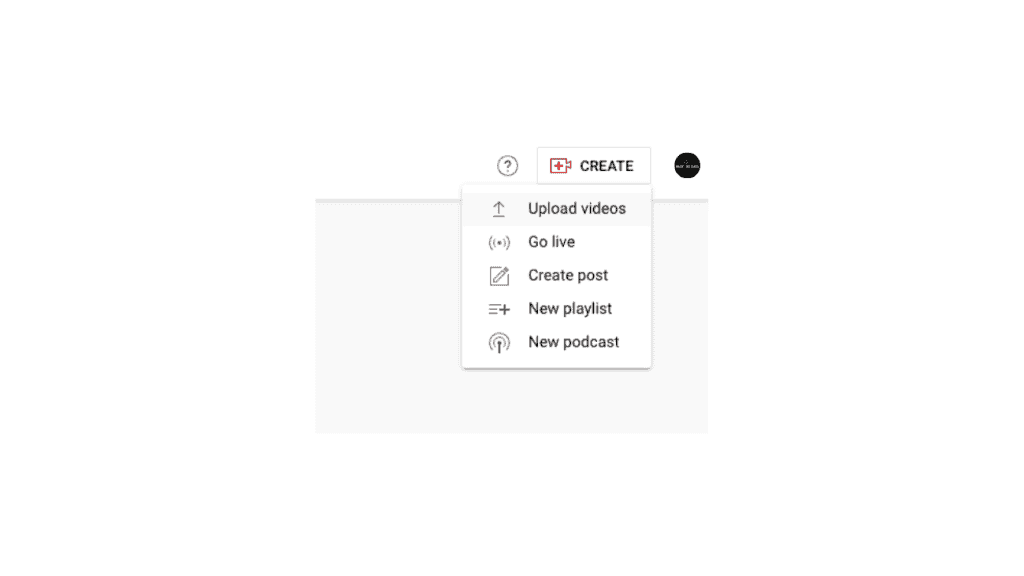
- From the Create drop-down menu, select Upload videos.
- Drag and drop your video files into the upload window.
- While the video uploads, fill in the details such as title, description, thumbnail, playlist, and audience settings.
- Once you’ve completed the basic info, click Video elements to add subtitles, cards, and an end screen. These help viewers discover related content and provide calls to action.
- Next, move on to the Checks section, where YouTube will scan for any copyright or content-related issues.
- Finally, head to the Visibility tab to set your video as public, private, or unlisted. You can also schedule the exact time for the video to go live.
If you need to make adjustments to the video file itself (such as trimming), refer to the instructions in the How to Edit a Video in YouTube Studio’section, where I’ll guide you through the editing process.
This straightforward method will help you smoothly upload and prepare your content for sharing on YouTube.
How to edit videos in YouTube Studio?
YouTube Studio offers a wide range of editing tools that make it easy to tweak almost any aspect of your videos or Shorts, even after they’ve gone live (perfect for those last-minute typo fixes in titles or descriptions!).
To edit a video you’ve already uploaded:
- Go to the Content tab on the left-hand side of your YouTube Studio dashboard.
- Select the video you want to edit by clicking on it. If you can’t find it right away, use the search bar at the top of the screen to locate it.
- In the Video Details tab, you can update the title, description, and thumbnail, add or remove it from playlists, or adjust the audience settings. On the right, you can also manage the video’s visibility, add or edit subtitles, or change the end screen and info cards.
To make changes to the video itself:
- Click on the Editor tab. This section allows you to trim your footage, add blurs, insert music or sound effects, and adjust your end screen and info cards.
YouTube Studio’s lightweight editor makes it easy to refine your video content without needing to re-upload or start from scratch.