There’s nothing better than finding the perfect samples for your track.
However, scrolling aimlessly through random sample packs using text-based search is boring and barely ever works.
Selector is the brand new AI tool that allows you to discover the suitable samples faster.
A selector is your crate-digging companion and your guide to the millions of samples now available on the Internet. We recommend you to check this source – LANDR Samples.
In this article, we will show you use Selector to find the right samples that compliment each other perfectly—and use them in your production.
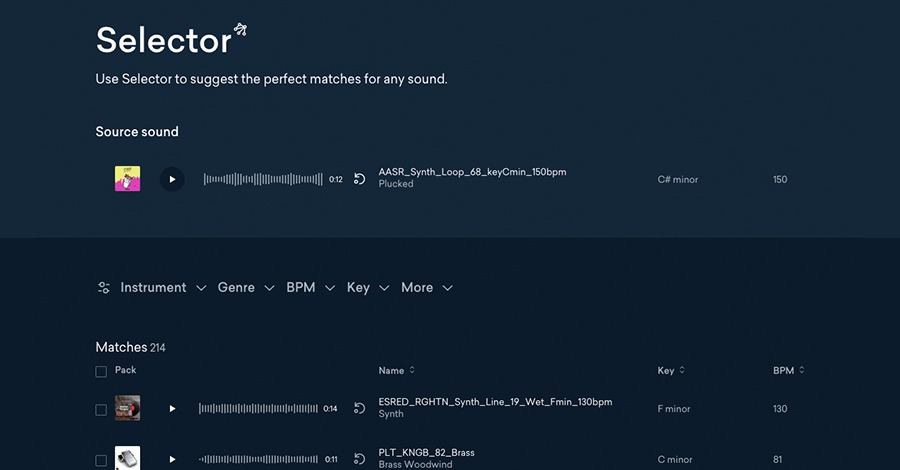
What is Selector?
Selector is the first-ever AI sample recommendation tool that helps you find the right samples faster.
Selector is the first-ever AI sample recommendation tool that helps you find the right samples faster.
It works by analyzing the most important features of a sound and matching them with other samples that share those characteristics.
Selector can find out how a sound’s rhythmic, tonal, and timbral information evolve.
Its sophisticated algorithms identify similar and complimentary samples by matching these sonic qualities with those of other sounds in the catalog.
With Selector, one sample can lead to an incredible collection of related sounds chosen from thousands of individual packs.
You know, the amount of time that a human spends combing through that much material; is enormous!
And the best part? All these samples work together musically. One recommendation session can generate enough samples to create a complete track.
The recommendation is the same as your sample pack which is created only for you according to your demand and favorite sounds.
Here’s use it.
1. Find a sound you like
Here is the necessary news for you: LANDR Samples now has millions of samples.
Use the discover page to surf through featured sounds, themed collections, artist packs, labels, instruments, moods, and more.
The first step to getting recommendations with Selector is to find a loop.
That’s why LANDR Samples provides a curated selection of starter loops.
These handpicked loops are the right place to dive in with Selector.
Then you will get a rich variety of recommendations from Selector. That is enough to make an entire track.
2. Start a recommendation session
You just need to click the Selection icon to easily begin a new recommendation session.
You just need to click the Selection icon to easily begin a new recommendation session.
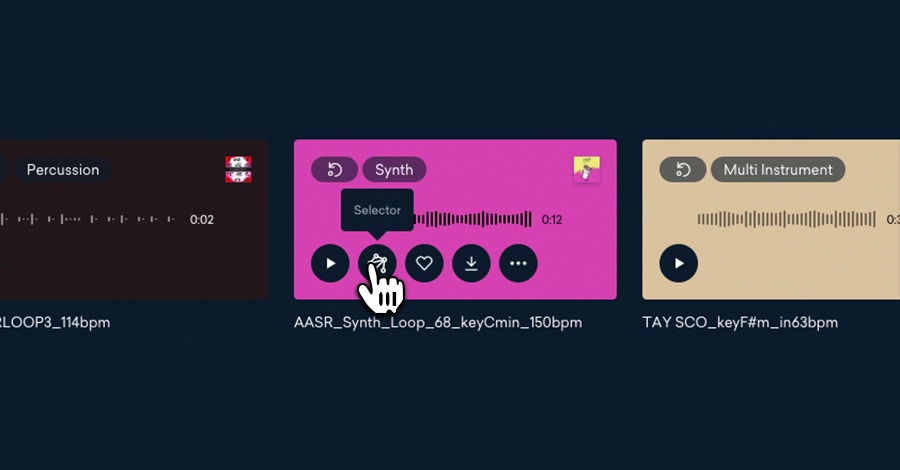
Selector will generate a unique list of recommendations according to your chosen samples.
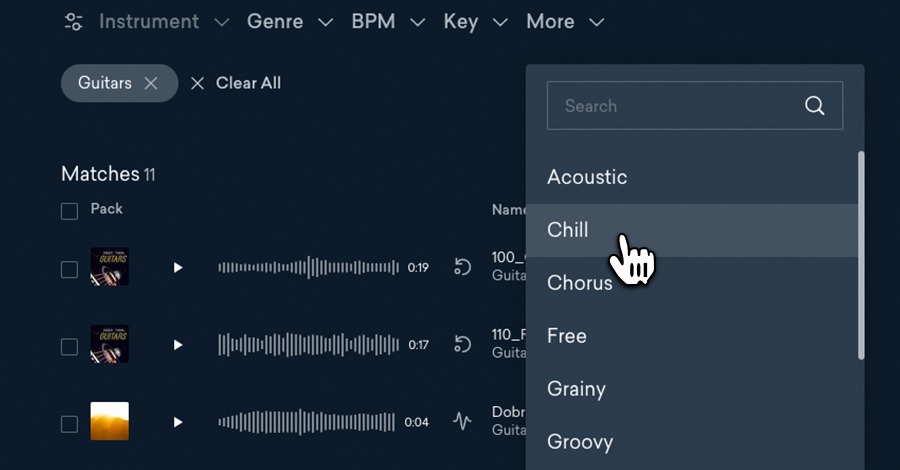
3. Use the filters to sort your recommendations
Sometimes even sorting via many pages of samples can take too long and interrupt your workflow.
That’s the reason why there are even more parameters that are used to filter your Selector recommendations.
Sort by, instrument, genre, BPM, the key to honing in on exactly the elements you want for your track.
You should use the “More” drop-down to choose additional tags to get you to the most suitable sound faster.
4. Download your samples
Select the sounds you need using the individual checkboxes or choose all to download the whole pack.
Select the sounds you need using the individual checkboxes or choose all to download the whole pack.
5. Warp and transpose to match your track
Drag and drop your downloaded samples from your downloads folder or find them in your DAW file browser then bring them into your session.
Keep warping on to bring your sample in at the BPM of your track. Next, transpose your sample to match the key of your track.
In case you don’t know how to do it, here’s a refresher:
Identify the key of your track
In case you write by improvising chords and lines you might not know the key of your track.
Here’s a pretty big hint: a song usually begins with tonic harmony. The first chord in a track is often a dead give away for what key it’s in.
To make sure, watch your chord progressions.
Transpose your sample
Identify the interval relationship between the root note of your song’s key and the notes in the sample.
Here’s another big hint: the key of a sample with harmonic content is often listed in the sample browser.
Count backward the number of semitones needed to move your sample to correspond with a note in your song’s key.
6. Start all over again
One of the using Selector’s greatest parts is how far it can take you.
Like one of the sounds, you found in your original session? Plug it back into Selector to find out what it recommends—and continue!
Hopping from recommendation to recommendation is one of the greatest rabbit holes you may fall in terms of sample discovery.
Hopping from recommendation to recommendation is one of the greatest rabbit holes you may fall in terms of pattern discovery.
The results might surprise you!
Chosen from a select group
Just having access to millions of samples won’t allow you to finish a track if you can’t find the one you need.
The truth is, tons of options is worse than not enough. And Selector is the best solution in this case.