Accessibility is key when it comes to online content. And now, with the advent of Instagram auto-generated captions, it’s easier than ever to make your content more accessible. By adding automatic captions to your videos and Reels, you can reach a wider audience. Even become an Instagram superstar (who knows?). This comprehensive article will guide you through the process of using Instagram auto-generated captions feature. By the end of this article, you’ll have a better understanding of how to enable and utilize this to your advantage.
What are Instagram Auto-Generated Captions?
Instagram Auto-Generated Captions are textual transcriptions of the speech or audio content in a video or Reel. The captions are displayed on-screen simultaneously with the audio, providing context for viewers.
Thanks to speech recognition technology, Instagram is able to automatically create these captions for you, making it easier to ensure that your content is accessible to everyone.
How to Use Instagram Auto-Generated Captions
Instagram’s auto-generated captions are easy to create and can be done in two ways: from your post or from your settings. The quickest way to create auto-generated captions for your post is by using the Captions sticker.
- Begin by starting to post your Instagram video or Reel like you normally would.
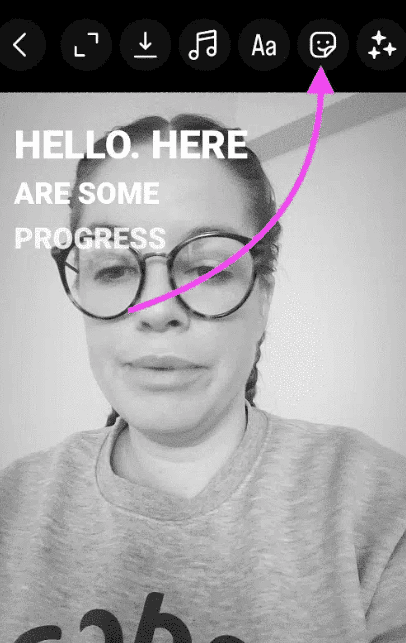
- On the editing screen, tap the Sticker button (the square smiley-face icon at the top right).
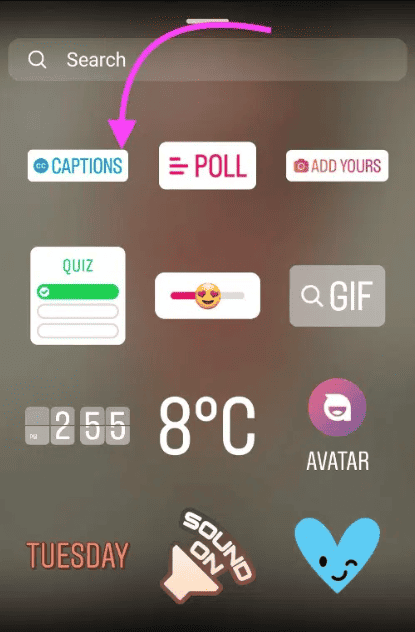
- Find the Captions option, then tap it.
- This sticker will automatically generate captions for you! You should see them scroll across your screen now. At the bottom of your screen, you can choose how your text presents itself.
- Edit any incorrect words by clicking on the caption as it scrolls across the screen. Click on the word you want to change and type it directly onto your screen. Then hit Done in the top right corner.
- Publish like you normally would by hitting Next, then Share.
By using the Captions sticker, your Instagram Auto-Generated Captions will be available to all viewers, even those who do not have captions enabled on their accounts. With this feature, you can be sure that captions will be auto-generated for all of your viewers.
Managing Instagram Auto-Generated Captions for Your Videos Before and After Posting
The good news for those who can’t decide is that you can manage captions for your Instagram videos both before and after posting.
Here’s how to upload your video with captions
- Step 1: Upload your video as you usually would, and before hitting Share, tap Advanced Settings.
- Step 2: Scroll down to Accessibility and toggle the Show Captions option on or off.
- Step 3: Click the back arrow and hit Share to publish your video.
Here’s how to manage captions for a published video
- Step 1: Go to the video you want to edit and tap the three vertical dots at the bottom of the video for more options.
- Step 2: Tap Edit.
- Step 3: Navigate to Advanced settings, scroll down and toggle Show captions to turn them on or off, and hit Share.
How to enable captions for videos you watch
If you want captions on your videos but don’t want to depend on other creators to provide them, you can turn on captions yourself. Here’s how to do it from your settings:
- Tap your profile or profile picture in the bottom right to go to your profile.
- Tap on the hamburger menu in the top right corner, then click Settings.
- Tap on Account, then click Captions.
- Toggle your Caption setting to auto-generate captions on your videos.


