These days, everyone is wanting to make great beats and it makes sense why.
You could be up and running quickly, all you should do is download one of some beat making apps.
Smartphones and iPads are particularly intuitive for beat making, they have that tactile element which particularly lends itself to percussive creation.
However, how to make beats that go viral from the crowd?
Randomly penciling something into a step sequencer is not likely to produce a great outcome.
It takes a little bit of knowledge and lots of practice to make something that is cool and authentic to your taste and aesthetic.
In this post, we will dip into the knowledge side of beat making so you could get set up to efficiently put the time in to get better!
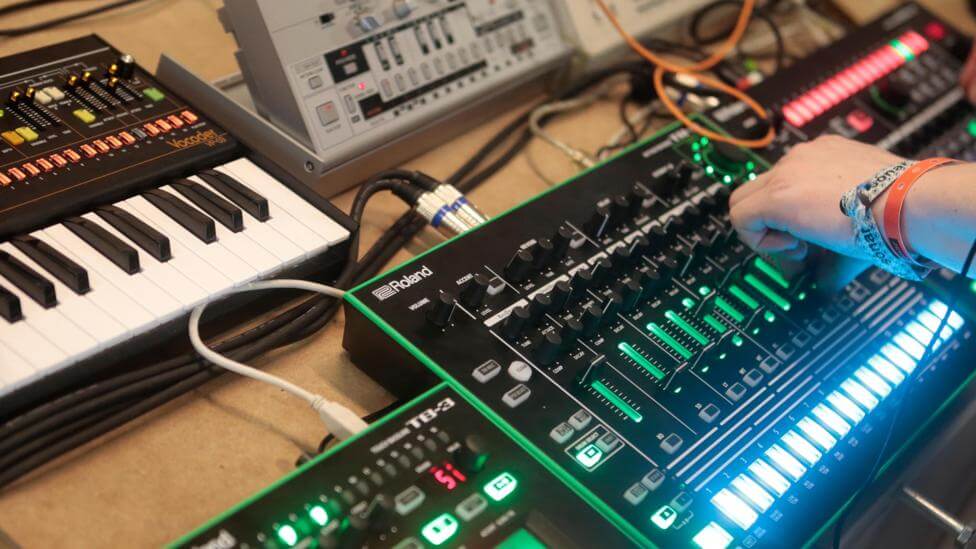
1. Choose a DAW or groove box
If you are learning how to write a song the hardest factor is beginning.
Learning how to make beats is a good way to get your artistic juices flowing. And the extra you do it the higher you get at it.
Step one is to find a platform where you will produce your beat.
Chances are great that you will end up using a DAW or a groove box.
In this guide, I’m using Ableton Live to show you the basics of beat making, however, any DAW could be used similarly to make beats.
2. Find your producer palette
Beat making is just like a painting. Before you even touch the canvas you must think about your colors.
Before opening your DAW, put together a collection of sounds. They will be the building blocks of your beat.
The sounds you select will assist to guide your process from the beginning.
There are lots of approaches to selecting your sounds. For this post, I will be concentrating on two.
- Sample packs
Sample packs are good when you are wondering how to sample without getting sued.
For instance, in the guide, we are utilizing samples from Beached, a sample pack available for download through LANDR Samples. Download it and you could follow along too!
- Virtual instruments
The second strategy is to use the instruments that include your DAW.
For beat making particularly, you will use a drumrack.
Your drumrack consists of all the percussive elements of your beat. You’ll spend time here finding the right snare, claps, high hats, kick, and more.
Virtual instruments include high-quality samples from the best and most iconic music gear. You do not want to save up 4000$ for a Roland TR-909.
You always need to be including in your collection by downloading free VSTs whenever you find them. Who knows if you will need that Frohmage.
3. Open up your DAW
Time to begin building! Fire up your DAW and let’s go.
Wait up, there is something you need to know first! It’ll save you major headaches in the future.
Stay organized with your samples from the get-go.
When you are utilizing sample packs, put them all in the same folder. Name the folder something you will not forget – like ‘SAMPLES [name of your project]’.
When you make your Ableton session, save it immediately. Put your sample folder in the Ableton project folder.
That method you will never run into the ‘oops your DAW cannot find your files’ problem (trust me it’s no fun).
If you determine to move the Ableton project folder all of your samples will be where you want them.
Hot tip: I even have folders for my Ableton projects by month so I keep track of my progression. However, that is optional – only for the organization freaks out there (like me)!

Okay, now let’s roll!
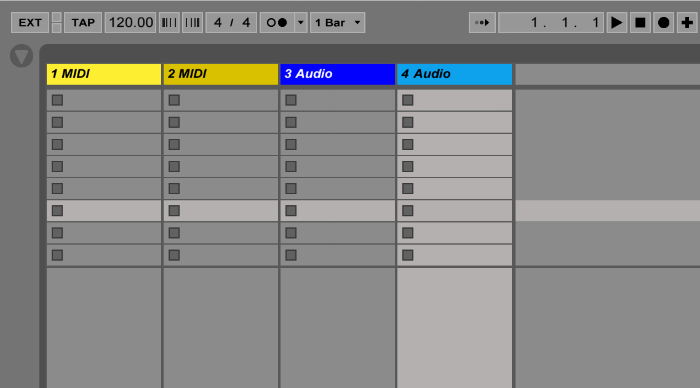
The first thing to know is that there are two types of tracks in your DAW – ‘MIDI’ and ‘Audio’.
When you are utilizing samples drag them into an Audio track. Audio tracks are also for recording vocals or an external instrument.
Use MIDI if you are considering to make great beats utilizing virtual tools or VSTs in your DAW.
4. Begin your Session
Let’s begin to make great beats.
Ableton has two views: Session view and Arrangement view.
Session view is the default if you open a session. The tracks are laid out vertically. Use it to drag in your samples and begin playing with ideas.
Select a drum kit from the sidebar and load it into your drumrack.
I am going with the Kit-909 Classic. Drag it on a MIDI track. Click on the first clip slot of the track. Open up the MIDI Note Editor.
Now let’s write the beat beginning with the Kick Drum. I’m going for four-on-the-floor with an additional hit earlier than the third beat.

Add the Snare Drum. I am putting it on the same beat as the Kick. It may sound weird for now, however, we will tweak the sounds in a moment.
Now add another layer. I selected the Rim sound for some percussive variation.
However, it could be anything you need, like a high-hat, a sample of your studio door locking, or anything else that matches.
Time for some Toms. I dropped one in right after the second Kick.
