Continue with some steps to use Facebook Business Manager…
Step 5: Connect your business partners or advert agency
This may not apply to you when you are just getting began with Fb advertising, however, you could always come back to this step later.
1. From your Facebook Business Manager dashboard, click on the gear icon (Business settings) on the top right.
2. Click on the People and Assets tab.
3. Choose your Fb page or advert account, then click on Partners in the left column.
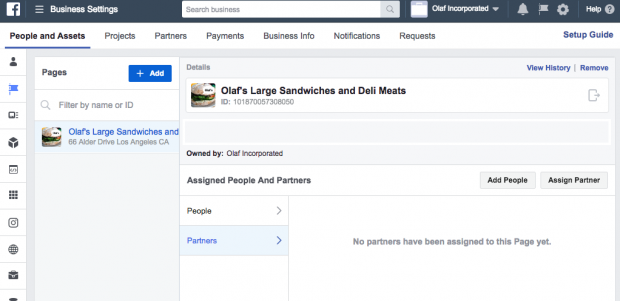
4. Click on Assign Partner.
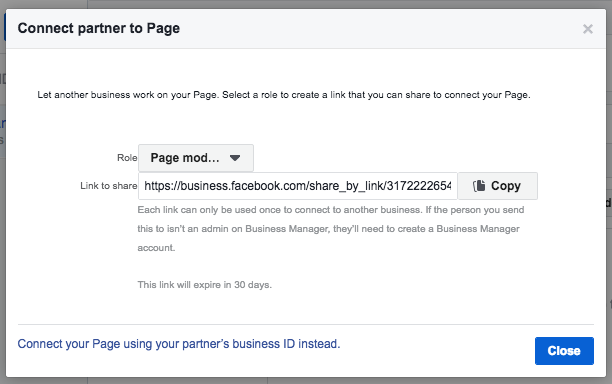
5. Select the role you want to assign to your partner or agency. The roles are the same as described in Step 4 above.
6. Copy and paste the provided link and send it to your partner or agency to invite them to your Facebook Business Manager, then click on Close.
The business you have just added could handle permissions for the individuals on their own teams from their own Facebook Business Manager account. Which means you do not need to worry about assigning and managing permissions for all the individual people who service your account at your agency or partner firm, just the partner company itself.
Step 6: Add your Instagram account
Now that you have got your Fb assets set up, you could connect your Instagram account to Facebook Business Manager as well.
1. From your Facebook Business Manager dashboard, click on the gear icon (Business settings) on the top right.
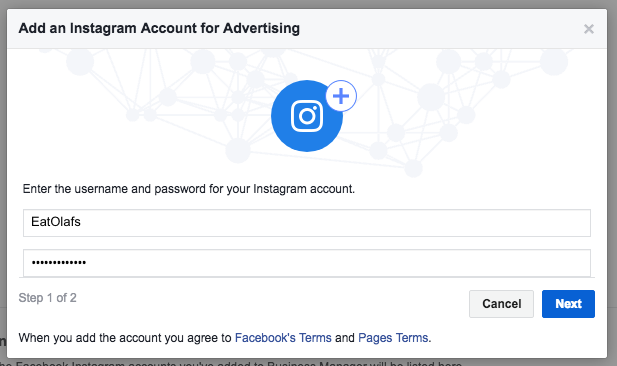
2. Under People and Assets, click on Instagram Accounts, then click on Add. In the pop-up box, enter your Instagram login information and click on Next.
3. When you have more than one advert account, select which ones to link to your Instagram account, then click on Next.
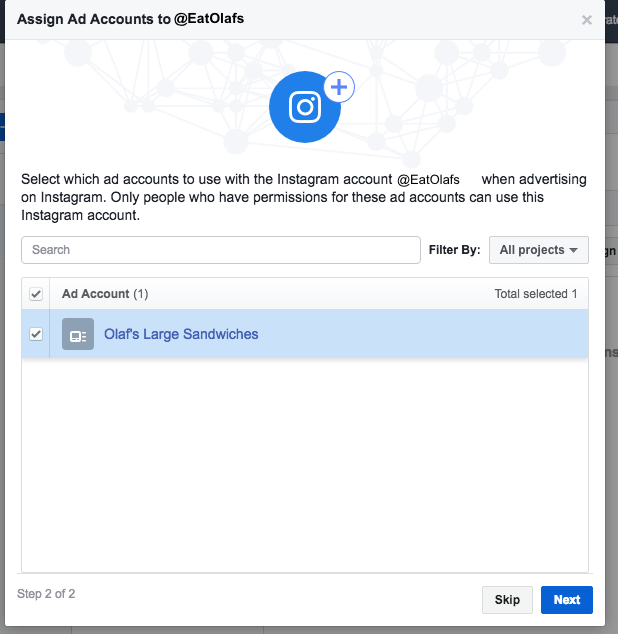
You will get a pop-up confirming that your Instagram account has been added successfully. Click on Done and you are all set.
The Facebook Business Manager dashboard
Now that you have your Facebook Business Manager up and running, it’s your central dashboard for all marketing and advertising activities within Fb. That is where you will go to update your page, view page, and advert insights, begin new advert campaigns, and so on.
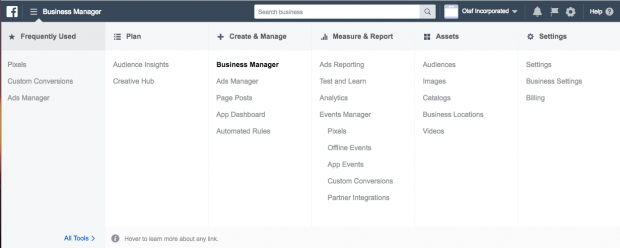
To get a look at all the features you could access via Facebook Business Manager, just click on the Business Manager link at the top left of your dashboard. You’ll see everything broken down into 5 categories: Plan, Create & Manage, Measure & Report, Assets, and Settings.
We have just walked you through assets and settings. However, before you dive into that fun Create & Manage section by creating your first advert, there is one more step to make sure you could make the most out of the platform: Setting up Facebook Pixels.
Step 7: Set up Facebook Pixels
What’s a Facebook Pixel? Put simply, it is a small bit of code that Fb generates for you. When you place this code on your site, it uses cookies to give you access to info that will permit you to track conversions, optimize Fb adverts, build targeted audiences for your adverts, and remarket to leads.
We recommend setting up your Facebook pixel right away, even when you aren’t ready to begin your first advert campaign yet, because the information it provides now will be valuable when you’re ready to begin advertising.
Our complete guide to utilizing Facebook pixels is a superb resource that walks you through everything you should know about making the best use of the information a Fb pixel could provide. For now, let’s get your pixel set up from within Facebook Business Manager.
1. From your Enterprise Manager dashboard, click on the gear icon (Business settings).
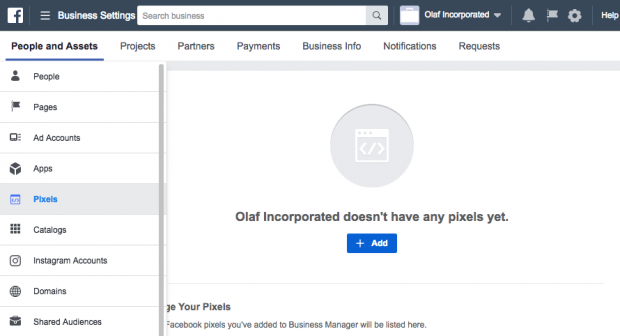
2. From the People and Assets tab, select Pixels from the left-hand menu, then click on Add.
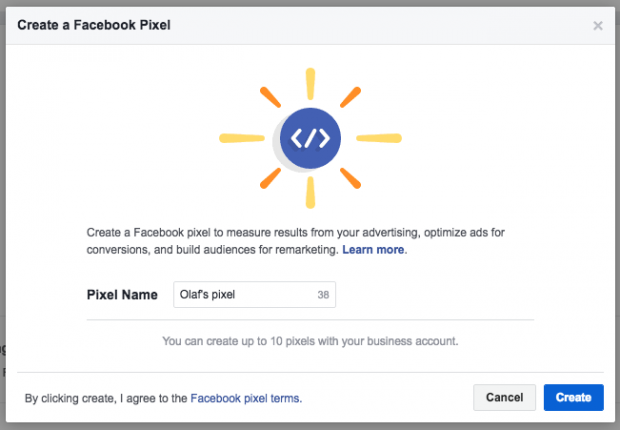
3. Enter a name (up to 50 characters) for your pixel, then click on Create. When you click on Create, you’re agreeing to the pixel terms and conditions, so you need to read these before you go any further.
4. Wait for the pixel to be created, then click on Set up the Pixel Now.
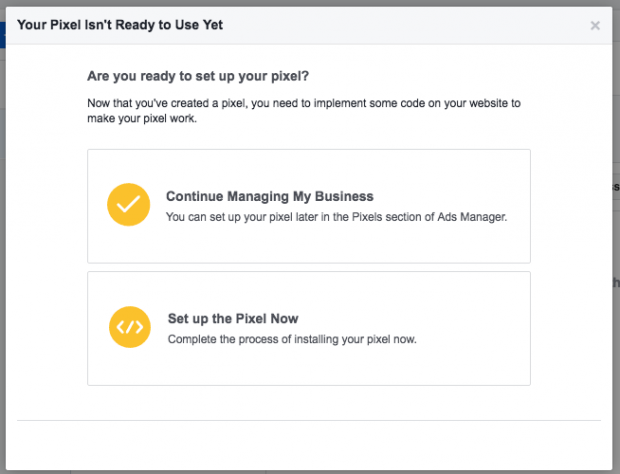
Remember that you could create up to 10 pixels with your Business Manager.
How to create your first campaign in Facebook Business Manager
Now that your pixels are in place, it’s time to launch your first Fb advert.
Step 8: Place your first advert
We have got a full guide that explains all the strategy and specific details you need to know to create compelling and effective Facebook ads. So here, we will just walk you through the steps you should take to get an advert up and running in Business Manager.
1. From your Business Manager dashboard, click on Business Manager on the top left.
2. Under the Create & Manage tab, click on Ads Manager, then click on the green Create button.
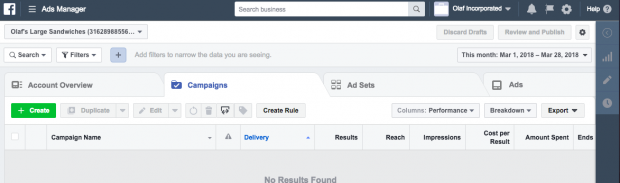
3. From the pop-up box, click on Choose Guided Creation.
4. Select your campaign goal, target your viewers to set your budget and schedule, and select your particular advert types following our step-by-step instructions.
And that’s it! With the small amount of effort invested today, you have obtained everything centralized in one spot, and you are ready to use Facebook Business Manager to make the most of your Fb adverts and marketing efforts.