How To Make Your Own Instagram AR Filters

How to make your own Instagram AR Filters

Are you eager to add some flair to your Instagram stories? Creating your own AR Filters can make your posts stand out in a crowd. In this guide, we’ll walk you through the steps to design and share your own custom filters. From simple effects to interactive animations, get ready to unleash your creativity and leave your followers amazed.

Let’s dive in and discover how to make your Instagram feed truly unforgettable!

What is an Instagram AR Filter?

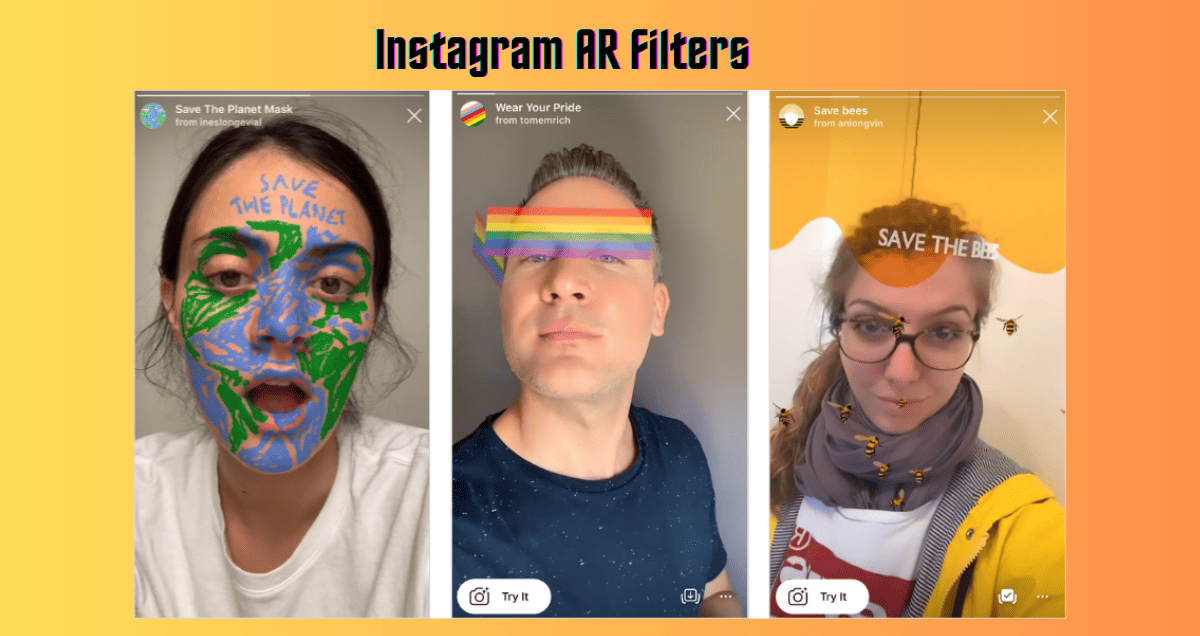
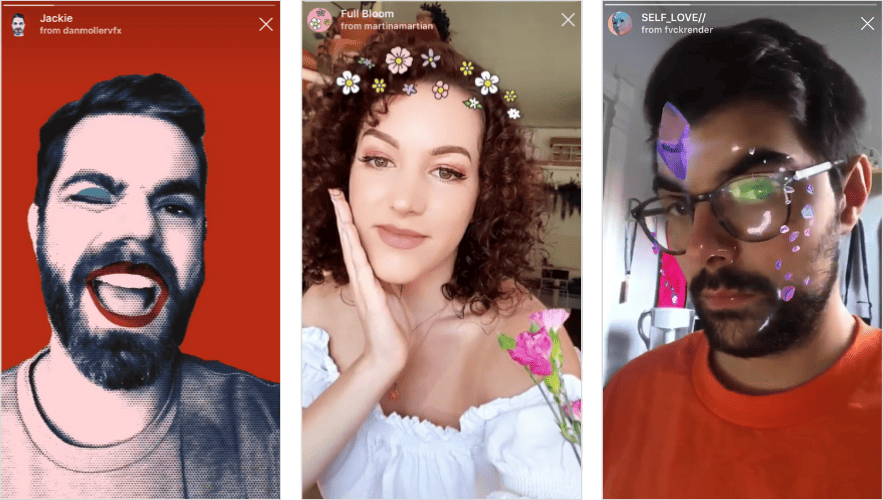
AR filters are cool effects made by computers that can be put on top of real pictures. These filters use your camera to add things like images in front or behind what you’re taking a picture of. If you’ve used Instagram, you might have seen these filters, like the one that makes you look like Will Smith from The Fresh Prince of Bel-Air.

What is an Instagram AR Filter

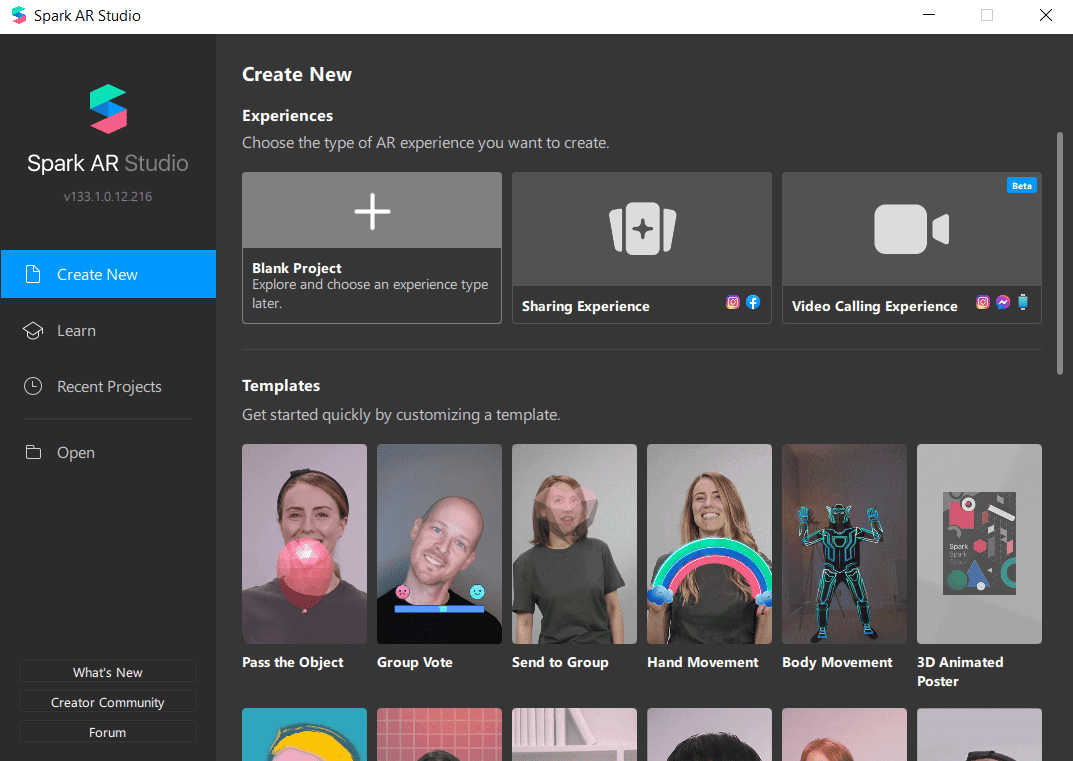
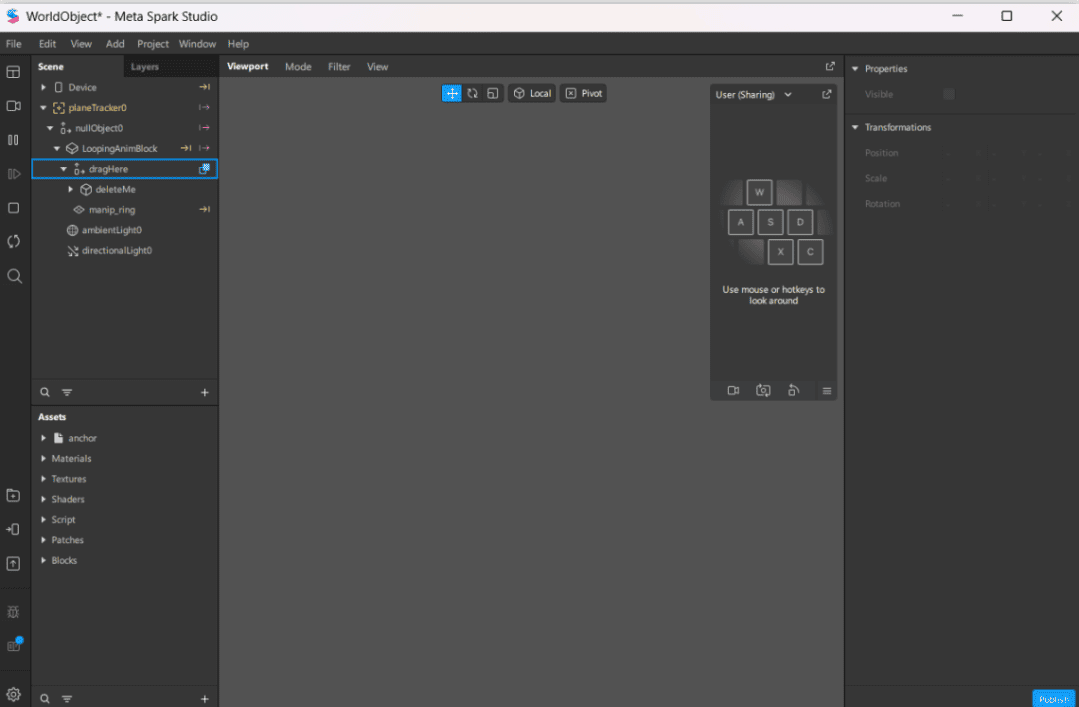
When Instagram first got these filters in 2017, people couldn’t make their own. But now, with Facebook’s new app called Meta Spark Player, anyone can create their own filters for Facebook and Instagram. This app is available for both Android phones on Google’s Play Store and iPhones on Apple’s App Store. It lets you see how your filters will look on a phone, doing fun things like putting a hat on your head in a selfie or adding graffiti in the background.

What is in Meta Spark Studio?

Meta Spark Studio lets you change pictures and videos for Facebook and Instagram. Even though it sounds hard to make your own AR filters, this tool makes it easy. It has lots of cool stuff you can do.

What is in Meta Spark Studio?

Let’s see what it offers:

1. Flexible AR platform that grows with you

Start making fun, immersive things without needing to know how to code, using ready-made designs and easy editors. Or, if you want to do more, use Meta Spark’s tools with JavaScript to create even cooler effects and take your ideas further.

2. Strong features that pull you in

You can choose to create with easy visual steps or use coding for more control. Meta Spark Studio makes it simple to build fun AR experiences that can follow objects, understand depth, hide things behind others, and even add sound and touch effects, plus lots more.

3. Share and check how it’s doing

Use Meta Spark Hub to manage and see how well your AR creations are doing on all of Meta’s apps and gadgets. You can easily share links to your AR experiences, put them out there when they’re just right, and get them to millions of people everywhere.

How to Create Your Own Instagram AR Filter

Step 1: Get Meta Spark Studio

Meta Spark Studio is a computer program you download. It’s not too big, just 464 MB, but it’s really powerful and gets easier to use the more you use it. Right now, it’s only for Mac and Windows, but if you’re a Linux user, you might be able to use it with Wine, a tool that helps you run Windows programs on Linux. We haven’t tried it with Meta Spark Studio, but it might work.

Step 2: Learn How to Use It

After you install it, try out some tutorials to learn how it works. Meta Spark Studio has a tour that’s five minutes long and shows you most of what you need to know.

If you want to learn more, check out the learning center. There are tutorials there to help you. The Getting Started part has basics to help you learn about features and how to use Meta Spark Studio.

You can also find tutorials on making your effects, trying them out, and using different features and tools.

Step 3: Put in Your Thing

Now, choose what kind of AR filter you want to make. For our example, let’s say we’re making a world object. This lets us put a 3D thing in a real place.

To start, pick the project you want. Then, you’ll see a canvas, which is like a place to work, with a spot for your thing already there.

Note: If you’re using Meta Spark Studio for the first time, you’ll have to say yes to their rules before you can start working.

The canvas might look tricky, but you can always check out the tutorials if you need help. When you’re on the canvas, you’ll need to add your thing. You can bring one in from somewhere else or use the stuff Meta Spark Studio has. We’re going to use the AR Library to bring something in. To do this, click on “File” at the top left of the screen, then pick “Import from AR Library.”

A different screen will pop up with many choices. Choose “3D Objects” from the menu on the left side.

After you pick your object, press the “Import Free” button. Since Facebook uses stuff from Sketchfab, you’ll need to make an account there or log in with your Facebook, Google, or Twitter account.

Adding Sound

While you’re in the AR Library, you can also put sound in your filters by bringing in clips from the library.

Step 4: Make It More Fun

Now that your object is on the screen, let’s make it cooler with effects. These effects decide how your object moves and looks when you play with it.

For example, if we’re using a picture of the moon, we can make it look like it’s moving. To do this, we’ll take our moon from the list of things we can use and put it in the scene below where it says “drag here.”

Now that our object is ready, we can start to make it look different. Here are some ways we can do that:

  • Make the light shine from different directions to make our 3D thing look more real.
  • Choose whether our object shows up on the front camera, back camera, or both.
  • Change how our object moves.
  • Add more stuff, like different movements, textures, and materials, to make it even cooler.

Step 5: Test Your New Effe

To see how your new AR filter looks, you can try it on Instagram or Facebook first. This lets you see how it works on each one.

Step 6: Share Your Filter

When you want to share your AR filter, click the “upload” button at the bottom left of the app. Facebook will check it before others can use it. This might take a few days. Make sure your filter follows Spark AR’s rules. To learn more about making filters that always get approved, read the guide on submitting effects for review.

Wrapping Up

Using Instagram AR Filters is a cool way for brands to make fun stuff and stay in people’s minds. Since your filters work on Facebook and Instagram, you can reach lots of people who like to make their posts and stories special, which means more people will know about your brand.

Share this post