Clipping audio is a common problem in music production that may damage a good mix, especially when it comes to mastering.
Clipping, on the other hand, isn’t always a bad thing. With saturation plugins, you can even introduce it into your mix on purpose!
What is exactly clipping? How can you prevent it when you really need to? Is it possible to resurrect a signal that has been clipped? These are some of the most frequently asked questions by new and intermediate producers.
Today, I’ll cover all you need to know about clipping in this essay.
Let’s get this party started!
What is clipping audio?
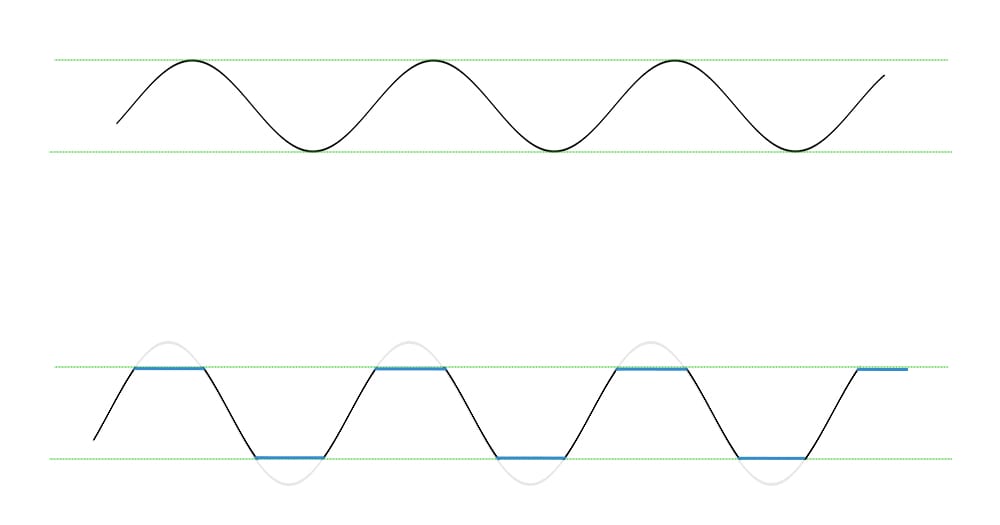
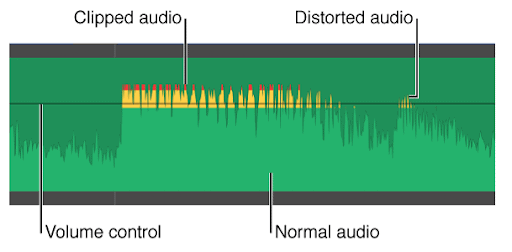
Clipping is a detrimental modification to an audio signal that occurs when the volume is too high for the system via which it is being sent.
This might imply recording your audio interface’s levels too high or pushing your DAW’s master fader into the red.
The tops of the waveform begin to be cut off at the limit when the signal level exceeds the system’s maximum level.
Clipping causes harsh, unpleasant distortion in a digital system like a DAW, which you want to avoid.
Clipping is a detrimental modification to an audio signal that occurs when the volume is too high for the system via which it is being sent.
Producers, on the other hand, frequently employ a gentler version of clipping known as saturation as a mixing technique. If you want to learn more about how this form of clipping may benefit your mix, we’ve put together a comprehensive guide to assist you.
However, the awful clipping that results from improper gain staging is nearly always a bad thing.
How to fix clipping audio
Unfortunately, clipping is one of the few really damaging processes in digital audio.
That implies there’s no way to go back to the original signal once it’s happened.
There is fairly complex software available that can reconstruct clipped waveforms. The de-clipped material, on the other hand, is always only an educated guess at what used to be there.
The greatest approach to avoid audio clipping is to avoid it in the first place. In the following part, I’ll go through this in further detail.
The greatest approach to avoid audio clipping is to avoid it in the first place.
Even if you try your hardest to avoid clipping, you may have to work with clipped audio on occasion.
If you use content that was recorded live or captured using a piece of portable recording equipment such as a field recorder, this might happen.
You could even be tempted to use a terrific take you accidentally captured that went over the time limit.
How to avoid clipping
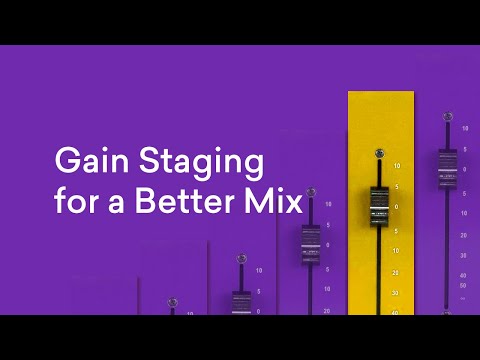
The easiest method to avoid clipping is to ensure that your signal levels have much room before the limit as you operate.
Gain staging is a technique for maintaining sufficient headroom throughout your operation.
These terminologies have their own meanings, so refer back to our in-depth guide for a complete explanation.
But, at its most basic level, all you need to do is understand your audio meters and keep track of them as you go.
Here’s a quick reminder on how to read meters to determine signal strength.
If you already know how they function, you may apply a rule of thumb: aim for your signals’ peaks to be about -9 dBFS and their bodies to be around -18 dBFS.
After you’ve collected all of your audio in your DAW, the most crucial location to avoid clipping is during export.
Keep that in mind as you record with your interface, apply plugins, and mix tracks in your DAW. If you do it right you won’t have to trim your faders drastically at the end of your mix to export a file that doesn’t clip.
While we’re on the subject, the most critical area to avoid clipping is on export after you’ve captured all of your audio in your DAW.
The reason for this is due to the way your DAW’s mixer handles the arithmetic involved in combining your signals.
Even if you didn’t hear clipping in the project, clipping might appear once the file exits your DAW.
Dealing with the likelihood of clipping should be at the top of your pre-mastering to-do list.
Clipping may be addressed by adjusting the master fader, lowering down individual track faders, or using plugins to solve gain problems as you prepare your audio for mastering.
If you stick to the -9 dBFS/-18 dBFS rule, you’ll have plenty of headroom leftover for mastering.
Turn it down right
Once you understand why clipping is a problem, it’s a simple problem to solve.
But it doesn’t rule out the possibility of it wreaking havoc on your mix. A distorted, clipped mix is a recipe for lousy mastering sound.
Fortunately, the information in this article will ensure that you never make that mistake again.
Return to your DAW and continue to create now that you’ve mastered the fundamentals.