
Synth pads are the washy ambient textures that help construct the atmosphere of a music track.
You might not clearly hear them in a dense mix, but pads often provide the sonic backdrop that glues a song together.
Creating great synth pads isn’t simple in case you’ve never tried them before. With so many parameters to keep track of, many synth plugins make it difficult to program the best sound.
Even so, beginners can begin with ambient synth textures with some key techniques.
In this article, we will explain the way to create enormous atmospheric synth pads in just 5 simple steps.
Let’s get started.
1. Build a rich waveform to start with
In subtractive synthesis, you start with a wave that’s rich in harmonics and narrow it down with filters and envelopes.

That’s why it’s essential to choose the best type of waveform you use in your patch.
In case you start with a rich waveform like a square or sawtooth wave you’ll have plenty of harmonics to experiment with as you build your sound.

As you build your patch you may use the low-pass filter to smooth out the higher frequencies for a warmer sound.
Most synths have a number of oscillators you may blend. That means you get to experiment with mixing completely different waveforms and octave positions for an even more complicated starting point.
Attempt to strike a balance between richness, movement, and harmonics with your basic waveform.
2. Adjust the envelope to make the overall shape of the music sound
The amplitude envelope is the place you make the essential qualities that turn an ordinary synth tone into a pad sound.
In such the most subtractive synths the amplifier section is linked by default to an envelope generator that you adjust using ADSR controls.
ADSR stands for Attack, Decay, Sustain, and Release. In case you need a refresher on how these work, head over to an in-depth guide from LANDR to brush up.
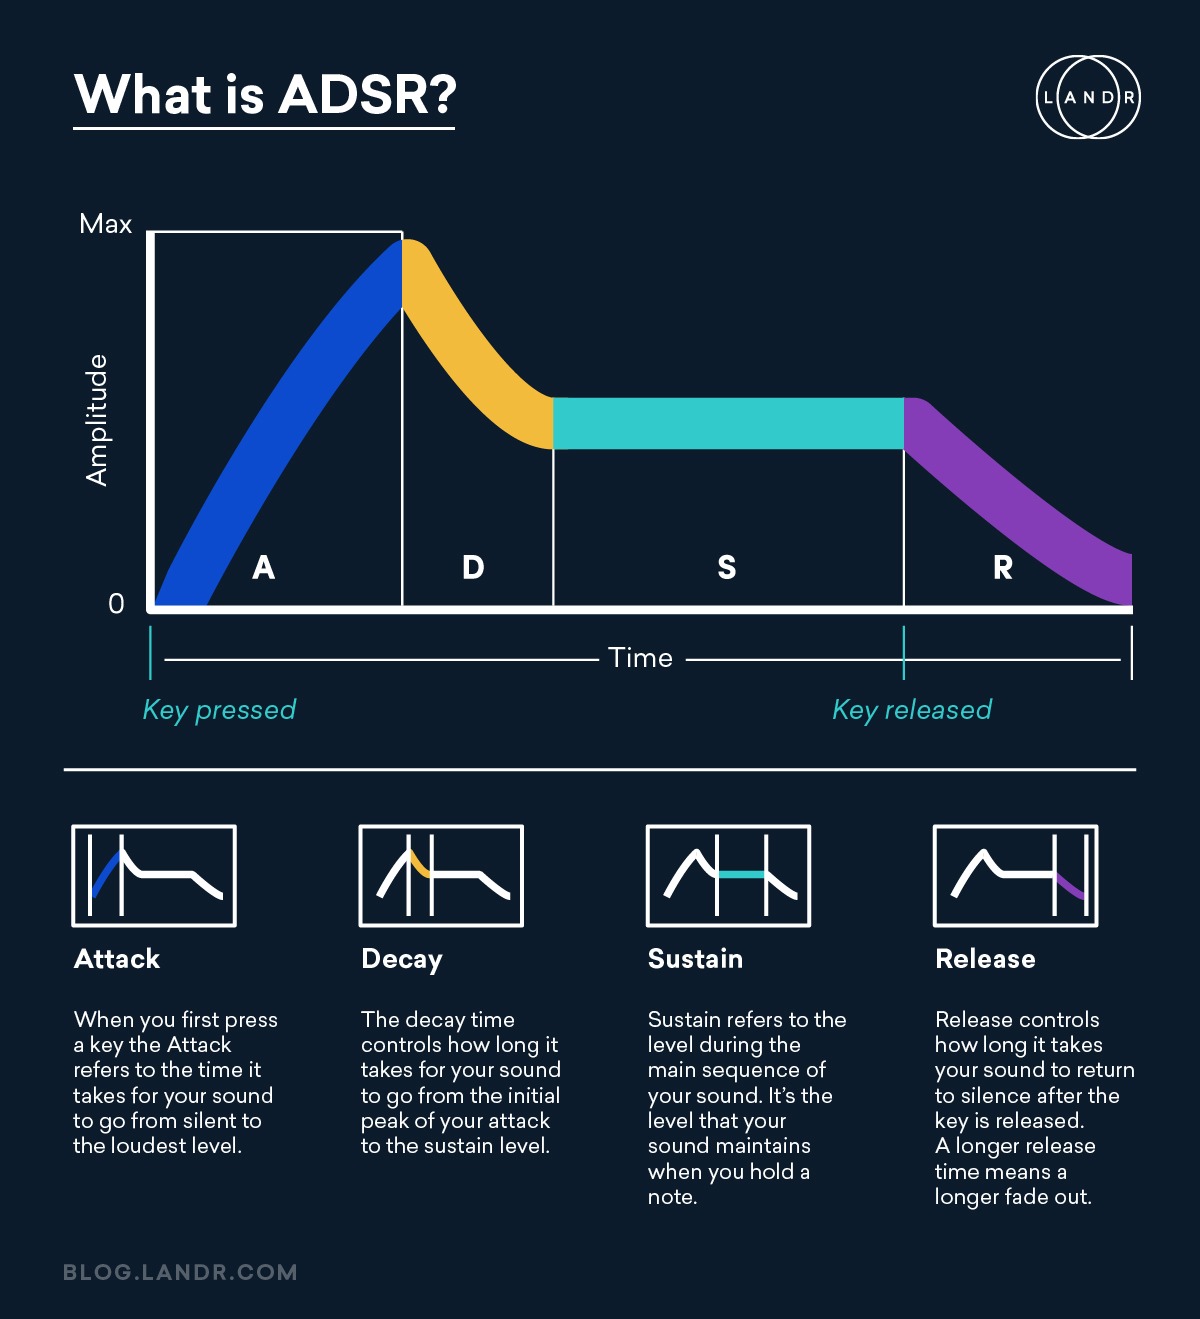
Pad sounds make use of specific ADSR settings that give them their atmospheric quality.
The first is a long attack time that rises slowly so that the sound gradually fades in. The second is a long release time so that sound slowly decays once you release the keys.
In a polyphonic synth that means that every chord fades into the next as you play, creating an evolving ambiance that sits properly in the background.
These two ADSR settings are the basis of a great pad tone, but the actual values are up to you.
Attempt to set your attack and release so that they rise and fall in time with the music.
The decay time and sustain level also contribute to a great pad, so don’t forget to dial those in a well.
With the best envelope shape, you’re well on your way to designing the perfect pad.

3. Use your low pass filter to sculpt the frequencies
Even with a nice gradual envelope, a rich waveform can sound a bit harsh with the filter wide open.
The subsequent step to create your pad sound is to use your synth’s low pass filter to shape the frequency balance.
The low pass filter’s cutoff frequency gives a decision on how much high end your pad will contain. Bring it down to create a warmer sound.
The resonance control allows you to add emphasis right around the cutoff frequency. At high resonance settings, frequencies in this area will be boosted, creating an extra peak.
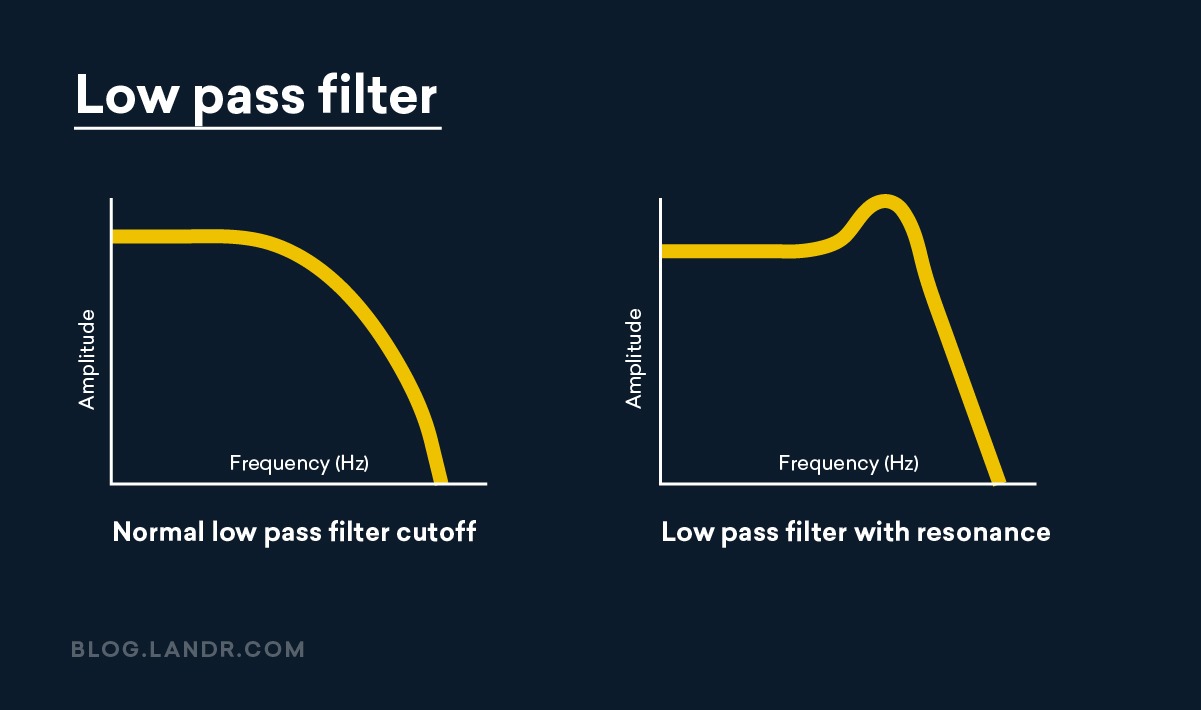
Use your synth’s filters to sculpt the frequencies so that the pad sits comfortably in the background of your song.
4. Use LFOs to create modulation
In case you’ve been following along so far you’ve made a nice warm synth pad with a satisfying envelope.
However, without modulation, it’s probably a bit boring. Modulation is the way you create movement and interest in a synth patch.
Imagine you had a third hand that might turn the knobs back and forth at a regular rate—that’s the way LFOs work!
They’re a separate waveform that oscillates at a much lower frequency than the audio oscillators that create the synth’s basic waves.
You may assign the LFO to any parameter you’d like to animate in your synth patch.
There’s a lot of creative potential with modulation, but here are a couple of LFO destinations that create well-known synth effects:
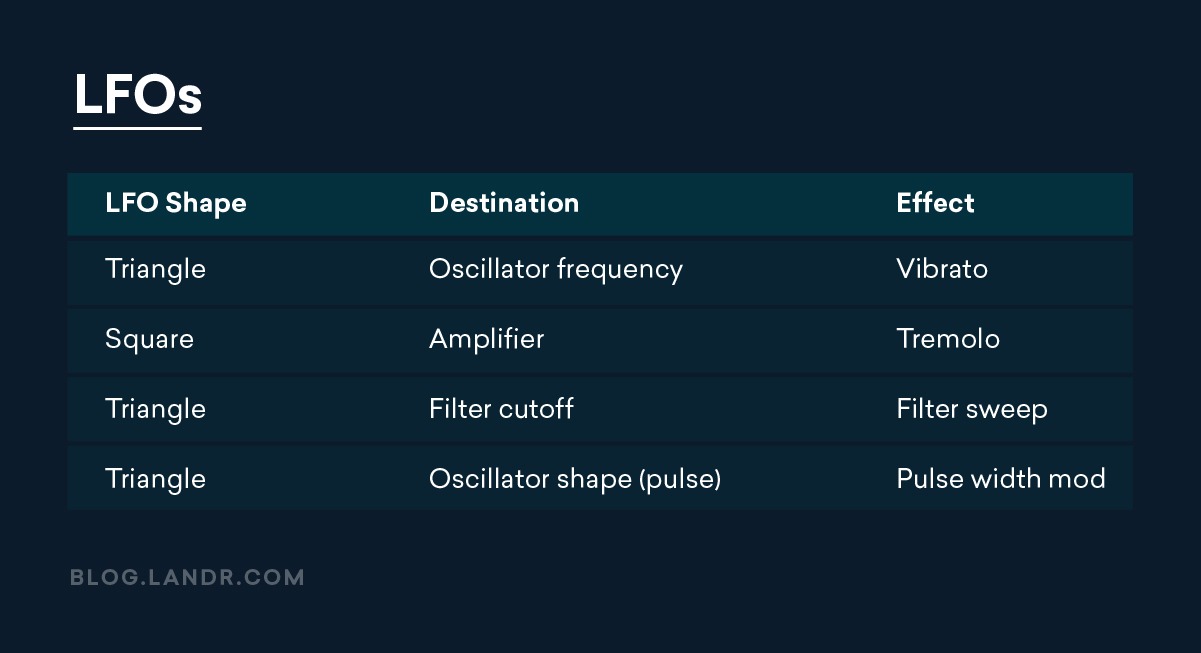
Use your LFOs and modulation matrix to add intrigue, action, and development to your synth pads.
5. Add effects for extra ambiance
Pads and audio effects like delay and reverb are made for each other.
Even in case you’ve built an excellent atmospheric sound using just your synthesizer’s built-in functions, delay and reverb can give your synth pad an even deeper and more satisfying texture.
The delay repeats and reverb tails will extend the duration of each chord and smear it lightly into the next chord, creating a swirling effect.
Out of that, time-based effects often feature LFO modulation of their own. It will create light pitch modulation in the reverb tails or delay repeats that adds dimension to the sound.
Atmospheric synth sounds
Pads are one of the most essential kinds of synth patches. All the producers should at least know the basics of how to create them.
In case you’ve made it through this tutorial, you’ll have an excellent start on the way to create pad sounds from scratch on your synths or plugins.