What if you wish to maintain the privacy of your Facebook profile and gain better control over what non-friends can view on your profile? Can you adjust your account’s default settings to achieve this? Regrettably, there isn’t a simple switch to instantly set your profile to maximum privacy by default. Nevertheless, with the right adjustments to your settings, you can ensure your profile remains entirely confidential. This article will guide you through the process of making your Facebook profile private.
Let’s begin!
How to Make Your Facebook Profile Private?
On a PC
If you’d like to set your Facebook profile to private using a web browser, follow these steps:
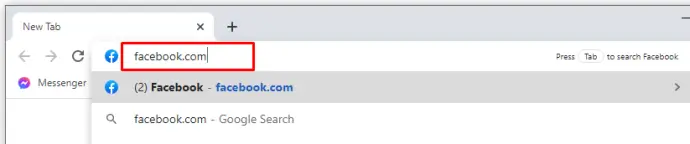
1. Open any web browser on your computer and navigate to the Facebook website.
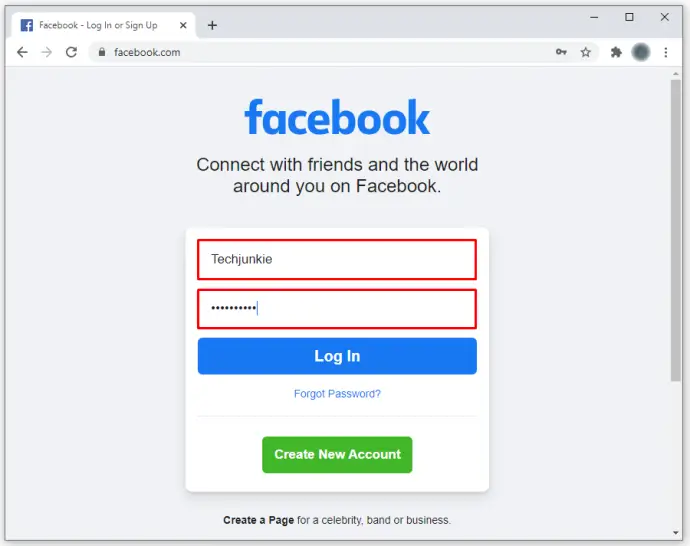
2. Log in to your Facebook account.
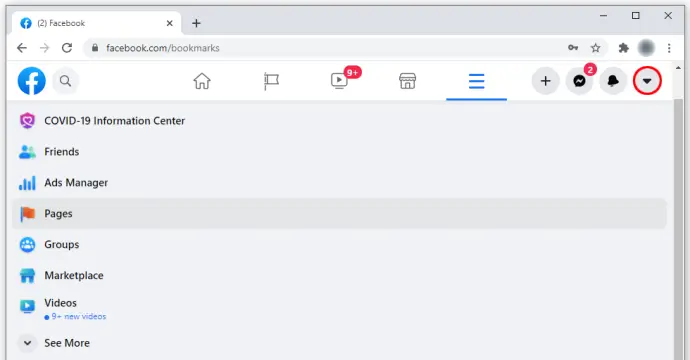
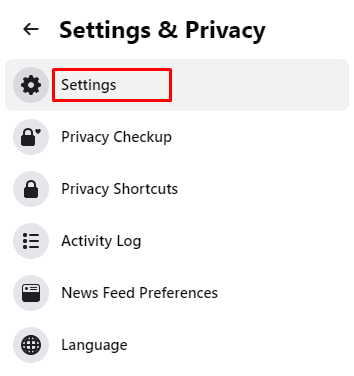
3. Click on the downward triangle (Account Settings) located in the top-right corner.
4. Choose Settings.
5. In the Settings menu on the left, click on Privacy. This action will open the Privacy Settings and Tools panel on the right.
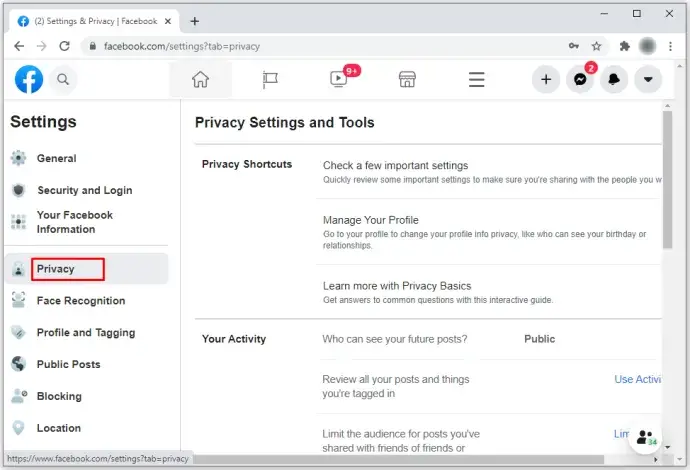
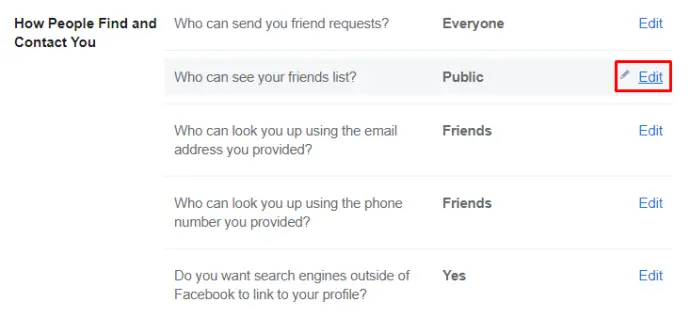
6. You can now customize your privacy settings for various features. Modify the settings according to your privacy preferences by clicking the blue Edit button for each privacy option you wish to change.
On Mobile
In today’s world, the majority of individuals predominantly access Facebook through their mobile phones. The good news is that the process of making your profile private via mobile is relatively simple. It’s essentially the same for both iPhone and Android devices, and there are two methods for adjusting your privacy settings within the Facebook mobile app.
Using Privacy Checkup Settings
For a quick privacy checkup on your mobile device, follow these steps:
1. Open the Facebook app and access Settings
2. Tap on Privacy Checkup
3. On the Who can see what you share screen, tap Continue
4. On the Profile Information screen, select the appropriate privacy setting for each profile detail by tapping the dropdown box next to it. Then, tap Next to proceed.
5. On the Post and Stories screen, use the dropdown boxes for each Posts and Stories option to determine who can view your posts. To adjust privacy settings for previous posts, select Limit at the bottom.
6. On the Blocking screen, you can either Add to blocked list to restrict someone or choose See Your Blocked List to view those already blocked.
Going through the Privacy Checkup settings helps you control what others can see. If you require more options, follow the steps below to further enhance your privacy settings.
Using the Settings and Privacy Menu
To get started, open the Facebook app on your phone, and then:
1. For Android users, tap the Hamburger icon at the top right; for iPhone/iPad users, it’s at the bottom right.
2. Scroll down and select Settings and Privacy
3. Choose Settings
4. Scroll further down the page to find sections like Profile details, How people find…, Posts, and more within the Audience and visibility category. Tap on these options to update your privacy preferences.
By following these steps, you can ensure that more than just your posts and contact information remain private. For instance, the Followers and public content option allows you to restrict who can comment on your public posts.
Final thoughts
In conclusion, achieving complete anonymity on Facebook isn’t a one-click process, but ensuring your profile remains private is a straightforward task. All the necessary options can be found in the Security and Privacy section within the Settings. Just follow the steps outlined in this article, and you’ll encounter no difficulties.