
Discover the secrets of how to create Instagram Reels in less time! Learn when to leverage Instagram’s reels editor and when third-party apps are worth the extra steps in this article. Say goodbye to the hassle and hello to efficiency!
The Significance of Instagram’s Upgraded Reels Editor for Marketers
Since its launch in 2020, Instagram Reels has provided basic editing tools for short-form videos, including text overlays, stickers, audio, and filters. However, the absence of a fully-featured timeline editor has made it challenging for users to perfect timing and placement for each element.
As a result, many marketers turned to third-party editing apps that offer more advanced features. While these external tools are helpful, they add an extra step to the already time-consuming short-form workflow. For those seeking a streamlined process, Instagram’s latest tools, now available on iOS and Android, can be beneficial.
In April 2023, Meta introduced several new features for Instagram Reels, such as advanced editing tools and improved watch time insights. Additionally, the platform launched a new portal to discover trending Reels content, including popular audio, hashtags, and topics. This portal can be a time-saver for marketers who heavily rely on trending content for their short-form video strategy. When they find a suitable trend for their brand, they can promptly start creating content.
However, those who typically use third-party video editing apps may face challenges in capitalizing on these Reels trends quickly. On the other hand, mastering Instagram’s in-app tools and direct editing enables marketers to jump on quality Reels trends faster and utilize the platform’s in-app templates more efficiently.
In summary, being aware of Instagram’s enhanced Reels editor to create them in less time and leveraging its in-app features can lead to a smoother and more efficient experience for marketers, making it easier to create captivating short-form videos and stay on top of trending content.
Ways to Create Reels in less time
With the introduction of in-app creative and scheduling tools on Instagram, the mobile app is now becoming a comprehensive platform for producing short-form videos. Let’s explore the new Reels editing tools and learn how to create and schedule a reel in very less time.
#1: Choose Your Starting Point
When creating reels within Instagram, you have several starting point options. If you already have the video footage you want to use, you can easily add multiple clips totaling up to 90 seconds.
For those who prefer to create new content on the spot, simply tap to start filming one or more clips. The advantage of filming directly in the Instagram app is the access to a wide range of video creation tools, including filters, effects, layouts, timers, green screens, and dual camera mode. Many of these features are not available for premade clips.
Another option is to begin with a template, which can simplify the process of editing clips together. To use this method, open any reel and tap the three-dot menu. Select “Use as Template” to start working with it. However, please note that this option is only available for reels edited within Instagram with the Templates feature enabled.
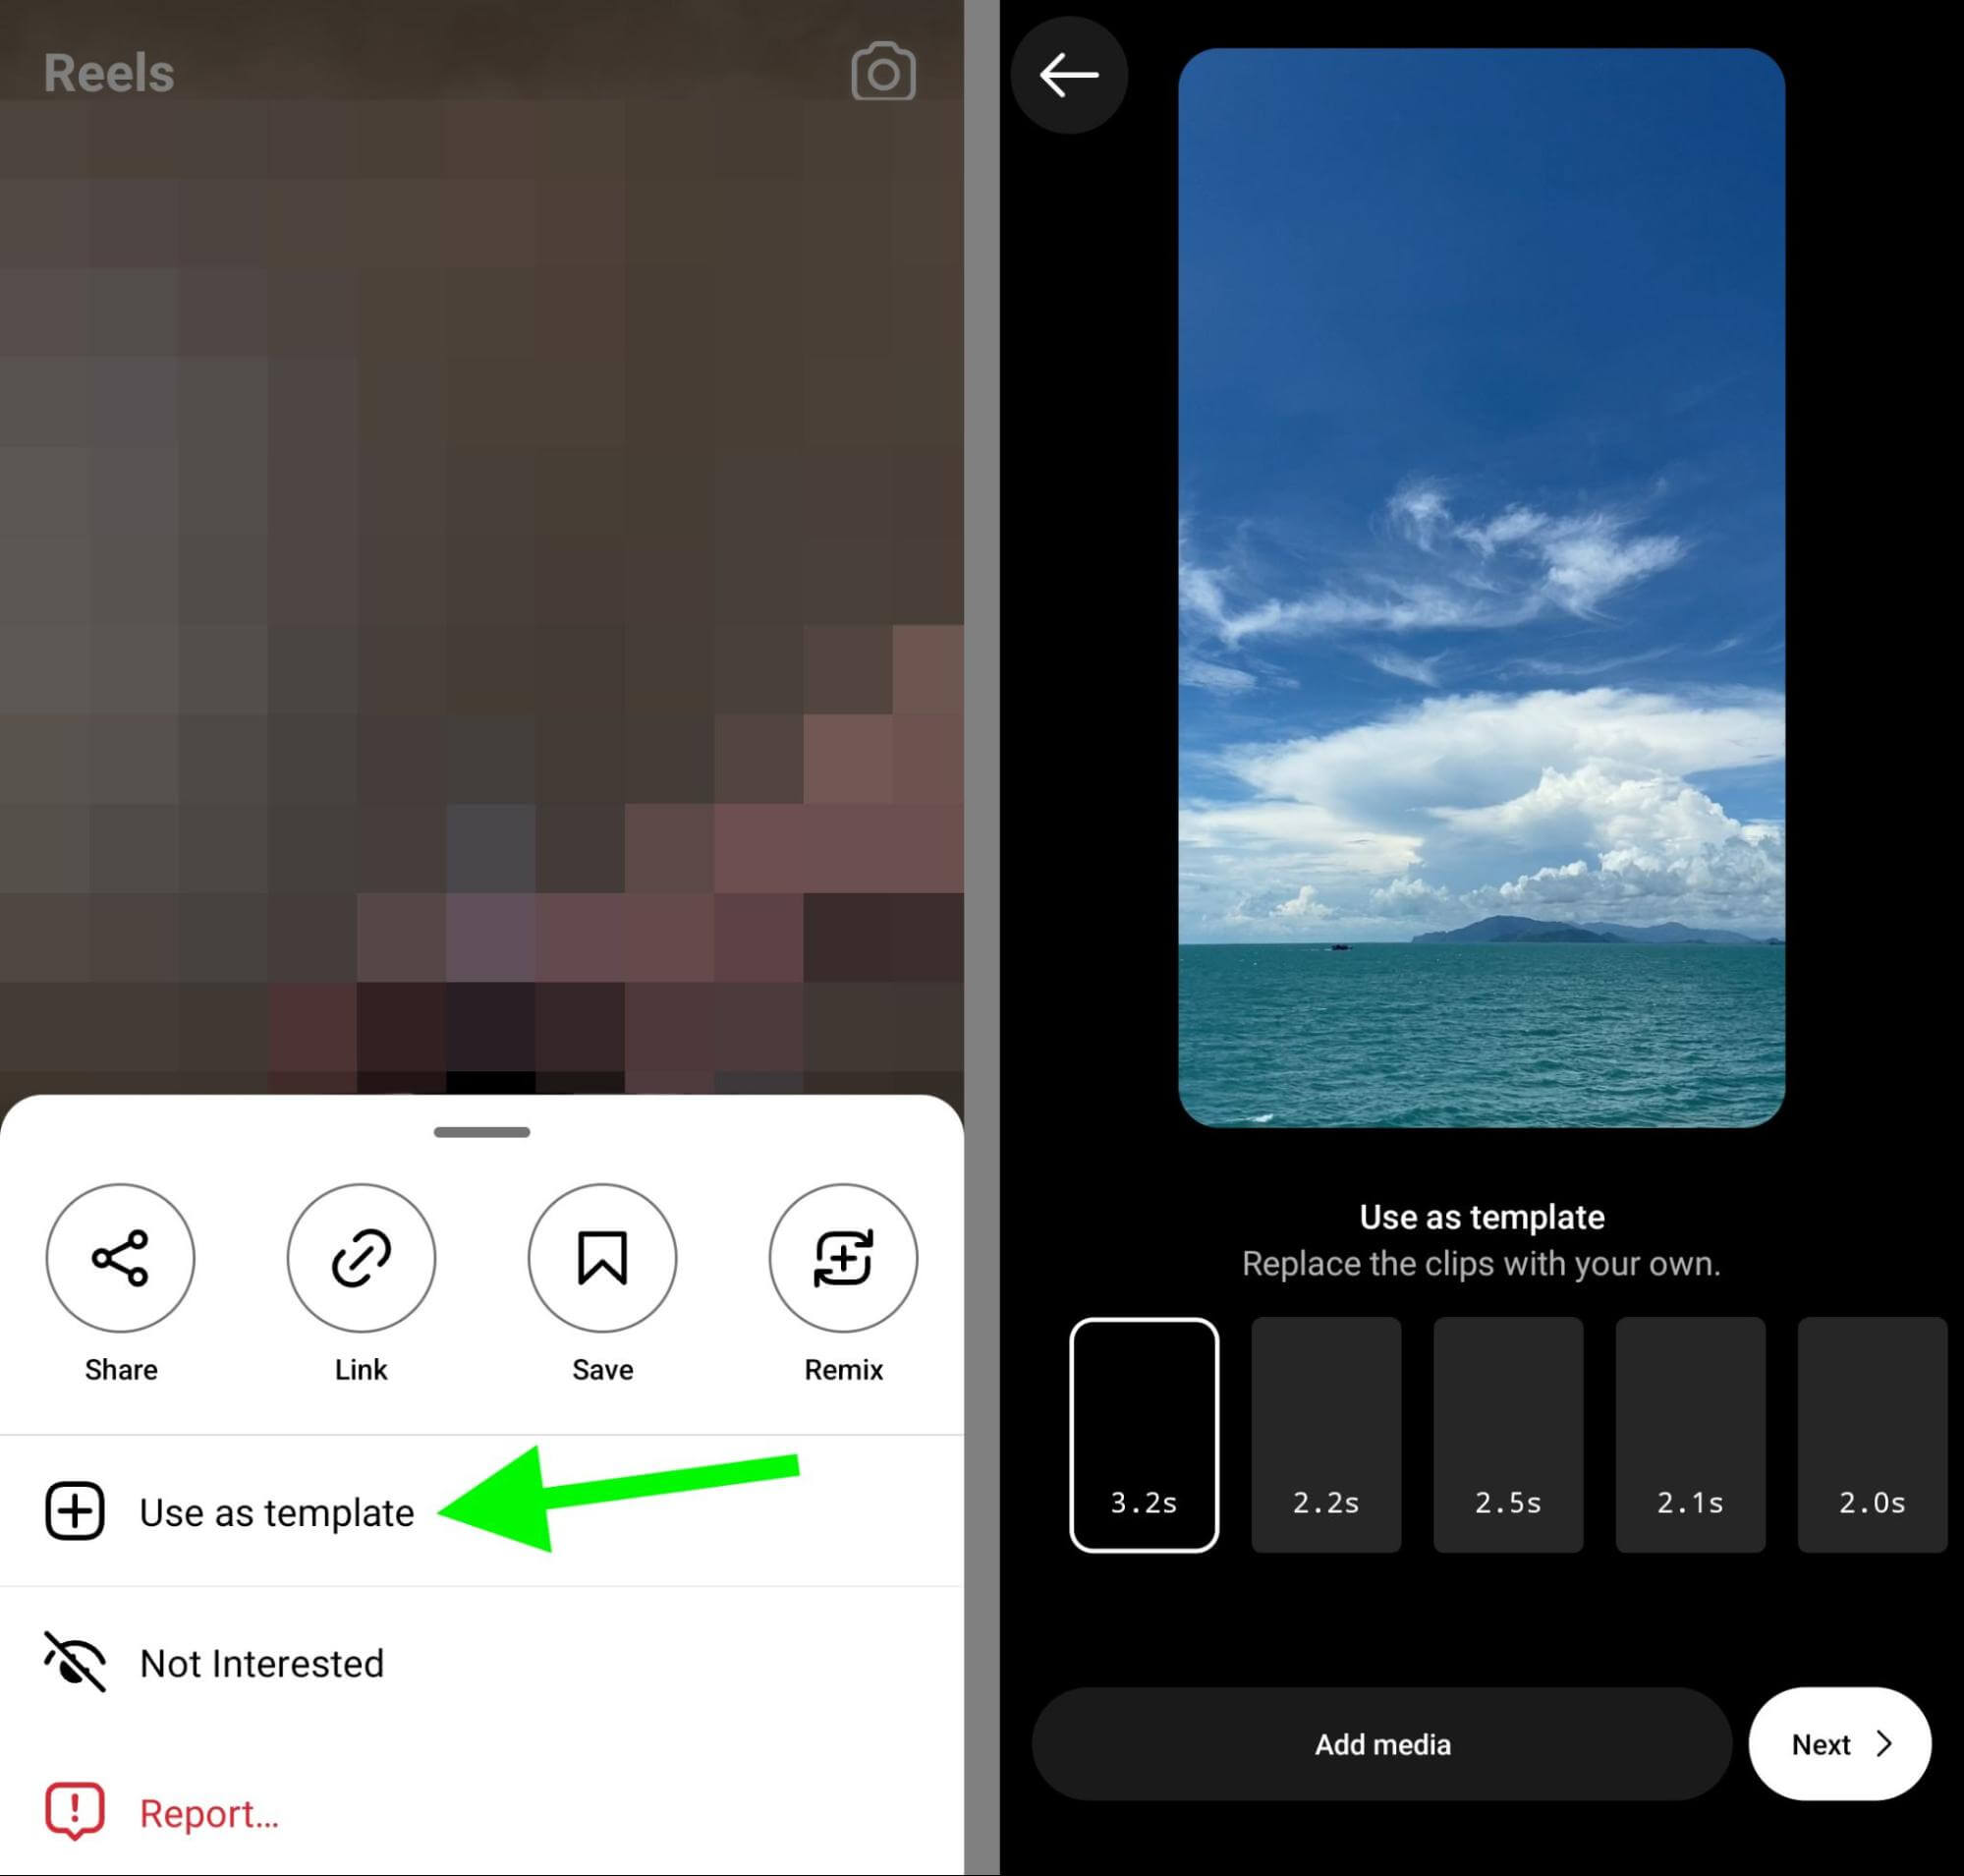
Next, simply tap to insert clips into each of the video placeholders. Don’t fret if your clips don’t perfectly match the specified length for each placeholder. You have the flexibility to edit the timing, adjust the clips, or even remove or swap them during the editing process.
#2: Enhance with Effects, Filters, and Markups
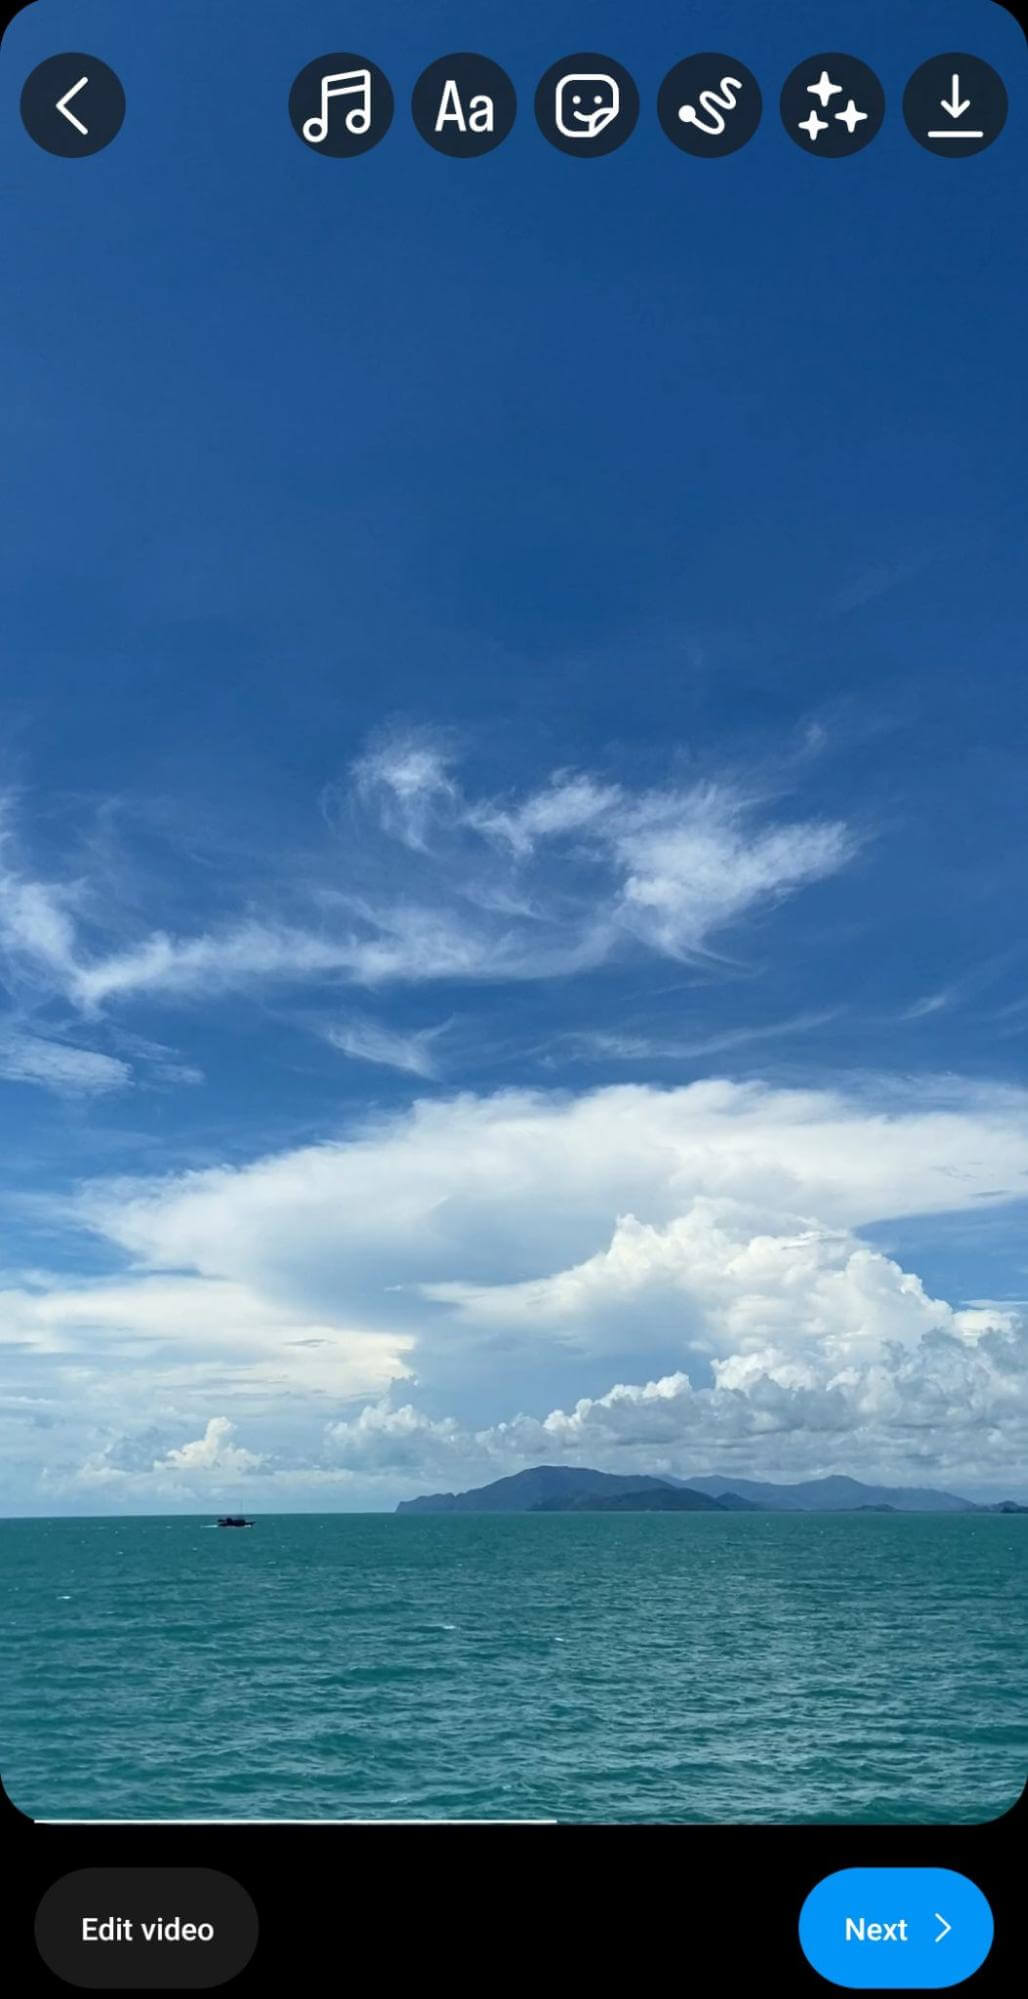
Once you’ve finished filming or adding all the desired clips, tap “Next” to proceed. If you’ve previously crafted reels within the Instagram app, the main editing screen will be familiar to you. Here, you can apply various effects, filters, and markups to enhance your video.
Within this context, there are a few actions you can perform here that are not available on the new Reels timeline.
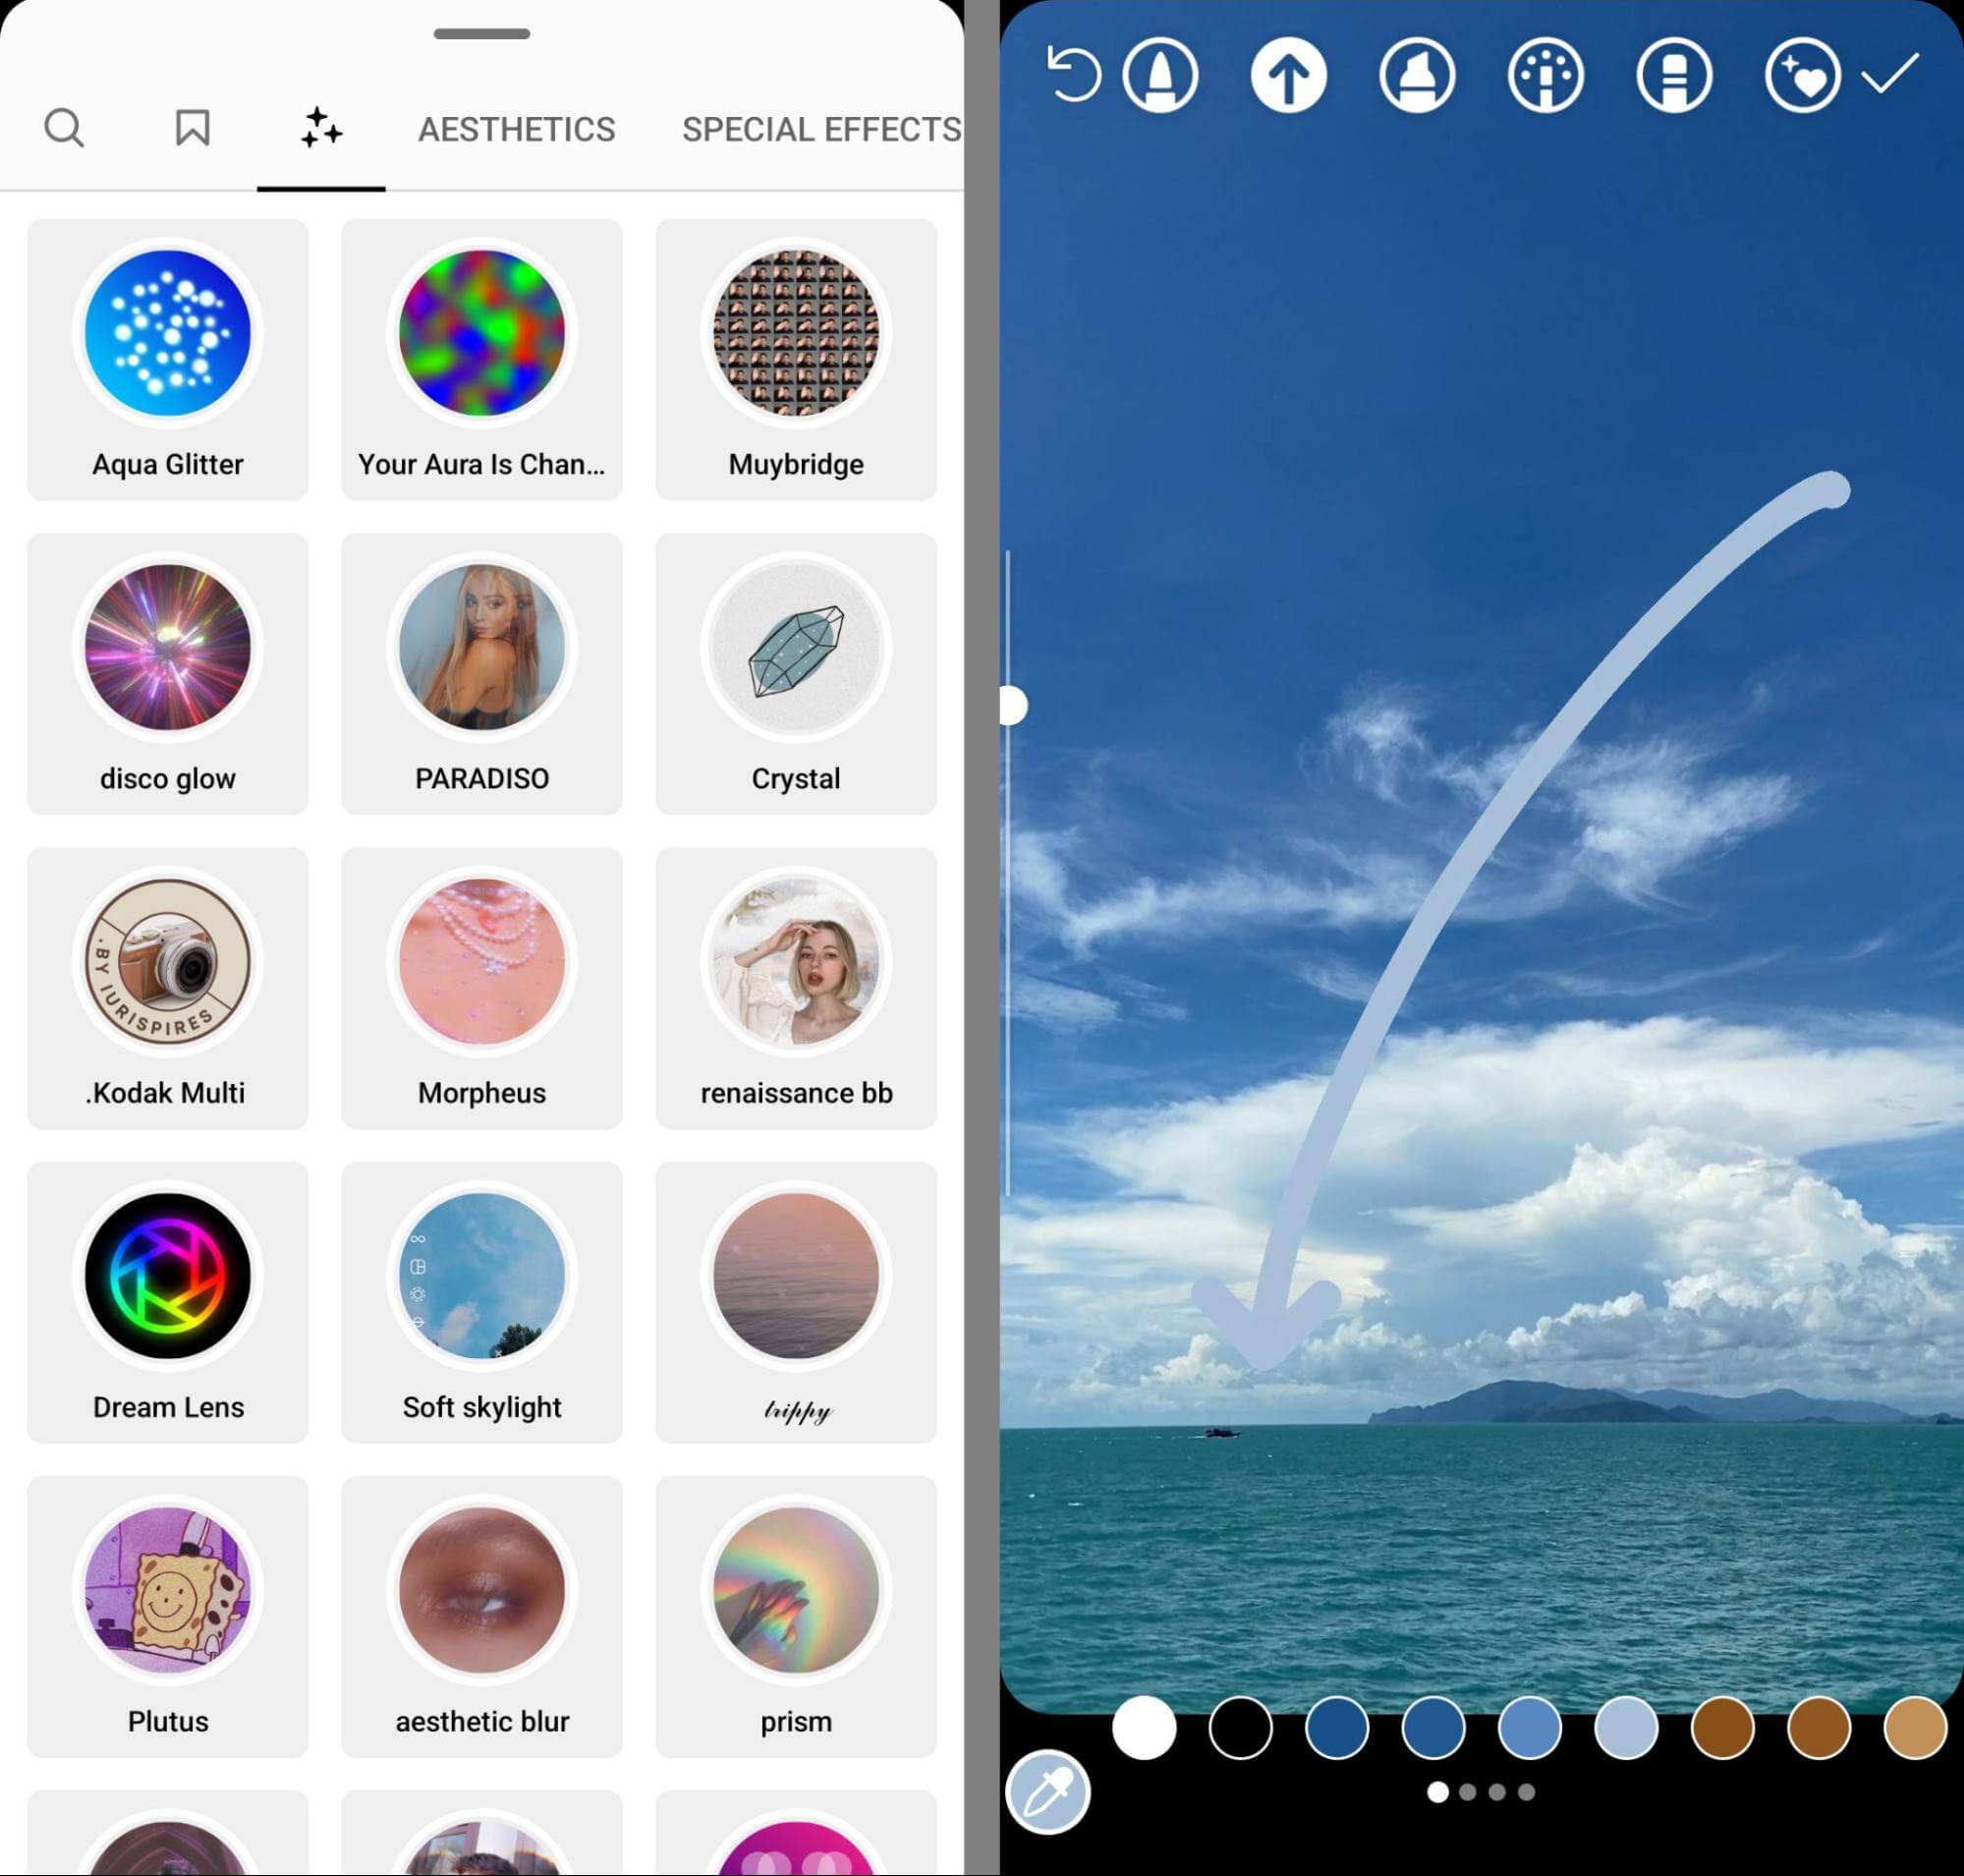
- Make your videos stand out in the Reels feed by adding captivating effects and filters.
- Enhance your videos with markers, editors, and drawing tools to create engaging annotations.
If you prefer, you can begin editing text, stickers, or audio directly from the main screen. However, the new and improved Instagram Reels editor now makes it simpler to add these elements from the timeline. The enhanced quality of the editor ensures a smoother and more seamless experience.
#3: Editing Video Clips on the Reels Timeline
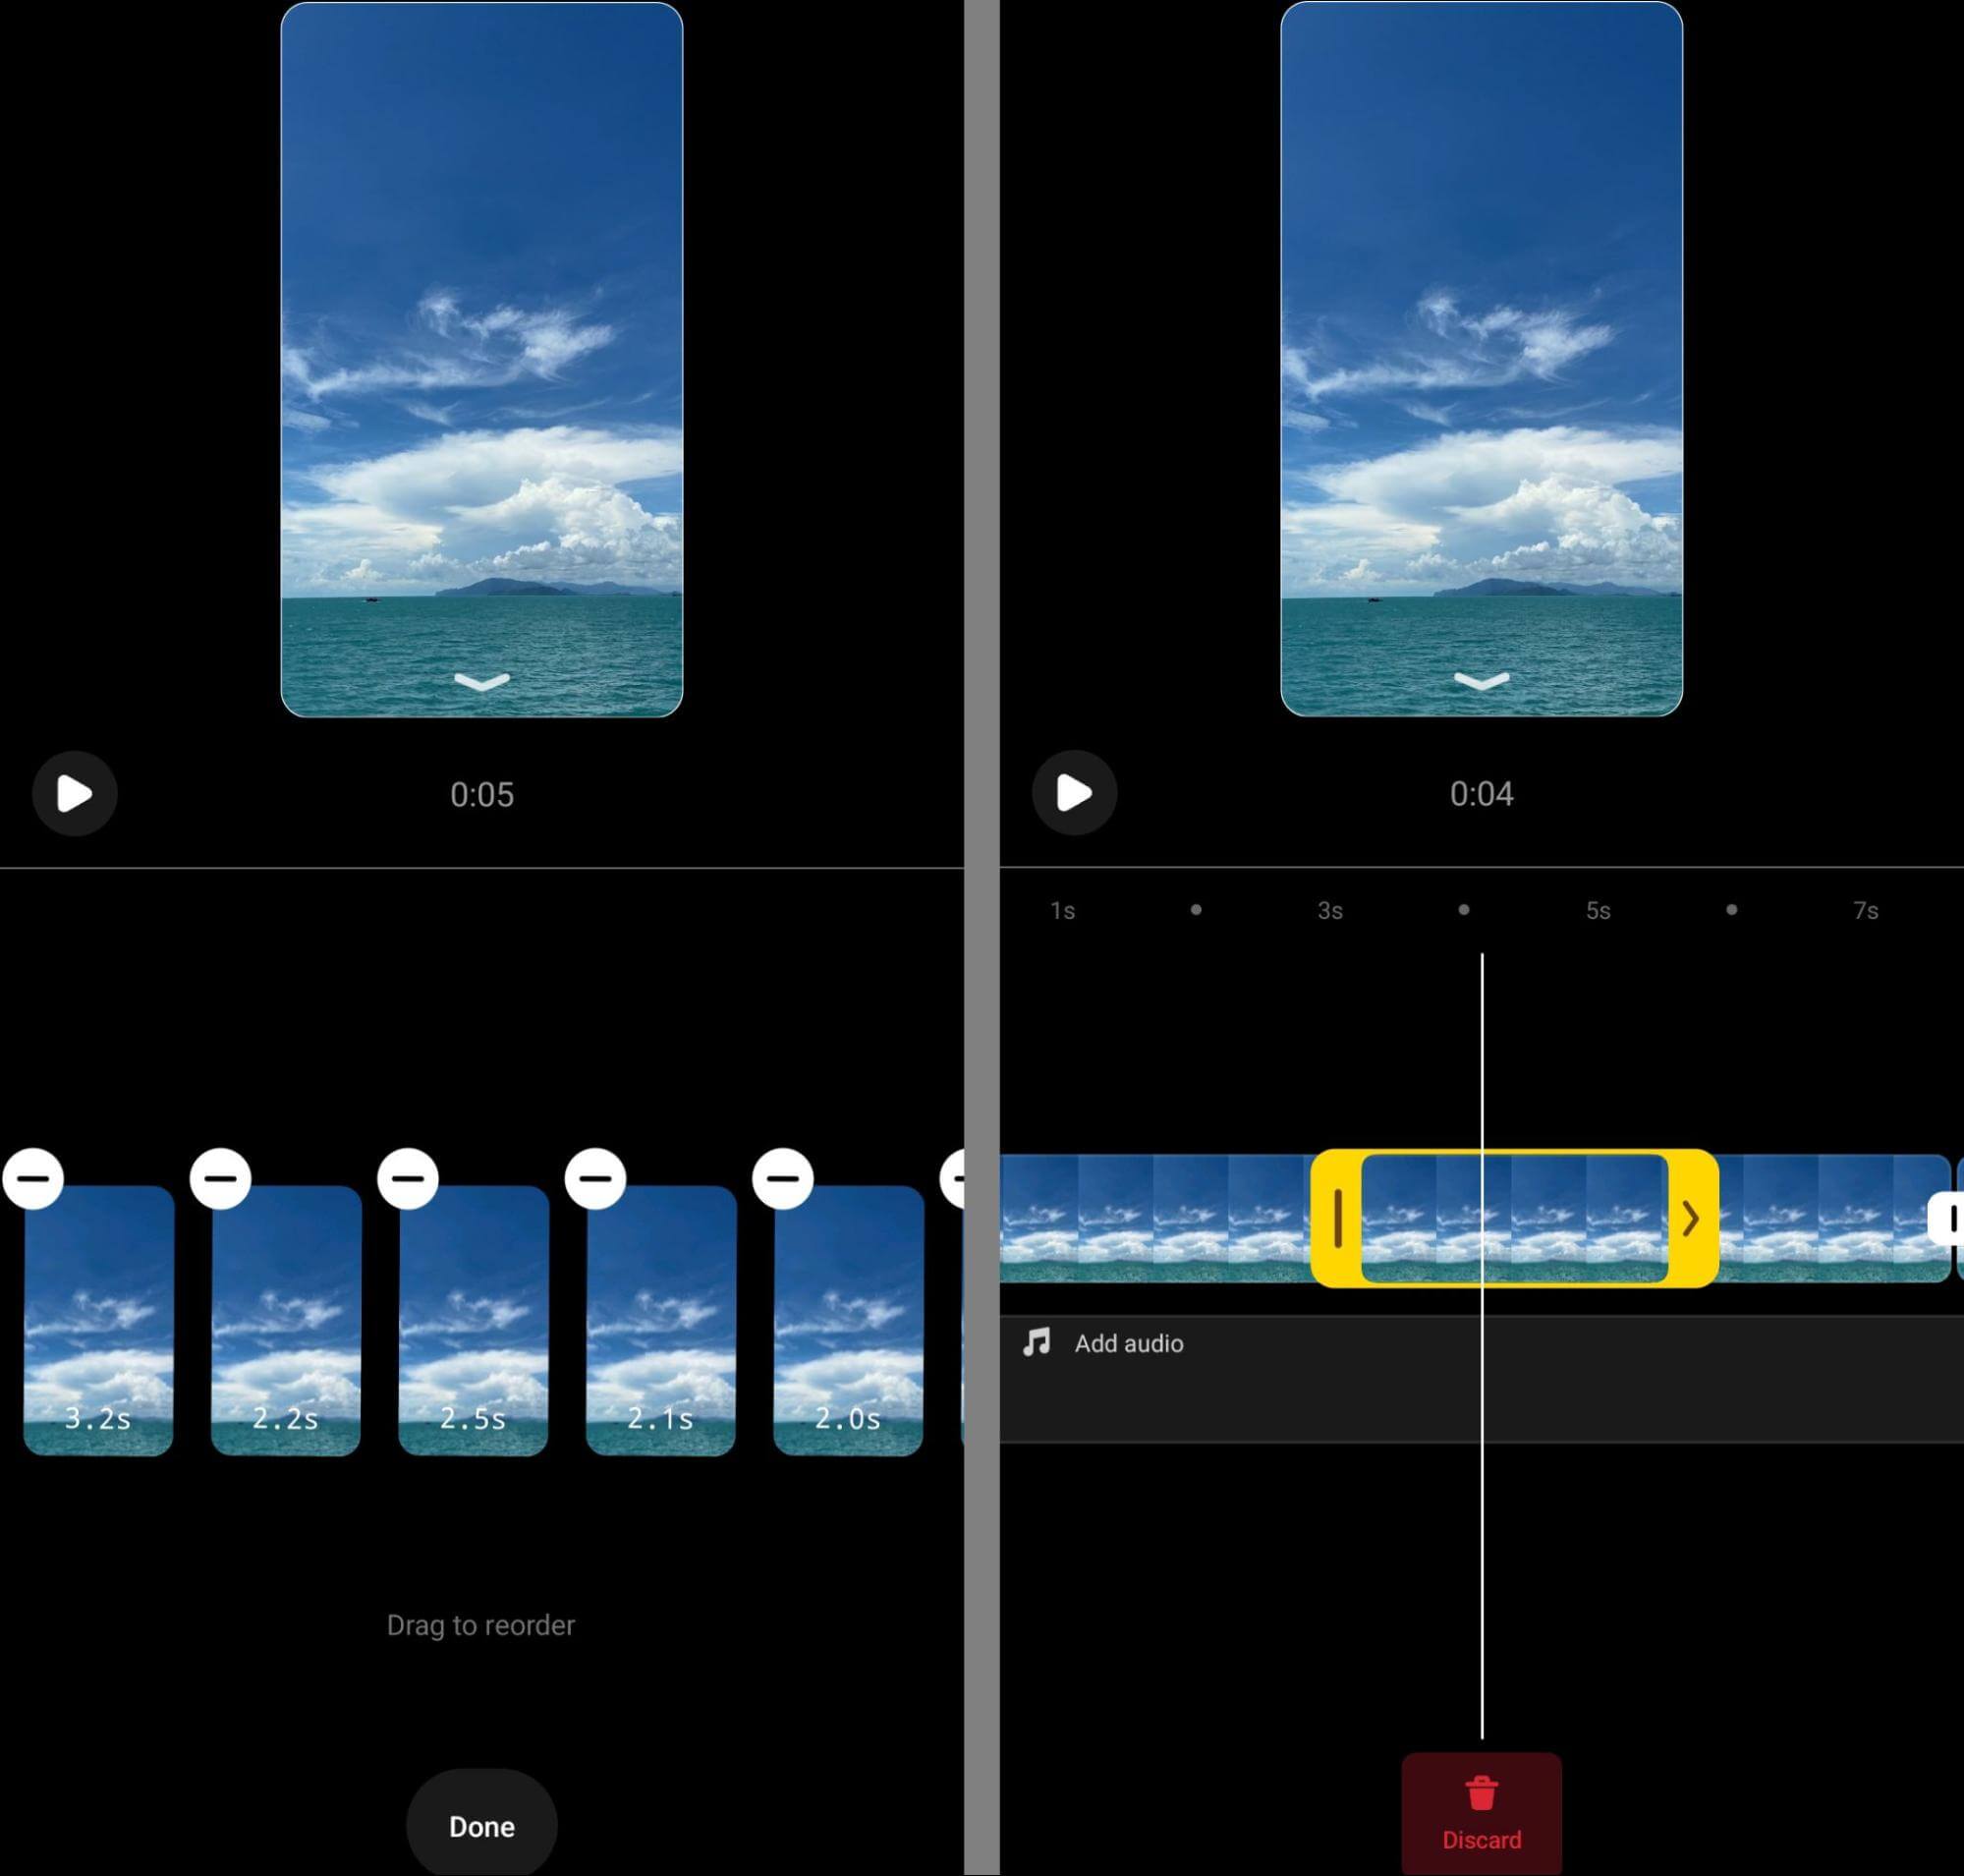
To access the timeline, simply tap the “Edit Video” button located in the lower-left corner. This new feature allows Instagram users to directly edit their reel clips from this section. If you wish to rearrange the order of the clips, just tap the “Reorder” button in the lower-left corner and then drag and drop them until they are in the desired sequence.
For trimming purposes, whether it’s a clip you filmed or one you added from a template, tap the clip on the timeline until a yellow slider appears. Use this slider to adjust the beginning or end of the clip according to your needs. Additionally, if you want to remove a clip entirely, you can tap the red “Discard” button, and the clip will be deleted from the timeline. This makes it easy to fine-tune your reel and achieve the perfect result.
Looking to include transitions between your clips? Simply tap the white box that appears between the clips to access the transition options. Scroll through the choices to preview them. You have the flexibility to add a single transition between two clips or utilize the “Apply to All” button in the lower-left corner to apply the same transition to all the clips. This makes it effortless to add smooth and seamless transitions to your video.

Looking to include additional clips in your short-form video? Simply tap the “Add Clips” button located in the bottom menu. From there, you have the option to select a clip from your gallery or film a new one in the moment. This interface also allows you to access the Reels Green Screen tool. Once you’ve added the desired new clip(s), tap the “Reorder” button to finalize the editing process. This ensures a seamless and complete video composition.
#4: Adding Text, Stickers, and Audio on the Reels Timeline
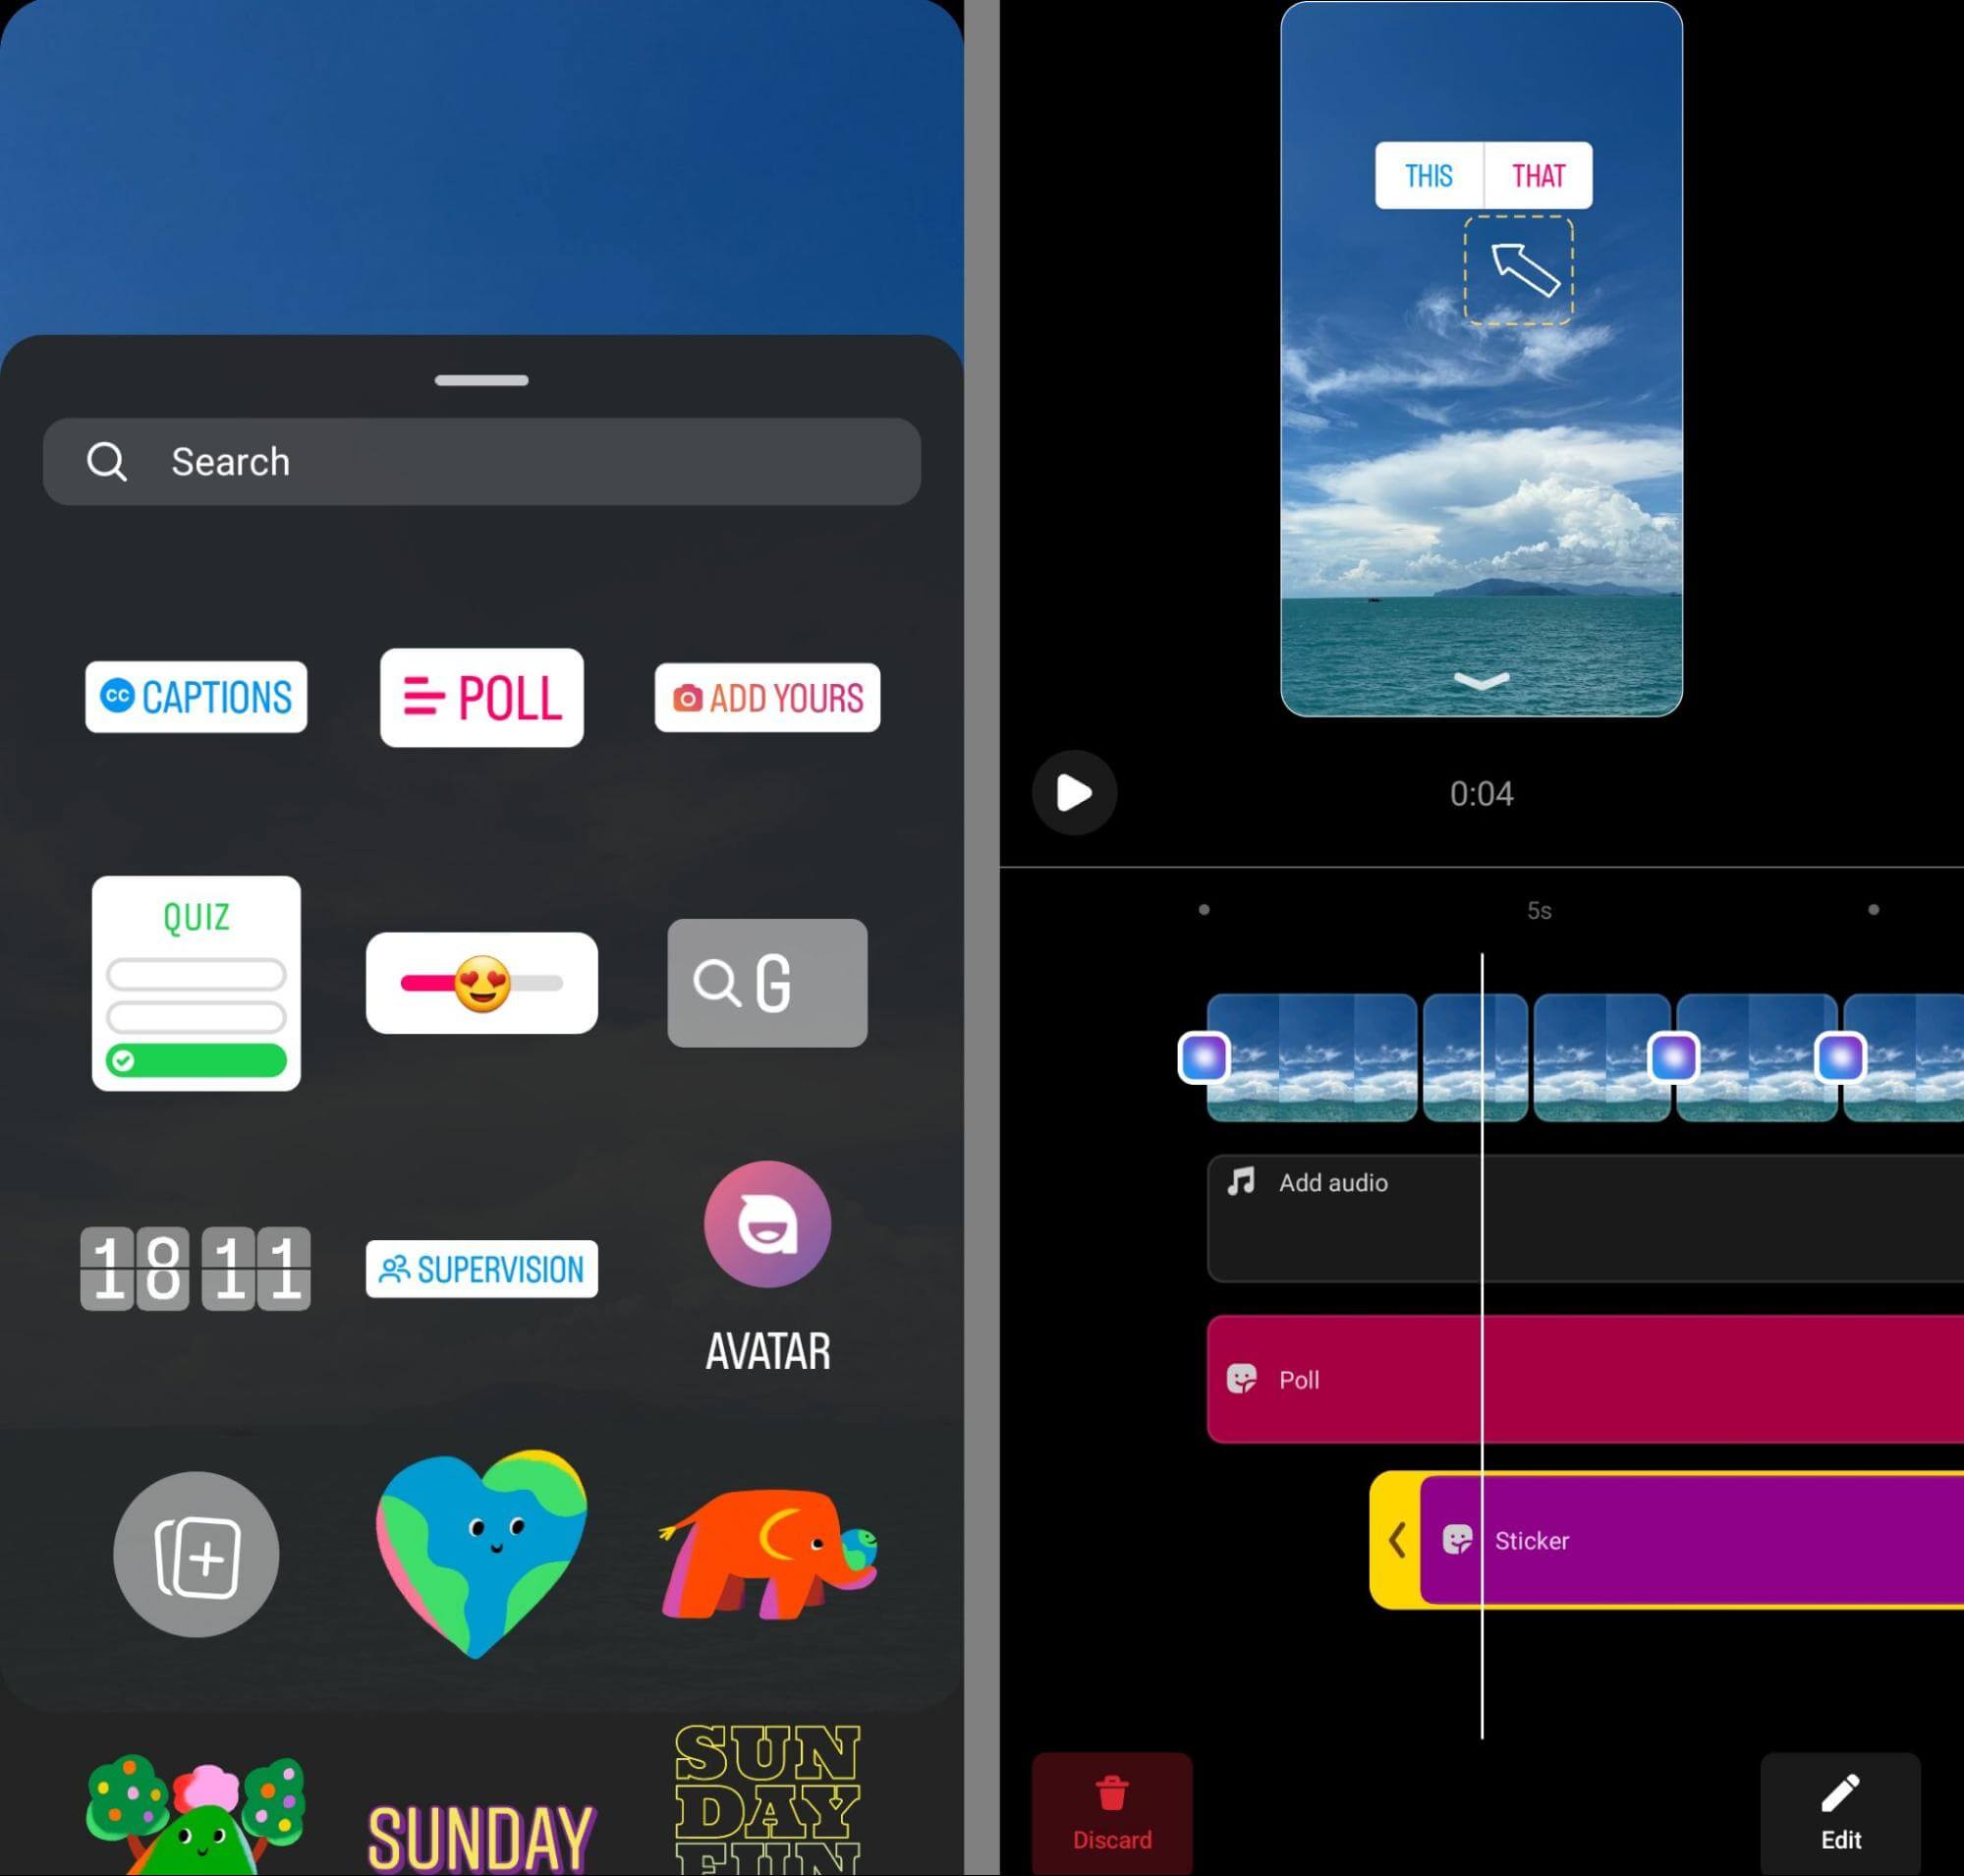
Once you’ve finished editing the video clips, it’s time to incorporate text, stickers, and audio from the Reels timeline. To access the Reels sticker tray, simply tap the “Sticker” button. Within the sticker tray, you can include captions, polls, emoji sliders, and GIFs to enhance your video’s appeal.
Keep in mind that interactive stickers like polls and emoji sliders will be displayed throughout the entire length of the reel. As of now, there isn’t an option to modify their duration. This feature allows you to engage with your audience seamlessly while creating captivating and interactive content.
With GIFs, you have the flexibility to display them for only a specific part of the video. Once a GIF is added to a reel, you can tap it on the timeline to adjust its starting or ending points. The editor will display the breakpoint between clips, allowing you to seamlessly align the GIF with the beginning of a clip and ensure it appears at the desired time. This precise control over the GIF’s timing enables you to create engaging and dynamic content within your reel.