If you want to effectively use Facebook to promote your products, the beginners need to utilize Facebook Analytics. It’s packed full of insights and information that may allow you to get the most from the social network that reaches 1.62 billion users every single day.
Why use Facebook Analytics for the beginners (a.k.a. Facebook Page Insights)?
As you use Facebook for business, you have to take a structured approach that ties your social media efforts to actual business goals. Analytics provides you with tons of beneficial data that may allow you to track and measure your results so you can refine your strategy and Facebook marketing.
This information to Facebook Insights will allow you to understand how and why each metric is essential to your overall social media strategy.
For example, understanding how and when individuals interact with the content you post on Facebook can also be an essential way to ensure the Facebook algorithm works for you, rather than against you.
Facebook Page Insights vs. Facebook Audience Insights
Two tools of Facebook Analytics for the beginners are Facebook Page Insights and Facebook Audience Insight which have a little bit of overlap between but they serve different purposes. The name of the tool is the key to how to use each of them:
- Facebook Page Insights provides you with detailed analytics on your Facebook Page. Therefore, you’ll be able to track what works, learn the way individuals interact with your content and improve your results over time.
- Facebook Audience Insights allows you to understand your Facebook audience so you’ll be able to better target advertisements and create extra relevant content.
In this post, we guide you to the way to use Facebook Page Insights. Looking for information on easy methods to track and analyze your Facebook audience? We’ve got a complete blog post about how to set up and use Facebook Audience Insights to get you started.
How to use Facebook Analytics for the beginners
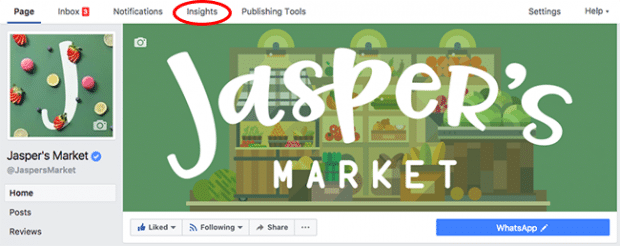
First things first. Go to your Facebook Page and click Insights in the top menu to access Facebook Page Insights and click More to find out if you don’t see Insights on the menu.
You’ll be taken straight to your Overview, just click Overview in the left-hand menu to entry again at any time
Overview: The big picture
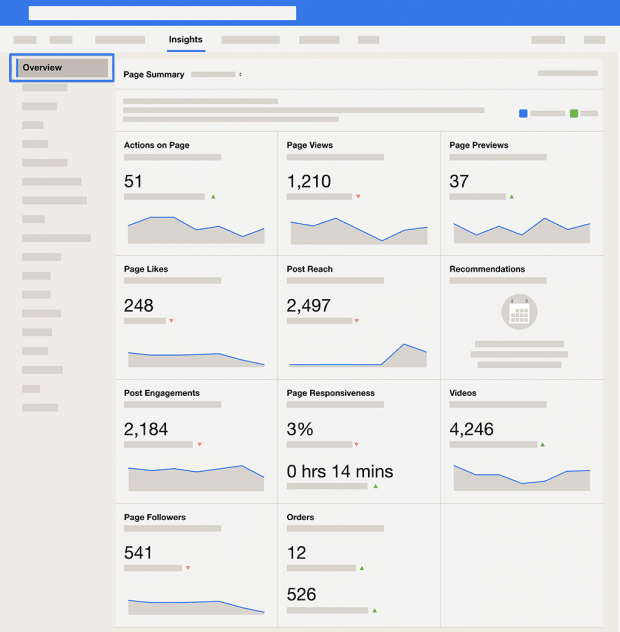
The Overview provides you with a bird’s-eye view of all the things that are happening with your Facebook Page. As a result, you’ll be able to choose to view information for the last seven or 28 days, for today, or the last day.
It is divided into three sections.
The first section is the Page Summary. Here, you’ll see a set of graphs with top-level metrics for a variety of categories:
- Actions on Page: Total clicks for both your contact info and call-to-action button
- Views on Page (Page views): Total views of your Facebook Page, including by individuals not logged into Facebook.
- Previews on Page (Page Previews): The number of times individuals see a preview of your Page by hovering their mouse over your Page information to.
- Likes on Page (Page Likes): The number of new likes.
- Post reach: The number of people who saw your posts in their timeline.
- Story reach: The number of people who saw your Stories.
- Recommendations: The figure for people who recommended your Page.
- Post engagement: A total number of post likes, comments, shares, and other engagements.
- Responsiveness: An evaluation of how often and how fast you respond to messages.
- Videos: The number of video views of three seconds or more.
- Page followers: The number of new followers
- Orders: Your orders and earnings.
You’ll be able to click on any of these charts to get extra detailed data or click on the corresponding item in the left-hand menu.
The second section known as Your 5 Most Recent Posts. This provides you with the numbers of reach and engagement on your newest posts. Additionally, there’s a choice to boost your best performing posts right from this screen.
The last section is Pages to Watch. In this section, you can compare your page with others by manually adding in Pages. For instance, you possibly can add a competitor’s page to see how you measure up. This could be a good method to benchmark your results in opposition to the main players in your industry.
Straight under the page summary, you’ll see a box with the heading Ad Results Have Moved. All tracking for Facebook advertisements has moved to a separate ad analytics page known as Ad Center. You can click More in the top navigation menu of your Facebook Page.
Posts: Detailed analysis
The Posts section of your Facebook page analytics dashboard provides you with tons of essential details about your posts. The activity on your Page, including three tabs:
- When Your Fans Are Online
- Post Types
- Top Posts From Pages You Watch
You could find it a bit confused because when you click on one of these tabs, only the data in the box at the top of the screen changes. The data in the section called All Posts Published below this top box, stays the same.

First, we’ll begin with the All Posts Published section before moving on to what you can learn from the individual tabs at the top of the page.
All posts published
In this graph, you possibly can evaluate the outcomes for all of the posts you’ve printed on your Web page. For every submit, you possibly can see:
- Sort: Was it a hyperlink submit, a photograph submit or a video? This column shows you which kinds of posts appeal most to your audience.
- Targeting: Was it a public post? Did you target a particular audience? This one ensures you take the targeted group into account when comparing results.
- Reach: By default, this column shows the number of people that saw your post. To see the breakdown of paid versus organic reach, hover your mouse over the yellow bar. At the top of the All Posts Published section, there’s a drop-down menu that you could use to change what’s displayed in this column. Your different choices are to view impressions (organic vs. paid) or reach among fans vs. non-fans.
- Engagement: Here you see the number of clicks every post got, the total number of reactions, comments, and shares. If you want to increase the number of comments on your posts, we will provide you with our service of gaining Post Likes, Shares, Comments.
Additionally, there is a choice to boost your posts right from this screen.
Now let’s have a look at the extra information you possibly can learn from the three tabs at the top of this screen.
When your fans are online
This graph gives you data when your fans are online, averaged for the period time you choose.
By scrolling your mouse across the graph, you can get the number of specific audiences for every hour of the day. By moving your mouse over the Days boxes above the graph, you’ll be able to see specific patterns for the various days of the week. Therefore, this can help you check whether your fans have the same patterns on the weekends as they do during the week.
Post types
This section provides you with an aggregate view of how effectively different post sorts perform with your audience based on reach and engagement.
Top posts from Pages you watch
Here, you’ll see extra detailed information about the pages you’ve chosen to track in addition to your own. For instance, you’ll only see engagement numbers, not reach, however, this could still provide great insight into what sorts of content are working for your competitors.