You might feel confident navigating your Facebook profile—until someone mentions they can’t share one of your recent posts. If you’re unsure how to make a Facebook post shareable, this scenario might leave you puzzled. Rather than aimlessly clicking around your profile page, why not dedicate your time to spreading the word about an adorable dog or delicious recipe?
But worry not! We’re here to assist. Our quick and thorough guide will walk you through the steps of making your Facebook posts shareable, allowing you to expand your audience reach (and relish the virtual praise from your friends and followers).
How To Make A Facebook Post Shareable?
On the Facebook App
The Facebook mobile app closely resembles its web counterpart, offering the same security features. To adjust the privacy settings of your post using the mobile app, follow these steps:
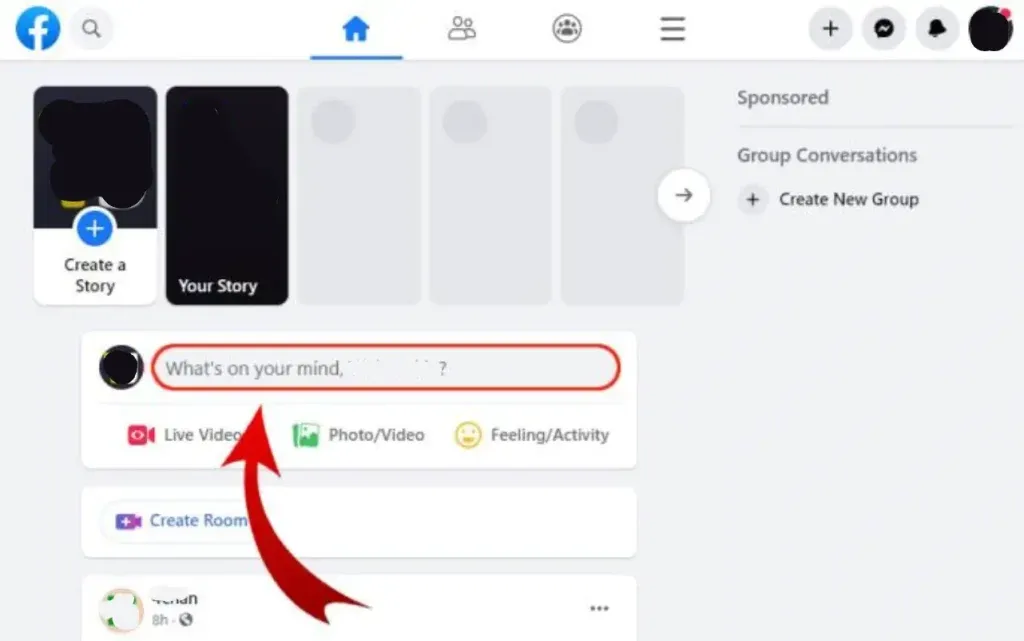
1. Tap the What’s on your mind? box on your Facebook home screen.
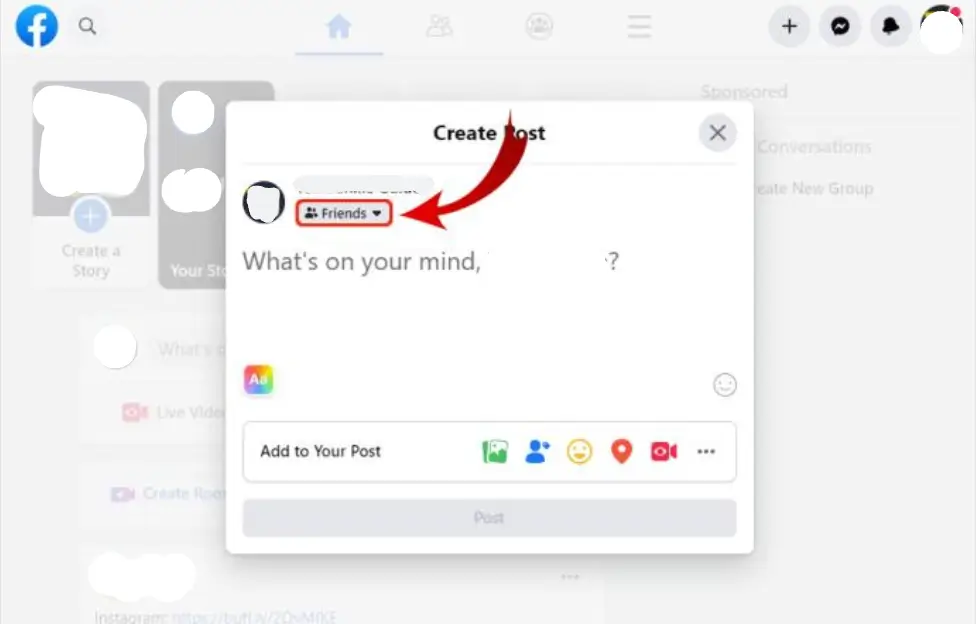
2. Below your profile name, tap on the Privacy link represented by the globe icon to modify the audience settings.
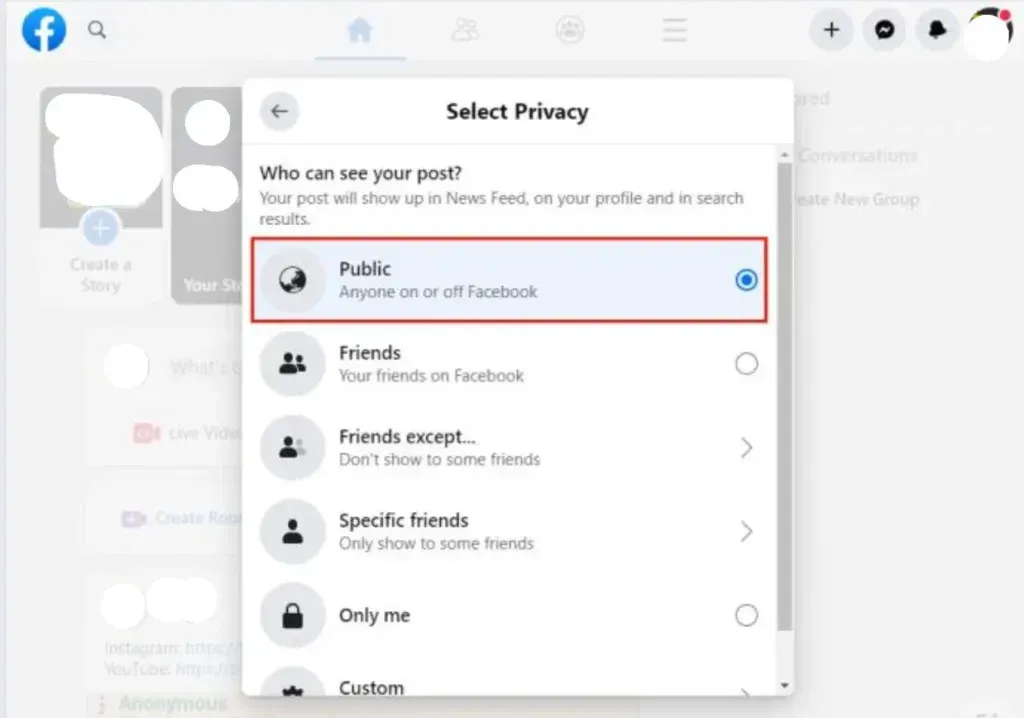
3. Choose Public to make the post visible to everyone. Once selected, proceed with composing your message.
4. Tap Post located in the upper right corner to publish the message on your wall.
If you decide to revert the post to private in the future, follow these steps:
1. Tap the three-dot icon and select Edit Privacy.
2. Choose Friends or another non-public option. This action removes the post from the view of anyone who shared the content.
Using a Browser
When sharing content on your Facebook wall and desiring others to share it as well, it’s crucial to ensure the post is shareable from the outset. To enable your friends to share your post, it must be set to public visibility.
Here’s how to achieve this:
1. On your Facebook Home page, navigate to the What’s on your mind? section.
2. Click on the privacy dropdown menu situated under your Facebook profile name.
3. Select Public to allow the post to be shared by anyone, both on and off the Facebook platform.
4. Once you’ve made the selection, click Post to display the message on your wall.
With the post set to public, others can now share it. If you wish to revert the post to private, you can do so by selecting one of the other options in the privacy menu. It’s worth noting that changing the post to private will also make it private for anyone who previously shared it. Instead, a notification will remain indicating that the original poster removed the post.
On a Facebook page
If you intend to share posts on a specific Facebook Page, follow these steps:
1. From your Facebook home page, navigate to Pages at the top of the left menu.
2. Select the desired Facebook Page from the list containing the post you wish to share.
3. Scroll down the page until you locate the specific post. Click on Share in the lower right corner. All posts on a Facebook Page are automatically set to Public and cannot be altered. Thus, anyone with access to the Facebook Page can share a post.
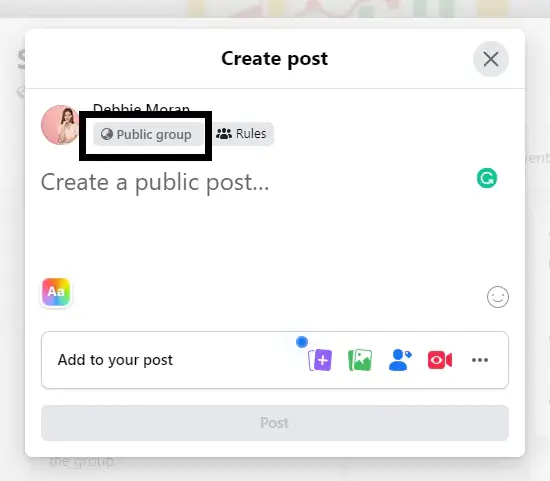
Through a Public Group
If you’re part of a Facebook group open to the public, any content you post within that group can be shared by members, provided you’ve set the security settings to public. Additionally, you have the option to schedule posts in Facebook groups, ensuring a consistent stream of quality content for group members.
Here’s how to post in Facebook groups and enable sharing:
1. From your Facebook home page, navigate to Groups at the top of the left menu.
2. Select the desired group from the list.
3. You can post in groups you manage or those that have enabled posting permissions for group members.
4. On the group’s homepage, click on the Write something button.
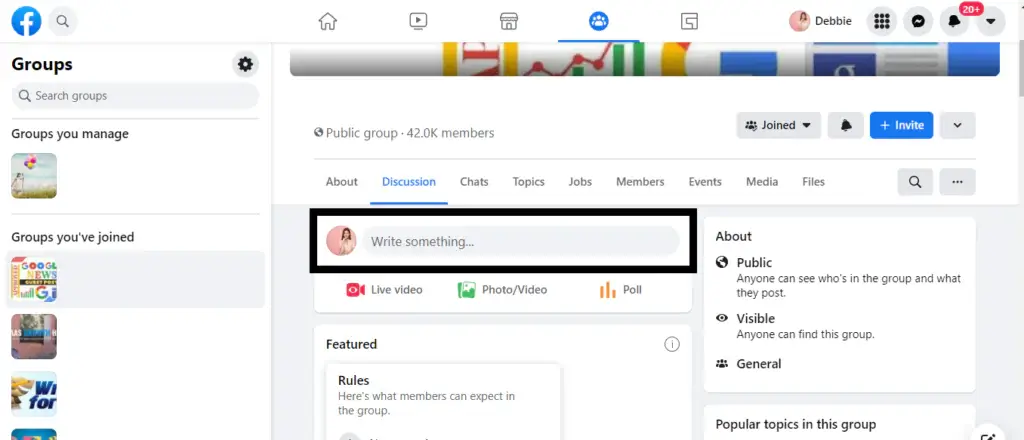
5. Craft your post and share it in the group. As the group is public, a share button will appear in the lower right of the post, allowing anyone to share it.
In a Private Group
If you’re part of a private Facebook group, any posts you create within the group are not shareable outside of it. However, if you wish to make a post in your private Facebook Group that others can share, follow these steps:
1. Create the post on your own newsfeed or timeline, ensuring that the post is set to be shareable to the public.
2. Locate the Share button positioned on the lower-right corner of the post, and click on it to reveal a drop-down menu.
3. Choose Share to Group from the menu, then select the private group you’re a member of.
4. The post will then be shared with your group. If anyone else wishes to share it outside the group, they can do so by visiting the original post and sharing it from there.
Can I Make A Facebook Post Shareable After Posting It?
You’ve recently made a post on Facebook, but you’ve started hearing murmurs that your friends or others are unable to share it. What could be the issue? If individuals can’t share your posts on Facebook, it’s probable that the post’s security settings restrict sharing.
Now, how can you make a post shareable on Facebook after it’s already been published to your feed? To make an older post shareable, adhere to these steps:
Using Website
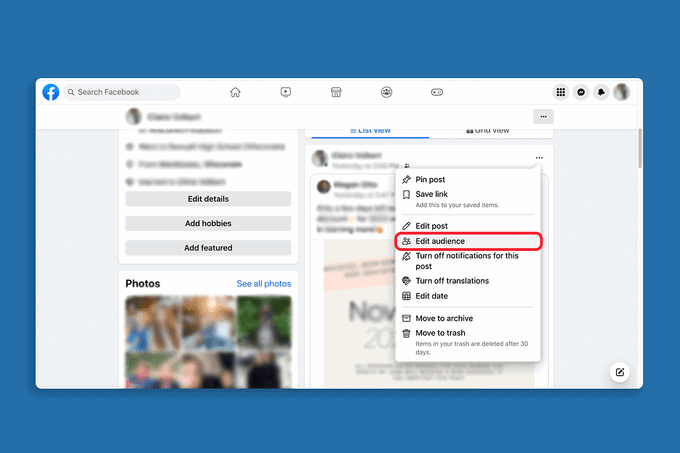
- Locate the post you wish to enable for sharing.
- Tap on the three-dot icon situated in the top-right corner.
- Select Edit audience.
- Decide whether you want the post to be visible and shareable by the public, friends, specific friends, or a custom list of friends.
- Click on Done
With Facebook App
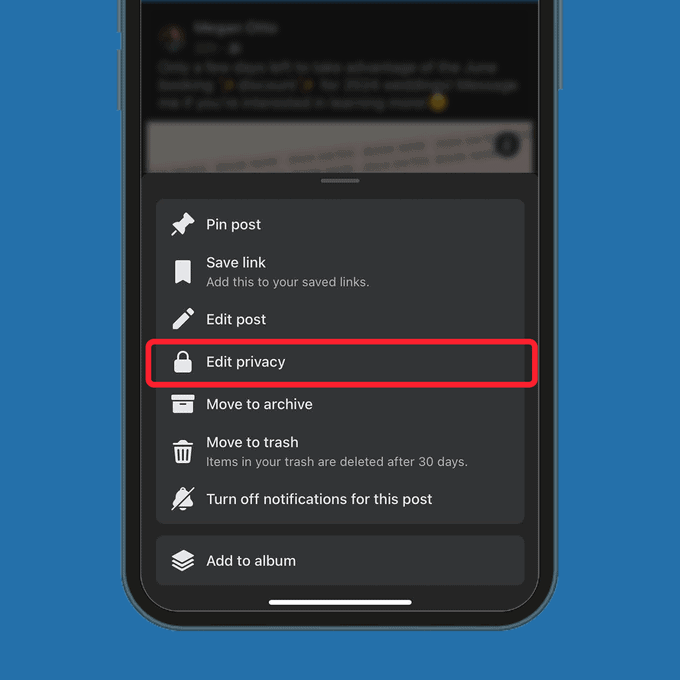
- Locate the post you wish to enable for sharing.
- Tap on the three-dot icon located in the top-right corner.
- Select Edit Privacy
- Decide whether you want the post to be visible and shareable by the public, friends, specific friends, or a custom list of friends.
- Tap Done
While you’re active on the social media platform, it’s important to stay vigilant about common Facebook scams and know how to steer clear of them.
What’s the benefit of allowing your Facebook post to be shared?
Many people prefer to keep their Facebook posts private by limiting who can share them. However, there are good reasons why you might want to let others share your posts, especially if you’re a business:
1. Sharing knowledge: If you’re an expert in something, sharing your posts can help spread your knowledge to more people. Just make sure the information you’re sharing is accurate.
2. Highlighting local issues or events: If you care about what’s happening in your community, sharing posts about local events or important issues can help others in your area stay informed.
3. Sharing for fun: Sometimes, you might just want to share something fun or interesting with your friends. Letting them share your posts means more people can enjoy them too!
Last words
As we’re wrapping up, we’ve covered all the steps to ensure your Facebook posts can be easily shared. The first thing you need to do is ensure your posts are set to public.
While the idea of going viral may seem daunting, it’s actually quite achievable with just a few key ingredients — elements that are likely already present in your posts by default.
From creating engaging content to actively interacting with your audience, these are all crucial aspects to keep in mind. Never underestimate the power of connecting with your audience when aiming to reach the “viral” side of Facebook.
Understanding how to schedule Facebook posts and make them shareable allows you to share your thoughts and ideas with the people you want to reach. This helps attract more followers to your profile and grow your Facebook community.