
Are you unfamiliar with Adobe software? or figuring out how to use Lightroom presets to edit your Instagram images can be frightening? If so, the good news is that it doesn’t have to be! With a recent upgrade to Lightroom CC, you can now edit your Instagram photographs like a pro on your mobile device. In this piece, we explain how to edit photographs in Lightroom CC mobile. And, how to round up a handful of our best Lightroom presets to take your photos from excellent to great.
Bonus: If you want to learn more about Influencer Marketing, read more in this blog post here!
Why Can Lightroom Presets Help You Upgrade Your Instagram Photos?
Lightroom presets are one-click photo editing tools that may significantly speed up your workflow and provide a professional touch to your Instagram photographs.
While mastering Adobe Lightroom on the desktop takes time and experience, using Lightroom presets on the mobile app is a quick and easy method to improve your Instagram images.
Many presets are available in “packs” or collections. So, you can select from various filters for each of your photographs while maintaining a consistent aesthetic on your Instagram account.
Many renowned Instagrammers are even releasing their own preset collections this year. Therefore, it’s simple for you to create the same look and feel as your favorite.
As previously stated, creating a consistent Instagram style for your feed is critical. Especially when you want to gain more followers and interaction. Your Instagram followers know exactly what to expect from your feed. They continue to receive the same consistent, high-quality content from your account. They are far more likely to convert into fans if you do so!
How to Use Lightroom Presets in Your Mobile App
Lightroom presets were previously exclusively accessible through the Lightroom desktop application – but that has all changed recently!
Adobe announced the debut of preset and profile syncing across all devices last month, which means you can (finally) use Lightroom presets on your mobile device!
The long-awaited feature release is a game changer for photo editors. Thanks to it, it is easier than ever to edit and share photos while on the road.
Lightroom is by far one of the most powerful picture editing applications available. Using Lightroom presets on your mobile device can help create high-quality Instagram Stories material and significantly improve your Instagram feed.
Are you ready to begin? Here’s how to utilize Lightroom presets on your mobile device to edit photos:
To begin, ensure that you have the most recent update of the Lightroom CC desktop (version 1.4 or later). Additionally, Lightroom mobile (version 3.3.0 or later) and that you are signed in with your Adobe ID.
Your presets have been installed in Lightroom CC on your desktop (instructions will be sent with your purchased presets). Then, they can be synced with the Lightroom CC mobile application.
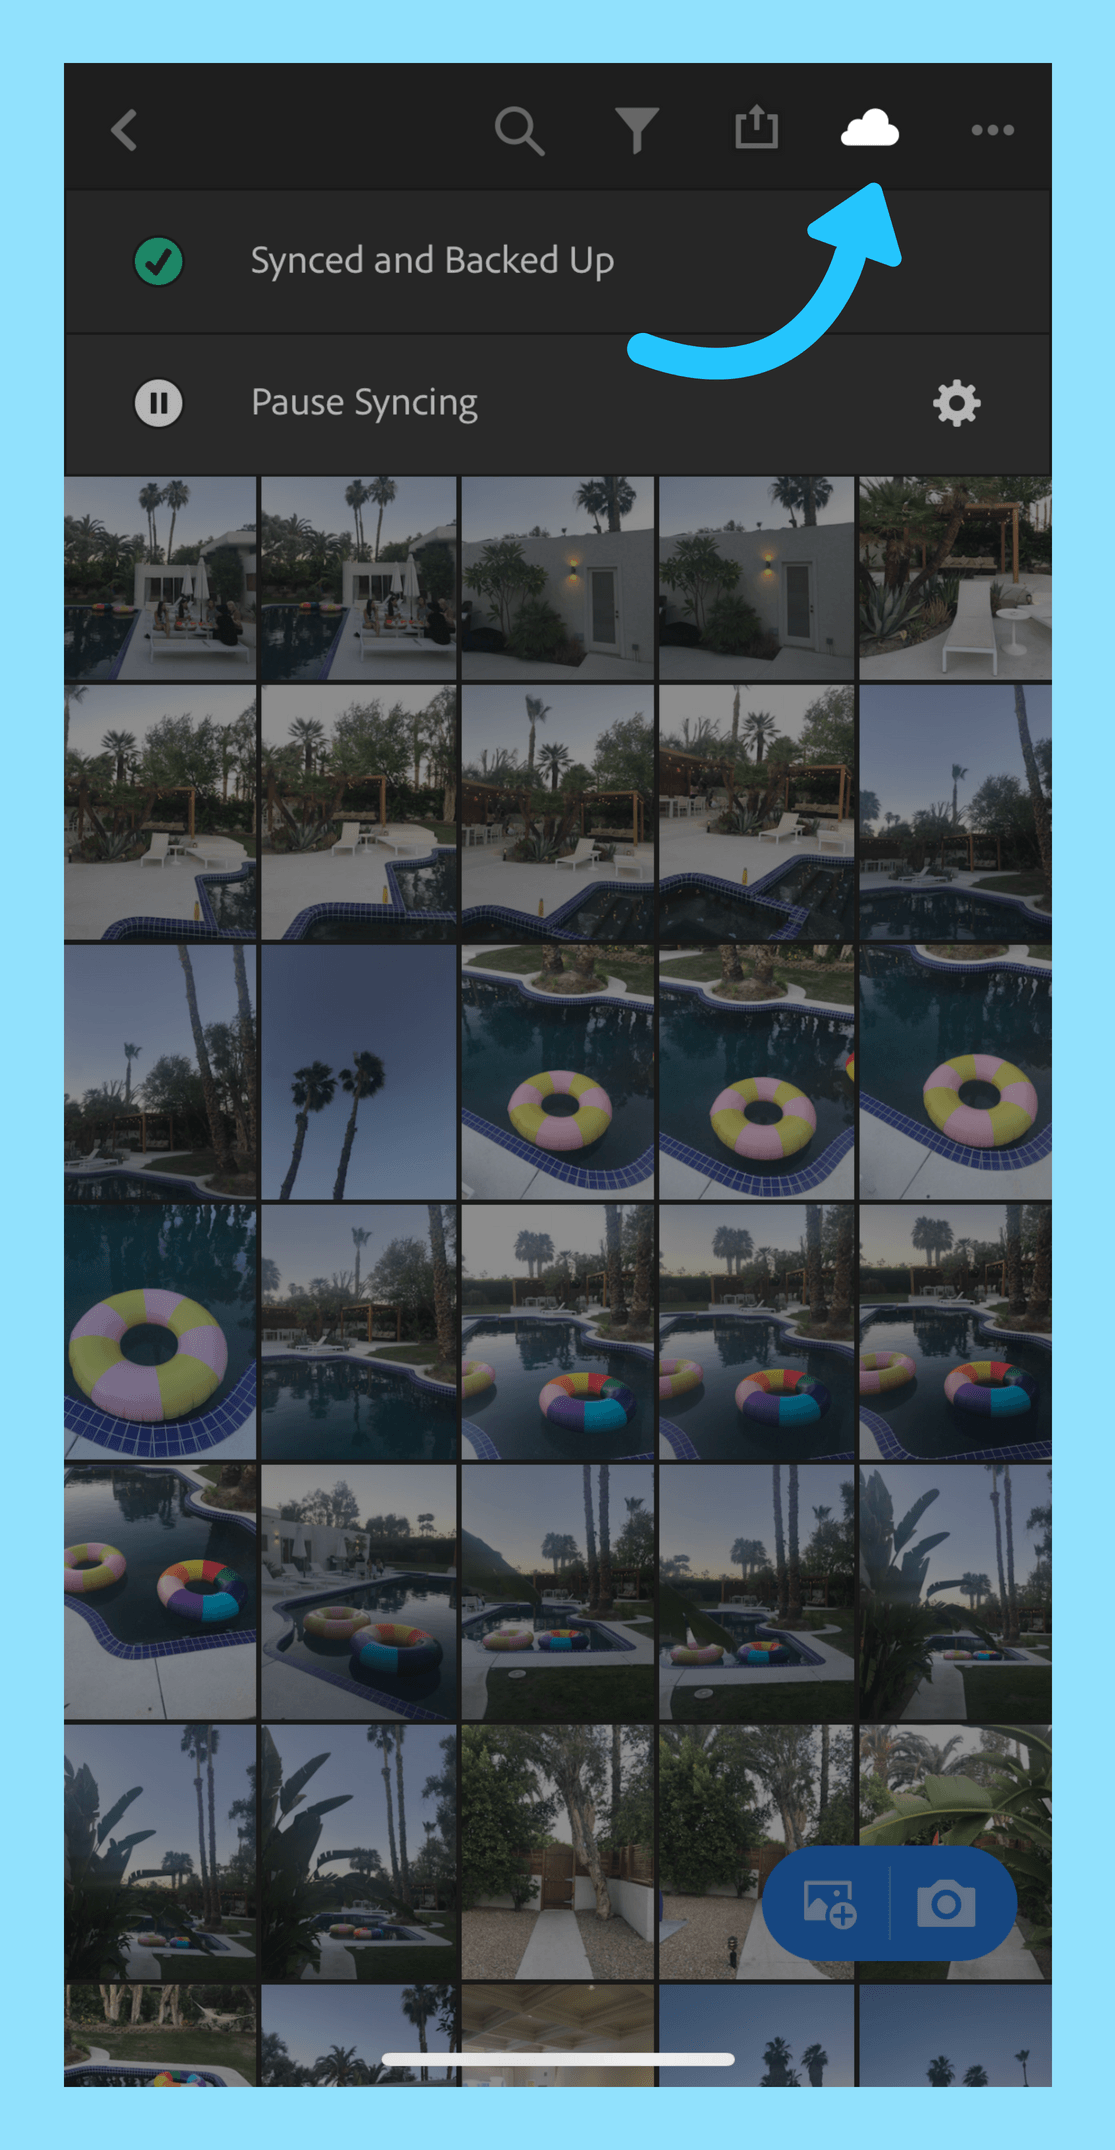
After you’ve installed your presets, check sure Lightroom CC is synced by clicking on the cloud icon.
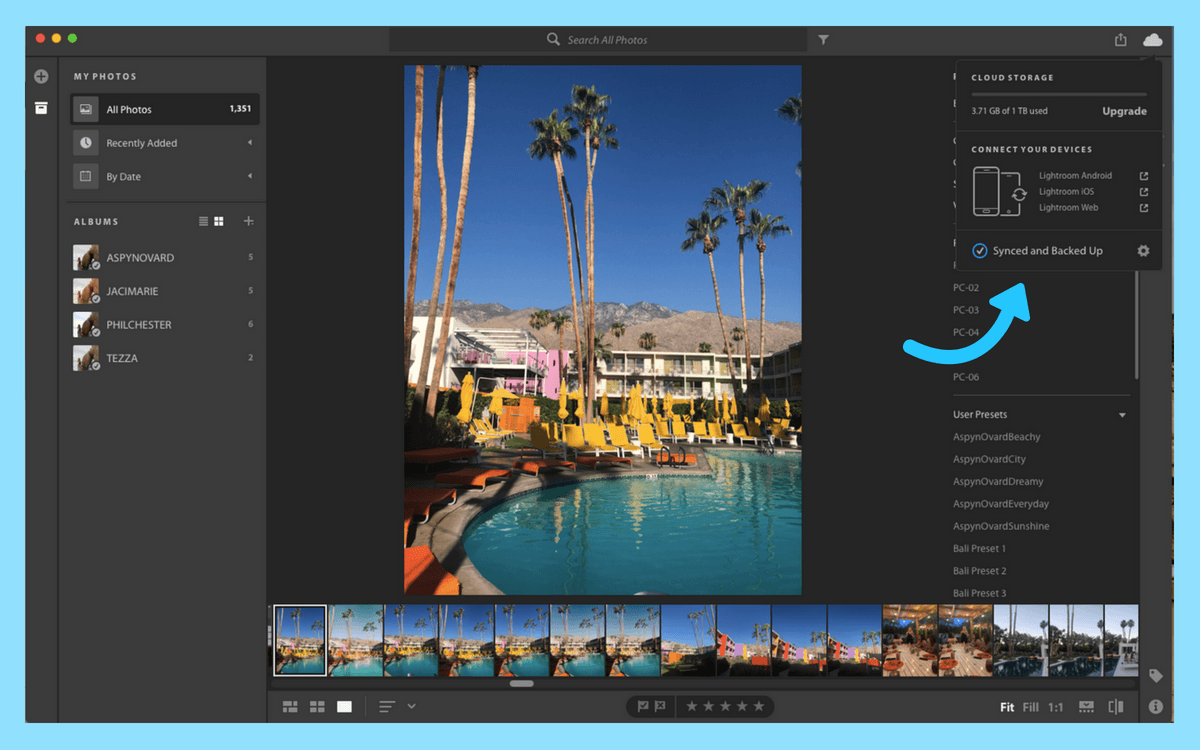
Your Lightroom mobile presets should now be synced!
When you launch the Lightroom CC mobile app, you should see your presets and recently added photographs (you may need to wait a few minutes for it to sync with your desktop):
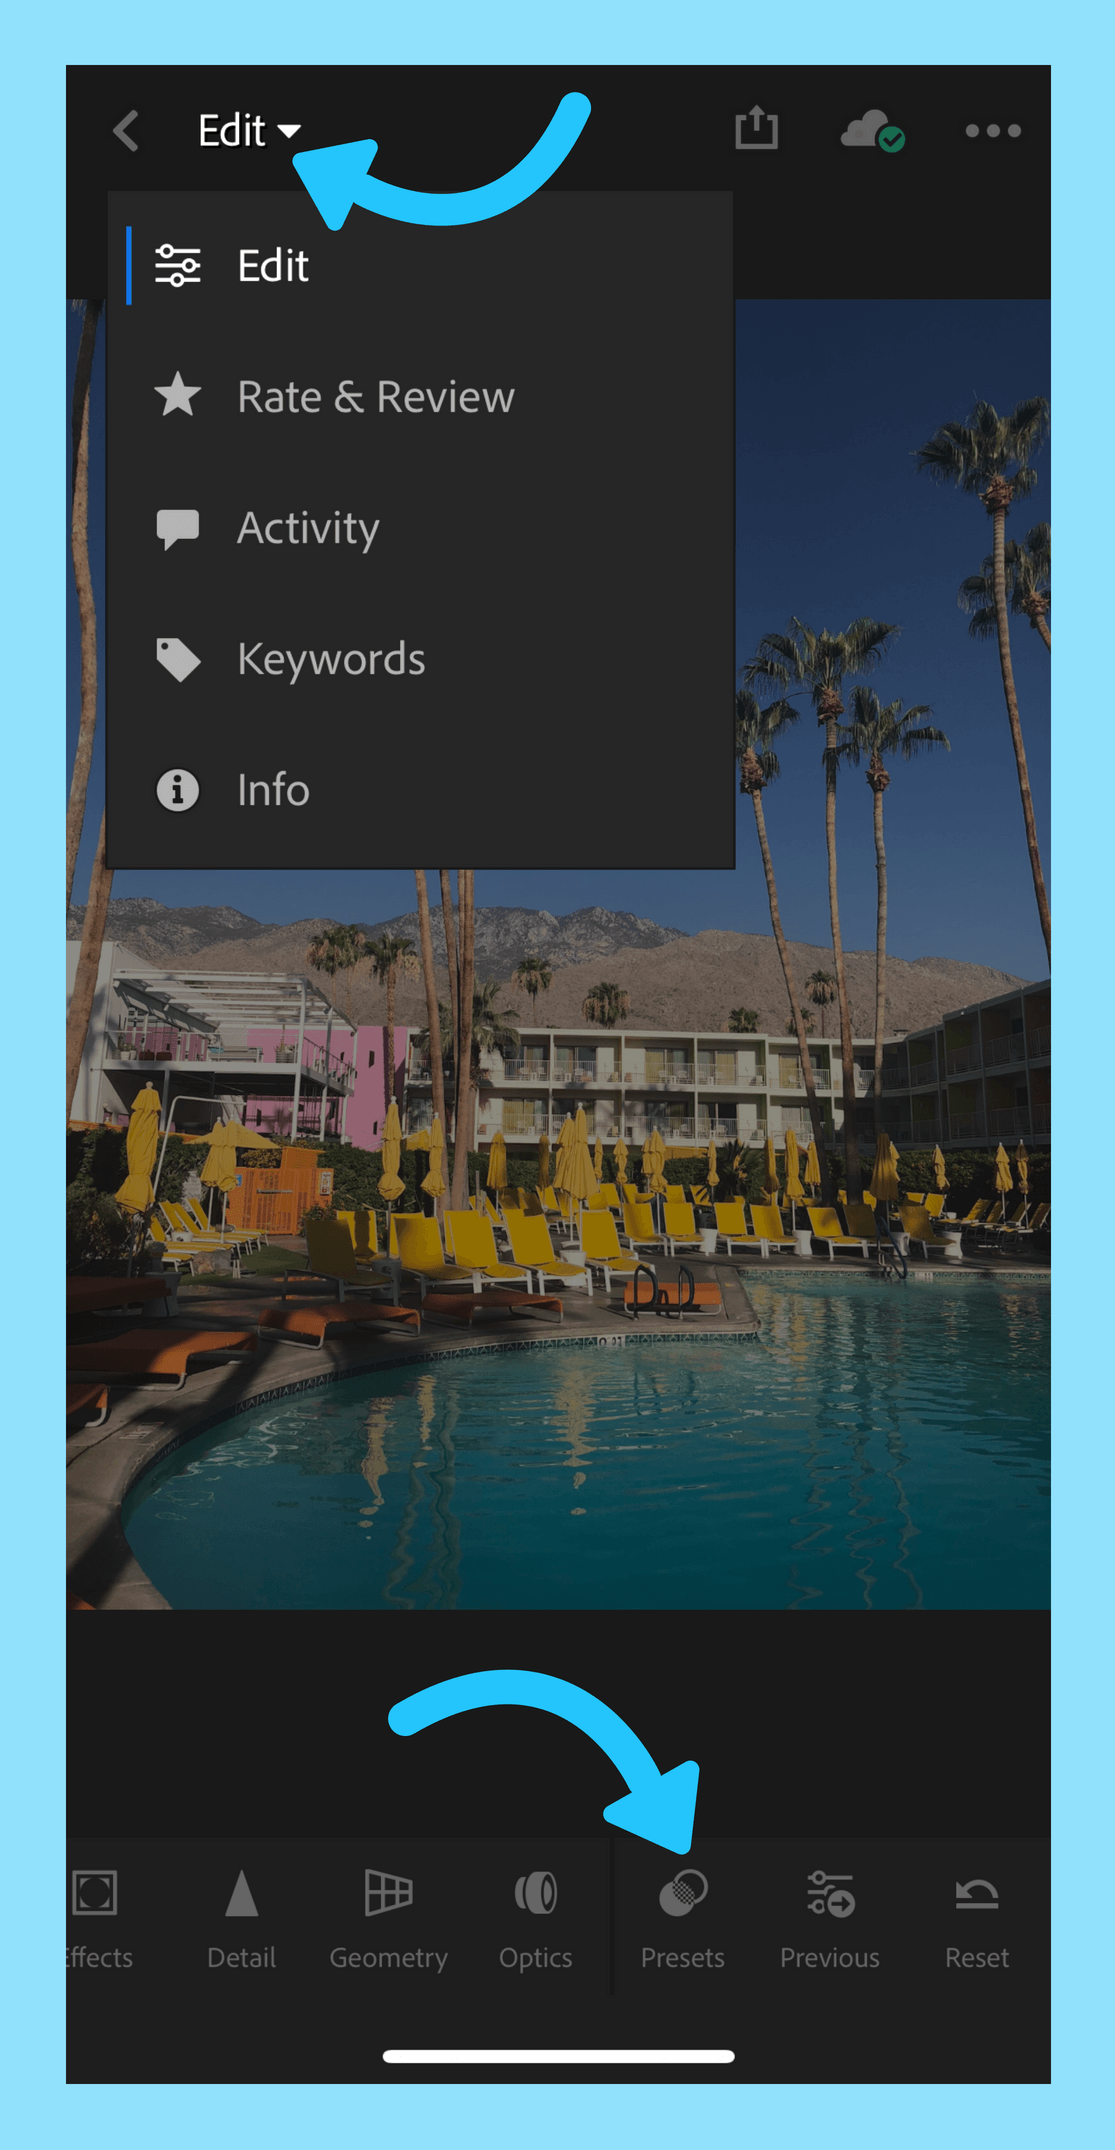
To begin, go through your Lightroom photo library and select the photo you want to modify. After you’ve chosen your image, choose Edit from the dropdown menu, and then press the Preset button on the bottom menu to see a selection of your presets.
Click the “✓” or press the “X” to close the preset menu without saving your preset.
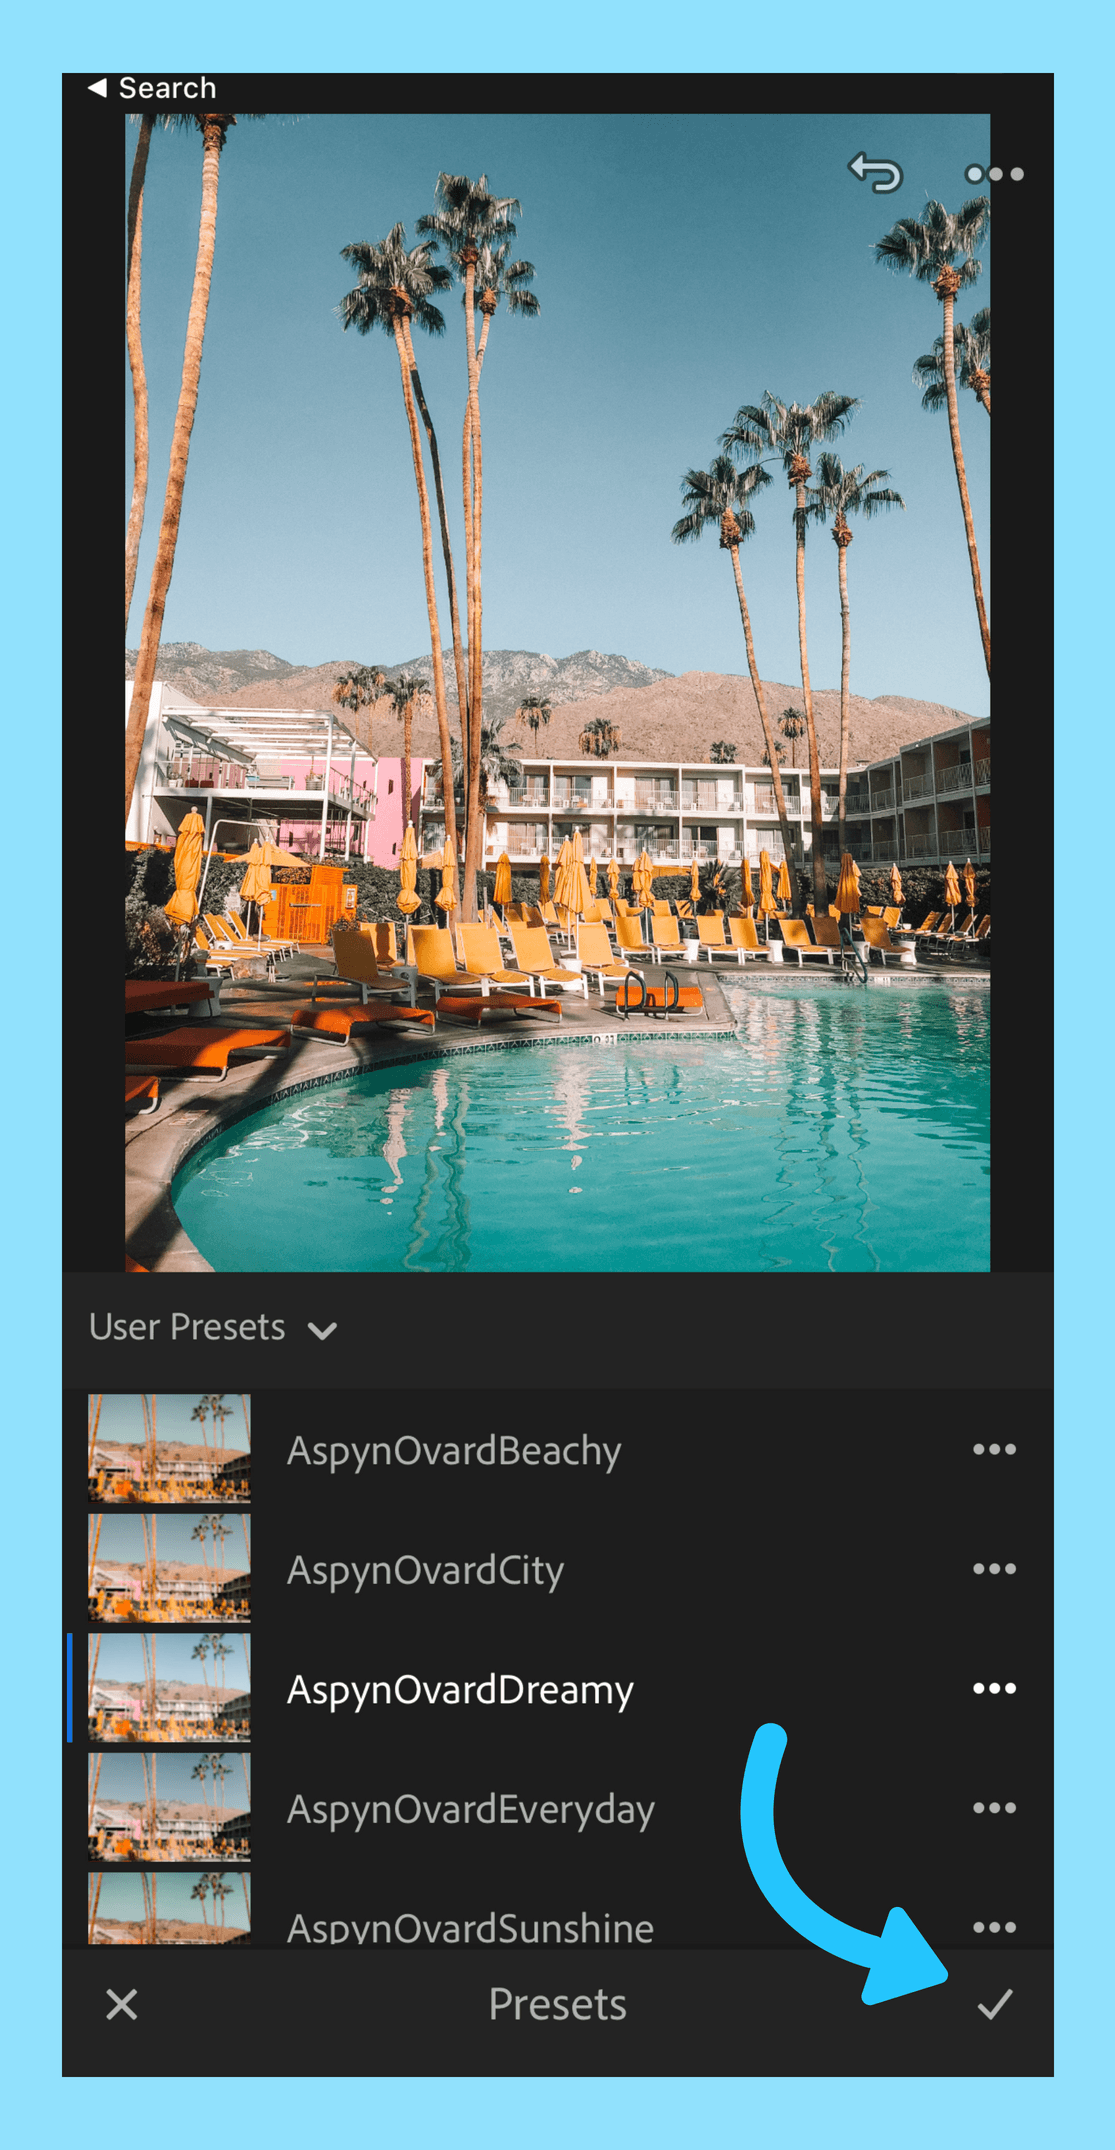
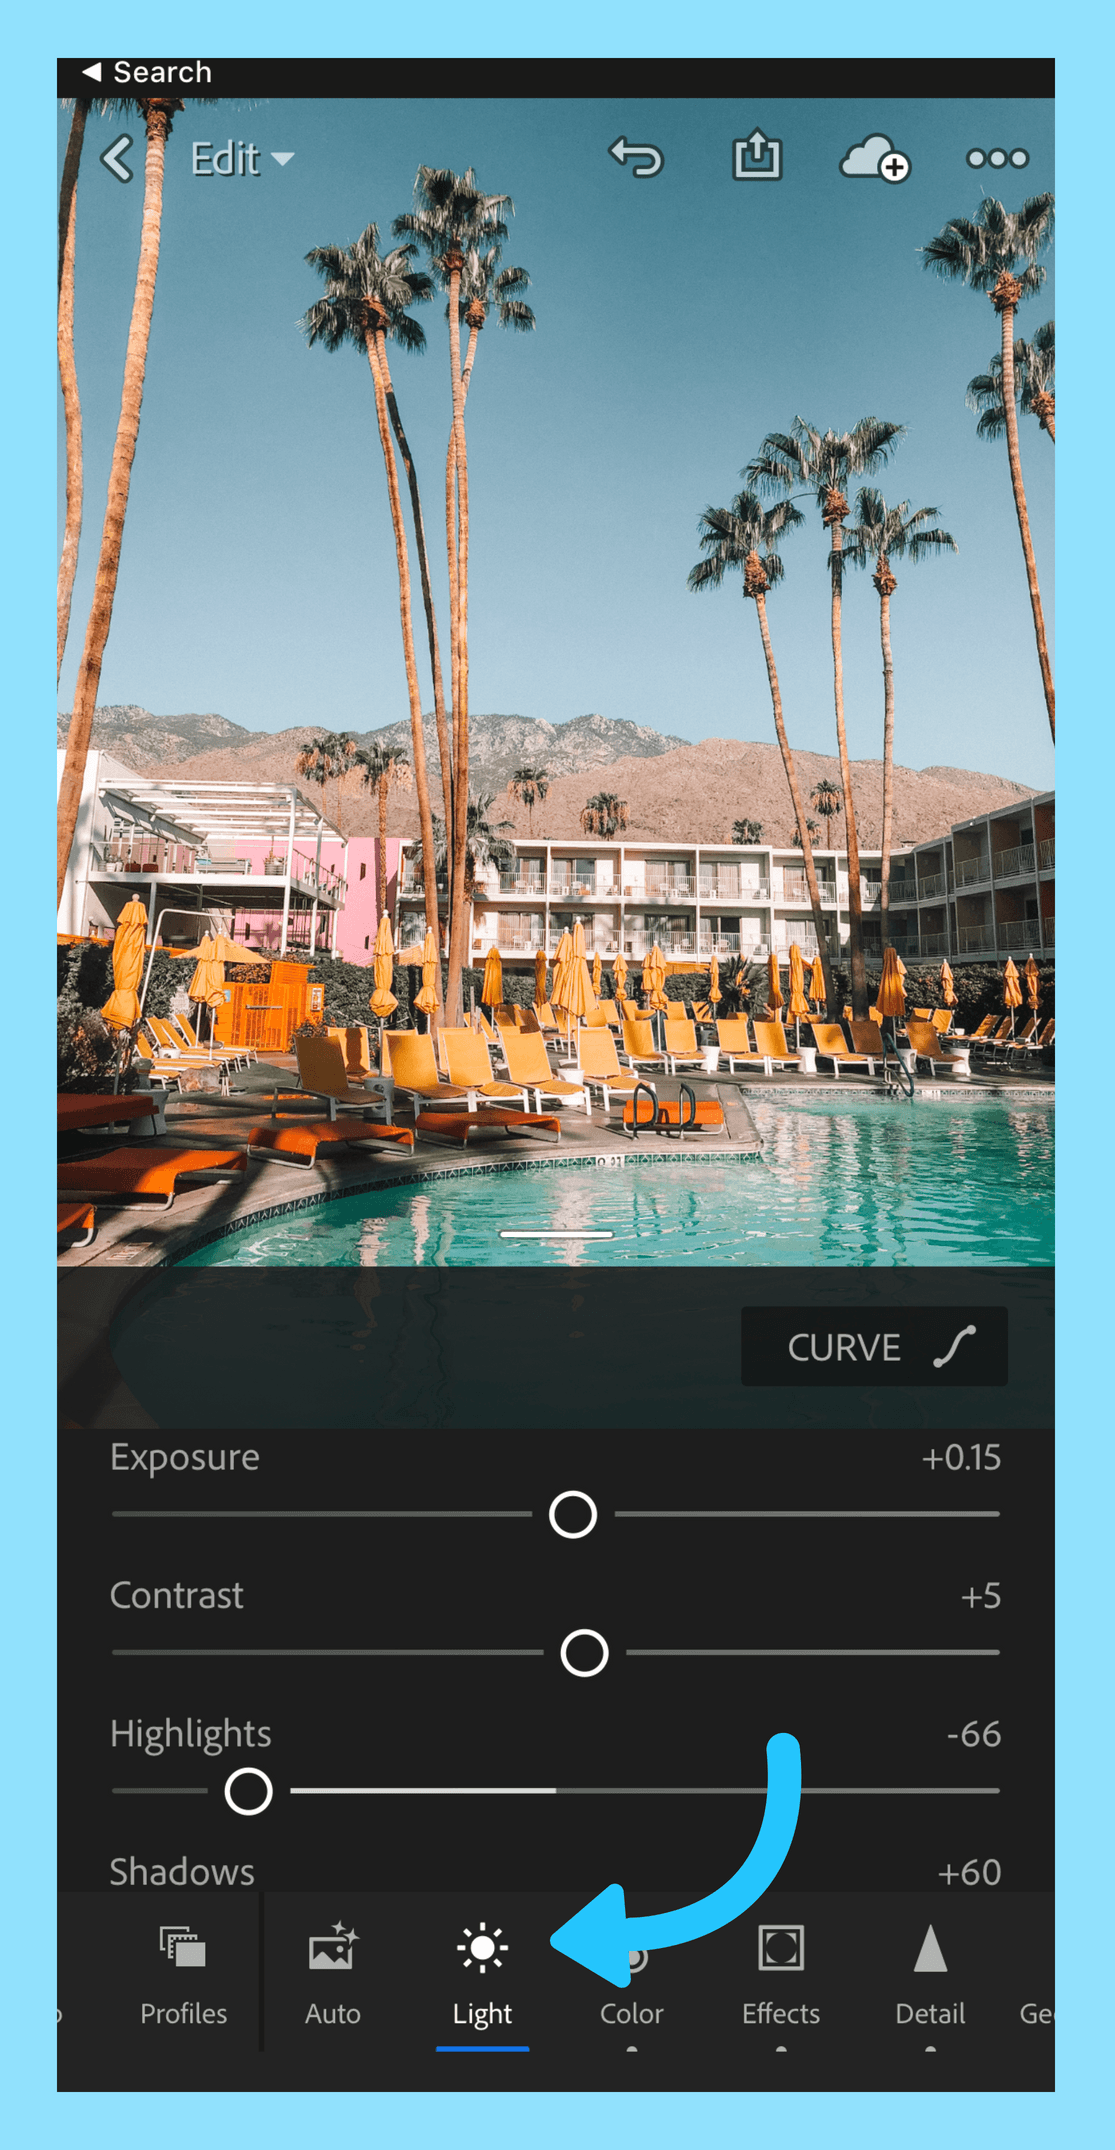
If you want to make changes to your preset selection, go to the photo settings toolbar at the bottom of your screen. By selecting “Light,” for example, you can alter the exposure, contrast and highlights, shadows, and other popular photo settings to make any last adjustments to your photo.
Finally, press the “Export” button to save your photo.
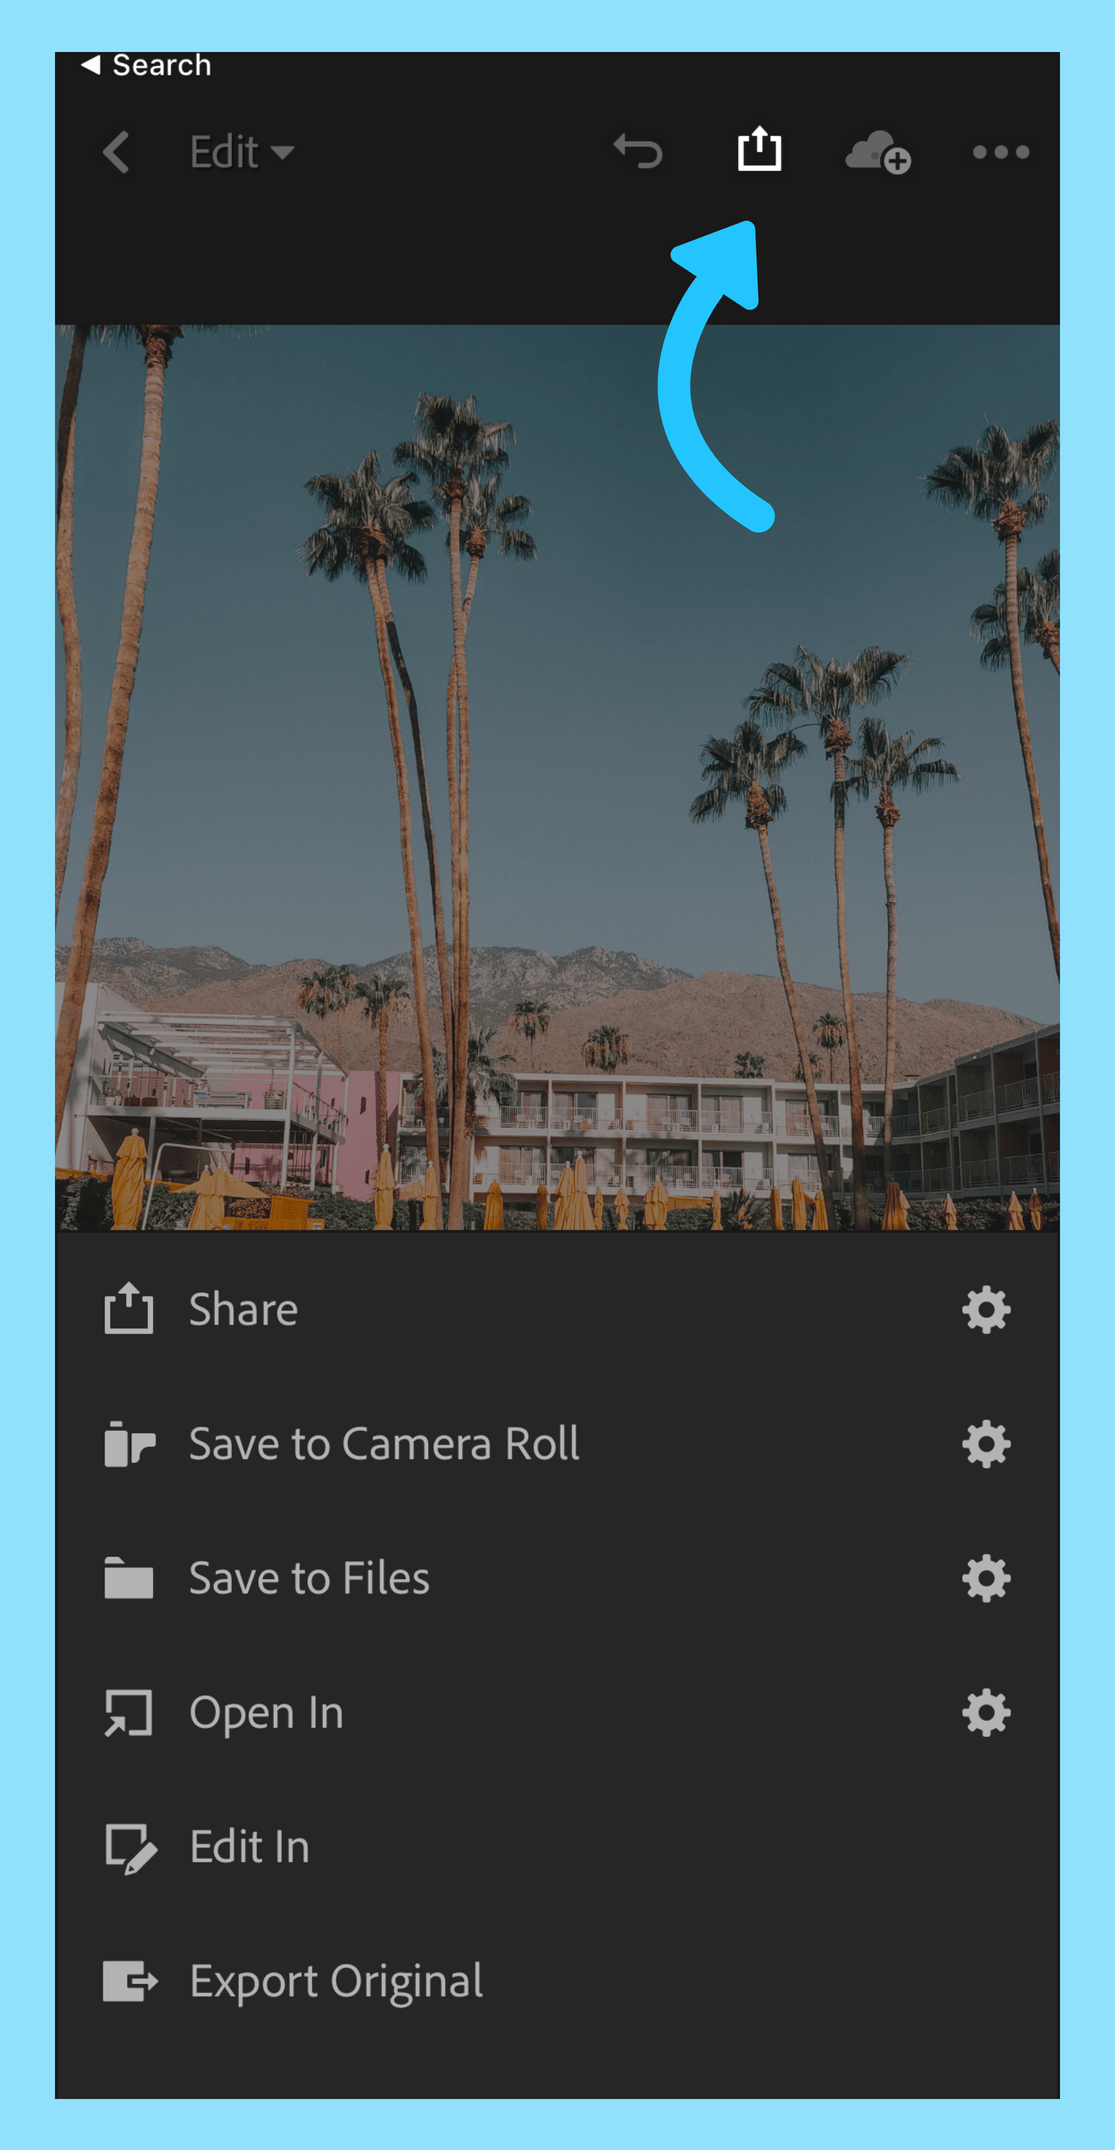
You may now add your nicely modified photographs to your media collection, Instagram Stories, or wherever you choose!
Later’s visual Instagram planner may also help you design the aesthetic of your Instagram feed after you’ve altered your photographs!
Simply drag and drop your photographs onto the visual planner. Then, you can see how they’ll look in your Instagram feed, then save to schedule them!
