Making sure Instagram users see your content increases chances of Instagram engagement, brand awareness, referral traffic, and conversions.
However, sometimes it’s hard for you or your team members to be hovering over your phones or laptops to post on Instagram at the time you believe you can get the best amount of users’ engagement.
You may also have other things focusing on throughout the workday that need to take precedence over navigating the Instagram app and clicking “Post” on your content.
In this post, we will let you how to schedule Instagram posts without using any third parties.
1. Connect your Instagram account to your Facebook Page.
Your personal Instagram and Facebook accounts can be used separately. However, businesses that want to use the Instagram posting schedule function will need to tether both accounts together. To do that, please follow these steps:
- Go to your Instagram profile, tap Three Line icon at the top right corner, choose Setting
- Scroll down and tap Account center, then tap Set up Accounts Centre
- Choose Add Facebook account and select the account that you want to connect to.
- Tap Yes, then Finish set up
2. Create posts/Stories with Facebook Business suit
Facebook Business Suite offers lots of useful tools for managing both Facebook and Instagram pages. But here we will focus on schedule Instagram posts feature.
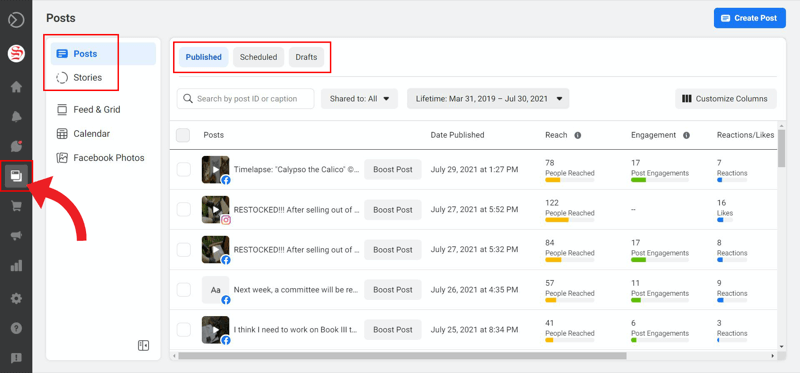
You’ll find Posts & Stories in the sidebar on the left screen side. Choose the option you want then click Create Post at the top right corner.
You could also find all your content such as published posts, scheduled posts, and drafts, as well as basic analytics for your published posts on both Facebook and Instagram.
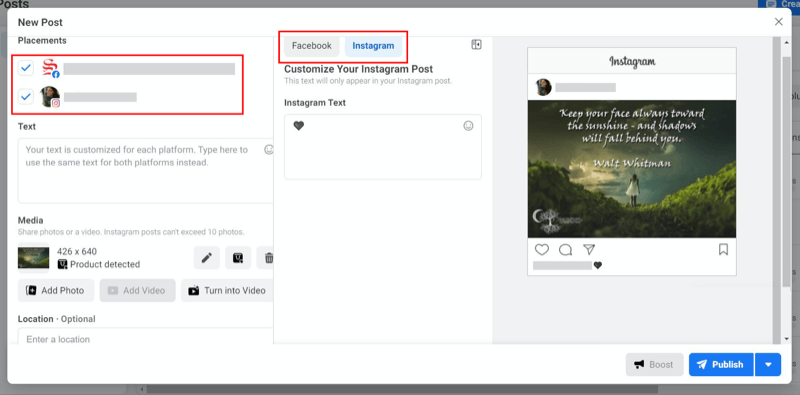
After that, the Content creating window will appear where you can write down your content and choose to share it on Facebook or Instagram, or both.
You can select to write content for both platforms in the box on the left, or toggle between Instagram and Facebook posts to customize the text for each one in a secondary text box located in the middle. This is a huge advantage that Facebook Business Suite hasn’t always offered. Now you could easily add some #hashtags or @mentions on your Instagram post without cluttering up Facebook post.
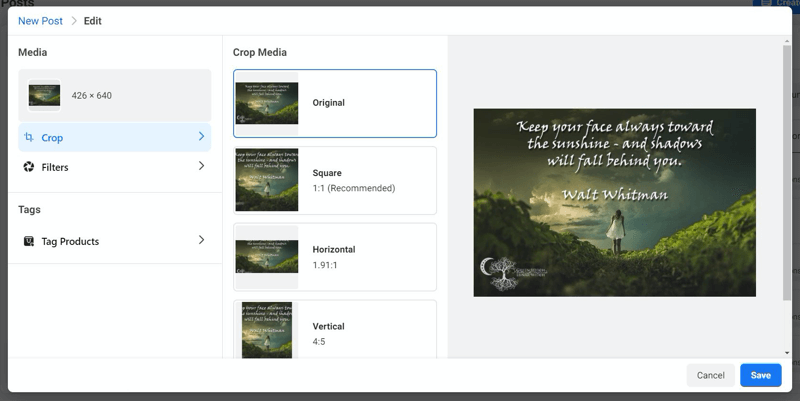
When you upload your content, Facebook Business Suite lets you tag products and do some edits, including adding filters.
You can also add your location if you want. This step is optional, however, it can help expand the post reach.
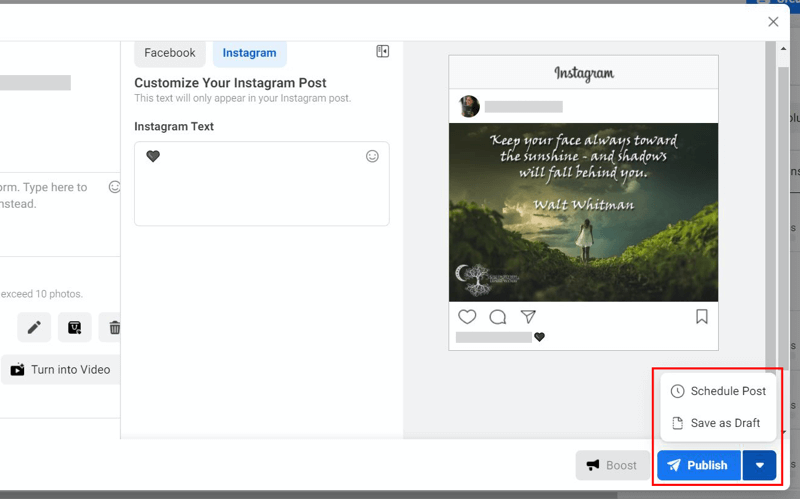
When they’re good to you, click Publish.
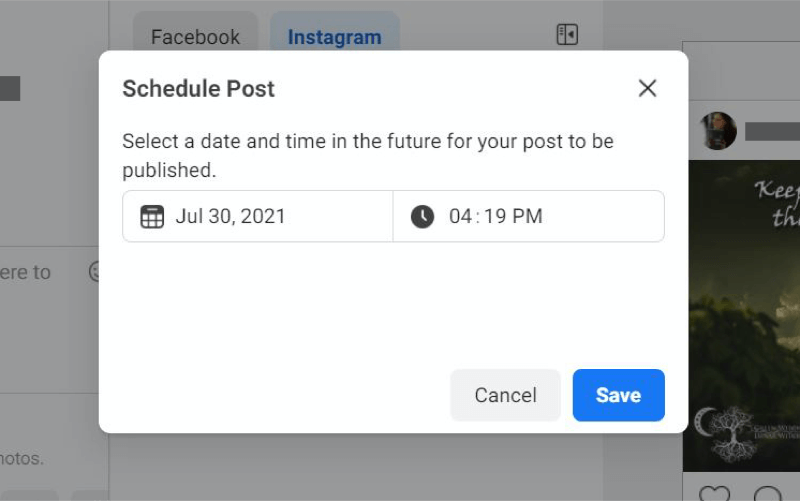
Wait… if you want to schedule for later, click the small arrow next to the Publish button. This will allow you to schedule Instagram posts or save them as a draft and come back to them later.
If you choose the Schedule Post option, a small window appears so you can manage the date and time your post will be updated.
Alternatively, if you defined the time that you’re going to schedule your Instagram post, you might prefer the Scheduled section, rather than the Published section.
Both Create Post and Schedule Post will open the same new post page, however, begin with the scheduling date and time right off the bat.
3. Reschedule an Instagram Feed Post in Business Suite
Once you refresh the page after scheduling, you will find it in the Scheduled section.
What happens if you find your schedule is wrong or you change your mind? Don’t worry. Business Suite allows you to edit it. To reschedule your post for a different time and date, choose the post that needs to update. There is a preview that you will see post details and a basic overview.
Click the three dots (…) button next to the post overview to navigate the drop-down menu with more options. Select Reschedule Post then change the date and time as you wish.
Besides reschedule option, you could find other options like Edit Post, Duplicate Post, Move to drafts, and Delete Post.
That’s all. Now you just need to relax, your post will automatically publish in the time you want.


