Knowing the way to schedule your posts on Instagram in advance is extremely necessary – it’s non-negotiable this year 2020.
Whatever do you, you’re running a business account, a creator account, or you are organizing Instagram account for your brand, using an Instagram scheduler is one of the best strategies to reclaim your time and creativity.
In this article, we will provide you with a step-by-step-guide and practices for all these kinds of Instagram accounts above. Then you can turn your attention to what matters.
Read on this post to know:
- 5 benefits of scheduling posts on Instagram.
- How to schedule Instagram posts on a business account
- The way to schedule Instagram posts on a personal account
- How you can schedule posts on Instagram creator account
- What is the difference between Instagram scheduling and Instagram automation?
- Best practices for scheduling posts on Instagram
Let’s get started!
5 benefits of scheduling posts on Instagram
1. Save your valuable time
Your calendar is already crammed. An Instagram scheduler allows you to plan your posts. It means that you can post in advance at the exact right time for your audience.
Block off a few fresh hours at the beginning of the week to line up your visuals and write some crisp copy. Then load all of it into your social media calendar and relax, understanding it will hit your timeline right when your followers need it.
2. Perfect your aesthetic
On Instagram—where everything is about visual—brands live and die by their look. Whether you’re a beachy influencer or a bleeding-edge tech startup, the color, composition, and tone of your posts should be unique and help you show off your brand’s identity.
Of course, that’s easier said than done.
Assembling multiple posts in one batch makes it easier to stay on brand. And seeing what’s coming up in your planner helps to catch weird vibes or off-brand looks before they go public and ruin your engagement.
3. Stop switching back and forth between screens
Call me an Old Millennial, however sometimes working on a computer is just easier. Especially when the videographer transferred the teaser videos in a .zip and the celebrity partner only approved two of these twenty-four pretty-much-identical photos from the shoot.
An Instagram scheduler lets you drag and drop your visual assets straight from your desktop to your calendar. Catch those typos on the big screen.
4. Get more followers
Every time you post to Instagram you’re growing your brand’s visibility. Both current followers and new ones. Maybe your post will hit it homerun and get on Instagram’s Explore Page. At the very least, individuals will discover you through the hashtags you choose.
Scheduling your posts in advance is an easy hack for your Instagram hashtag strategy. Whereas using the same thirty mostly-irrelevant hashtags on every post will win you no points with the algorithm, with a scheduler you can fine-tune your techniques in advance.
5. Increase your engagement
Don’t ghost your followers. Give the individuals what they need.
One of the simplest, greatest ways to get more Instagram likes is to post when your followers are online. Of course, in case your analytics are telling you that your followers are in Hanoi or Cape Town, their morning commute won’t be the most convenient time to be on Instagram for you (or your work/life balance).
It seems like the self-help gurus were right: to make it stick, schedule it in.
We will recommend you use a tool to schedule your post on Instagram. It is Hootsuite’s Instagram scheduler. Check it out to know-how!
How to schedule Instagram posts on a business account
In case you’re a retailer, local business, brand, organization, or service provider, you probably already have a business account on Instagram. (And if you do, please smugly sip your coffee and skip to Step 2.) For those who don’t, check out Step 1.
Step 1: Switch your Instagram account to a business profile
There are many benefits to converting to a business account. You get access to Instagram’s advanced native analytics to learn more about your followers, you may promote posts as advertisements, and add links to your Stories.
However most importantly: that is the only kind of Instagram account that can straight publish and schedule Instagram posts using Hootsuite.
To switch your account, on your phone, open the Instagram app.
- Tap the hamburger icon
- Click the settings button
- Choose Account
- Tap Switch to Professional Account
- Choose Business and follow the prompts
Notice that you’ll need to connect your Instagram account to your Facebook business Page to do this.
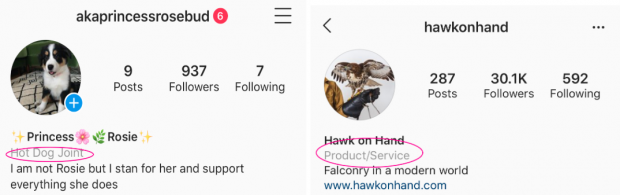
Pro tip: remember that the kind of business label you choose on your Facebook page is visible on your Instagram profile.
Step 2: Sign up or log in to your social media management platform
A tool like Hootsuite lets you schedule posts on Instagram and manage all your other social media profiles from only one dashboard.
In case you don’t have an account, sign up here. It takes just a few seconds.
Step 3: Add your Instagram business profile to your social media management platform
In case you’re using Hootsuite, it’s quite easy to link your Instagram account.
- In the top right corner on this dashboard, click your profile icon
- Tap Manage Social Networks
- Click + Private Network in the bottom-left corner of the dashboard to add Instagram. Or, if you’re part of a larger team: choose Manage beside your organization name and click Add a Social Network or Add a Shared Network to add this profile to an organization
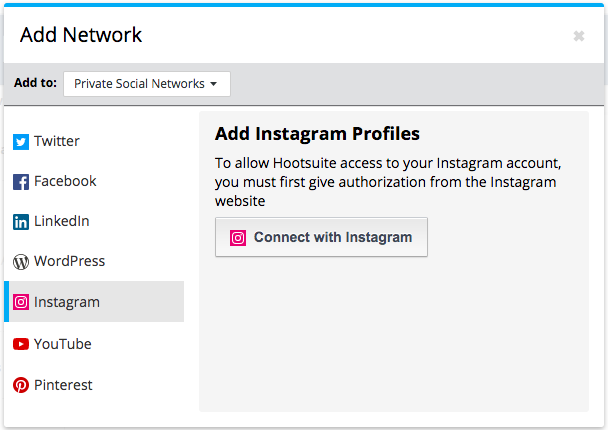
- Choose Instagram in the list, and then click Connect with Instagram
- Input your account credentials
Notice that to enable direct publishing, you’ll also need to add your account’s associated Facebook Page to Hootsuite, as well.
Step 4: Compose your post(s)
Now let’s join the enjoyable part.
- Click New Post and Choose Instagram from the list
- Upload your photo or video (you can edit them directly on Hootsuit such as crop, apply filters, etc)
- Write your compelling Instagram caption
- Add your hashtags, @s, and location
- Preview your post in the right-hand pane

Step 5: Schedule your post
When you click Schedule for Later (as opposed to Post Now), you can select the right time and date your post will go live.
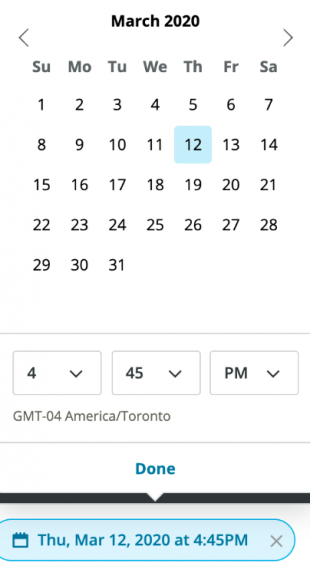
The Hootsuite scheduler automatically suggests the optimal time, but we recommend you check Instagram analytics to deeply understand your customers’ habits.
Step 6: Wait for your post to be published to Instagram
That’s it! Welcome to the ease of Instagram scheduling.